x1 x1
x2
Supplied hardware
knock-outs
2
1
1
2
1
2
5
3
4
5/16”
2
1
LN
JN.22773 PN.17202-06-01 05.12.08
Remove the (6) tamper-proof screws from the unit as illustrated with the
tamper proof service tool provided. Make sure to retain the (2) screw
inserts from the lower fascia screw holes.
WARNING: Use caution when removing casing.
The casing may have sharp edges/corners which
may cut or cause harm.
Remove fascia as illustrated.
Pry the appropriate metal knock-out from the backplate in one of the
locations pictured. Install electrical entrance fitting into knock-out.
Connect the electrical supply using approved flexible or solid conduit and
electrical fittings. Ensure that the flexible or solid conduit and wires are of
sufficient length to make the necessary connection to the backplate and
the terminal block.
Select a location that will allow accessibility to the Dyson Airblade
TM
hand
dryer and proper clearance from surroundings and floor. Make sure that the
unit is installed in compliance with all building codes and/or regulations.
Position the mounting template provided on the wall where the Dyson
Airblade
TM
hand dryer is to be installed. Recommended heights are shown,
but may need to be adjusted for each individual installation. Securely fasten
the mounting bracket to the wall with a minimum anchor size of 0.25".
Hang the unit on the secured mounting bracket as illustrated.
Securely fasten the four remaining anchors to the wall.
Recommended minimum anchor size of 0.25".
Carefully replace the fascia as illustrated.
ATTENTION!: Do not overtighten screws as this may damage the fascia.
Make sure that the clips on the top of the front fascia are seated correctly and that the fascia is mounted flush before tightening screws.
1. Insert and tighten the (2) anti-tamper screws into the middle of front fascia as illustrated.
2. Place a mounting nut insert underneath the lower fascia and slide into mounting hole with a 5/16" allen key, then insert and hand
tighten the anti-tamper screw. Finish tightening with the supplied tamper proof service tool. Repeat process for the opposite lower side.
3 & 4. Insert the filter cover panel, and then (2) anti-tamper screws. Tighten with supplied tool.
5. Test unit for correct operation before inserting the (2) screw covers.
WARNING: Risk of electric shock!
Secure the Line, Ground and Neutral wires into the proper terminal block
locations. Verify connections are correct before proceeding.
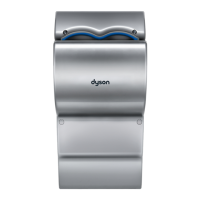
AB04 (120V)
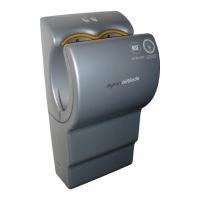
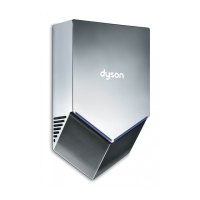
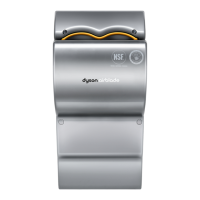
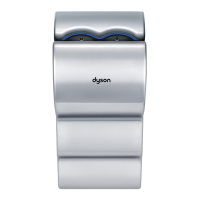
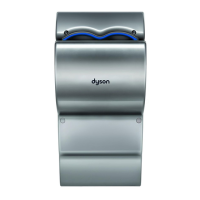
Dyson Airblade
TM
hand dryer wall mounting instructions
If you have any questions on the installation please call our
Dyson Helpline toll free at 1-888-DYSON-AB (1-888-39766-22)
Important safety information – Read before proceeding further.
Installation work and electrical wiring must be done by qualified person(s) in accordance with all
applicable codes and standards, including fire-rated construction.
WARNING: Before beginning any installation work you must confirm the following:
Make sure that the electrical supply has been disconnected or switched off before attempting installation to avoid the
risk of electrical shock or electrocution.
Ensure no pipe work (gas, water, air) or electrical cables, wires or ductwork are located directly behind the drilling area.
WARNING: Risk of electric shock! If casing is removed or handled improperly the internal components
of the Dyson Airblade
TM
hand dryer may cause harm or become permanently damaged.
CAUTION: To reduce the risk of electric shock, do not expose the internal mechanism/components of
this unit to rain or moisture.
Check that the electrical supply will correspond with the rating plate located on the bottom of the unit.
If the unit is connected to any electrical supply other than that stated on the rating plate of the unit, permanent damage
or improper/unsafe operation of the Dyson Airblade
TM
hand dryer may result.
All wiring and electrical work must be done by a qualified electrician in accordance with all federal, state and local
applicable codes and standards, including fire-rated construction.
A means for all pole disconnection must be incorporated in the fixed wiring to the appliance in accordance with local
wiring regulations.
The Dyson Airblade
TM
hand dryer must be grounded properly.
The instructions herein must be read carefully before attempting to install the Dyson Airblade
TM
hand dryer. Read and
retain for future reference.
Failure to accurately follow the instructions may result in the incorrect operation of the Dyson Airblade
TM
hand dryer,
damage to property and/or personal injury.
Dyson will not be held liable for any damages to property or personal injury as a result of failure to comply with the
instructions contained herein.
Failure to follow these instructions will invalidate the warranty of this product. Please refer to the Owner’s Manual for
details of the warranty.
The Dyson Airblade
TM
hand dryer requires a 15 amp circuit breaker on a dedicated line.
28.75” adult male height
25.75” adult female height
21.75” child/wheelchair user height
Height measurements are from the floor
39” adult male height
36” adult female height
32” child/wheelchair user height
Height measurements are from the floor
3.15” 3.15”
Electrical supply location options
The Dyson Airblade
TM
hand dryer requires a 15 amp circuit breaker on a dedicated line
Drill hole of at least 2” diameter
65
78
43
2
1