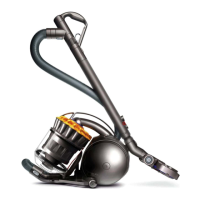
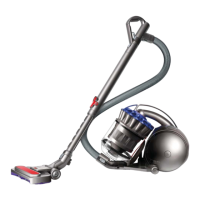
ASSEMBLY
Lie the vacuum cleaner at and attach the vacuum cleaner head by sliding it on until it
clicks. Stand vacuum cleaner up straight, attach wand to hose and push into place until
it clicks. Push wand down into hose and attach tools to the side of the vacuum cleaner.
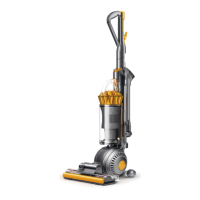
USING YOUR DYSON VACUUM CLEANER
Press foot pedal and recline handle to use. The stabiliser stand will automatically lift up.
To switch ‘ON’, depress power button in front of handle. After cleaning, push the
vacuum cleaner into an upright position and stabiliser wheels will automatically drop.
Use the carrying handle located above the clear bin™ to carry the vacuum cleaner.
CAUTION:
• When returning to the upright position, ensure that the stabiliser wheels are fully
engaged before releasing the vacuum cleaner.
• Do not press the cyclone release button while carrying the vacuum cleaner.
PLEASE NOTE:
Fine dust such as plaster or our should only be vacuumed in very small amounts. •
Consult your ooring manufacturer’s recommended instructions before vacuuming •
and caring for your ooring, rugs and carpets. Some carpets will fuzz if a rotating
brushbar is used when vacuuming. If this is the case, we recommend vacuuming in
hard oors mode and consulting with your ooring manufacturer. (Refer to carpets/
hard oors section.)
If used in a garage when car cleaning, care should be taken to wipe the soleplate •
and wheels with a dry cloth after vacuuming to clean off any sand, dirt, or pebbles
which could damage delicate oors.
CARPETS/HARD FLOORS
The brushbar will always default to ‘ON’ (spinning) each time you switch on the
vacuum cleaner and recline it for cleaning. The brushbar will automatically stop if it
becomes obstructed. If the brushbar stops during use, please refer to the ‘Clearing
brushbar obstructions’ section. To switch the brushbar ‘OFF’ (e.g. for hard oors),
recline the vacuum cleaner and turn it ‘ON’, then press the brushbar ‘ON/OFF’
button - the brushbar will stop spinning.
HIGH-REACH CLEANING
CAUTION:
• Powerful suction can cause the hose to ‘pull back’ - please take care.
• To avoid personal injury and to prevent the vacuum cleaner from falling when
cleaning stairs, do not work with the vacuum cleaner above you on the stairs.
• To release the wand, open the wand cap. Extend the red tube until the handle slides
off the vacuum cleaner. Tools can be attached to either the hose or wand. Ensure
wand cap is closed when wand is not in use.
CLEAR BIN
TM
EMPTYING
CAUTION:
• Switch ‘OFF’ and unplug the vacuum cleaner before emptying the clear bin™.
Empty as soon as the dirt reaches the level of the MAX mark – do not overll.
To remove the clear bin™ from the vacuum cleaner press the button at rear of
carrying handle. To release the dirt, press the red clear bin™ release button.
The British Allergy Foundation is a UK national charity with the aim of improving
awareness, prevention and treatment of allergies. The British Allergy Foundation
Seal of Approval is a UK registered trademark.
PLEASE NOTE:
Do not use the vacuum cleaner without the clear bin•
TM
in place.
CLEAR BIN
TM
CLEANING
CAUTION:
• Do not immerse the whole cyclone in water or pour water into the cyclones.
• Ensure the clear bin
TM
is completely dry before replacing.
PLEASE NOTE:
Do not use detergents, polishes or air fresheners to clean the clear bin™.•
Do not put the clear bin™ in a dishwasher.•
When vacuuming, certain carpets may generate small static charges in the clear •
bin™. These are entirely harmless and are not associated with the mains supply.
To minimize any effect from this, do not put your hand or insert any object into the
clear bin™ unless you have rst emptied it and rinsed it out with cold water.
wASHING YOUR FILTERS
CAUTION:
• Switch ‘OFF’ and unplug the vacuum cleaner before removing the lters.
• Ensure lters are completely dry before retting into the vacuum cleaner.
PLEASE NOTE:
This machine has two lters, located as shown. It is important to check your lters •
regularly and wash with cold water at least every 3 months or as required.
The lter in the ball should be rinsed and tapped out until the water runs clean, •
then tapped out again to ensure all excess water is removed. Please leave to dry
completely for 24 hours.
It is normal for the lter in the ball to turn grey in colour. The lters may require •
more frequent washing if vacuuming ne dust.
Do not use detergents to clean the lters.•
Do not put the lters in a dishwasher, washing machine, tumble dryer, oven, •
microwave or near an open ame.
BLOCkAGES
CAUTION:
• Switch ‘OFF’ and unplug the vacuum cleaner before checking for blockages.
• Please ensure vacuum cleaner is upright before removing hose or airway
inspection parts.
• Beware of sharp objects when clearing blockages.
• Ret all parts of the vacuum cleaner securely before using.
PLEASE NOTE:
Clearing blockages is not covered by your vacuum cleaner’s 2 year guarantee. •
If any part of your vacuum cleaner becomes blocked, it may overheat and then
automatically shut off. Unplug the vacuum cleaner and leave to cool down.
Clear blockage before restarting.
CLEARING OBSTRUCTIONS
CAUTION:
Switch ‘OFF’ and unplug the vacuum cleaner before clearing brushbar obstructions. •
Failure to do so could result in personal injury.
If your brushbar is obstructed, it may shut off. If this happens you will need to •
remove brushbar as shown and clear any obstructing debris. Failure to do so could
result in personal injury.
CONFORMITY INFORMATION
A sample of this product has been tested and found to be in conformity with the
following European Directives: 2006/95/EC Low voltage Directive, 2004/108/EC
EMC Directive, 93/68/EEC CE Marking Directive.
PRODUCT INFORMATION
Net weight 7.5kg, 230-240V, 50Hz, maximum power 1200W.
Please note: Small details may vary from those shown.
This product is protected by the following intellectual property rights:
PATENT/PATENT APPLICATION NUMBERS:
JP 2004-537336; EP 1361812; AU 744408; EP 1119282; JP 2002-527132;
US 6,519,807; AU 744362; EP 1121043; JP 2002-527131; US 6,572,078;
GB 0326102.1; AU 2002-226556; EP 1370172; JP 2004-528876; US 6,991,666;
AU 2002-225207; EP 1361814; JP 2004-520137; US 7,018,439; AU 2001-240894;
EP 1268076; JP 2003-528704; US 6,835,222; AU 2002-225232; EP 1361815;
JP 3940082; US 6,974,488; AU 2003-283157; EP 1526796; JP 2006-503607;
US 2005-0235454; AU 2003-283159; EP 1526797; JP 2005-534442;
AU 2003-283161; EP 1526798; JP 2006-503608; AU 2004-294771; EP 1680232;
JP 2007-508934; US 2007-0079579; AU 2005-263889; EP 1768536.
Equivalent patents, registered designs and applications exist in other countries.
 Loading...