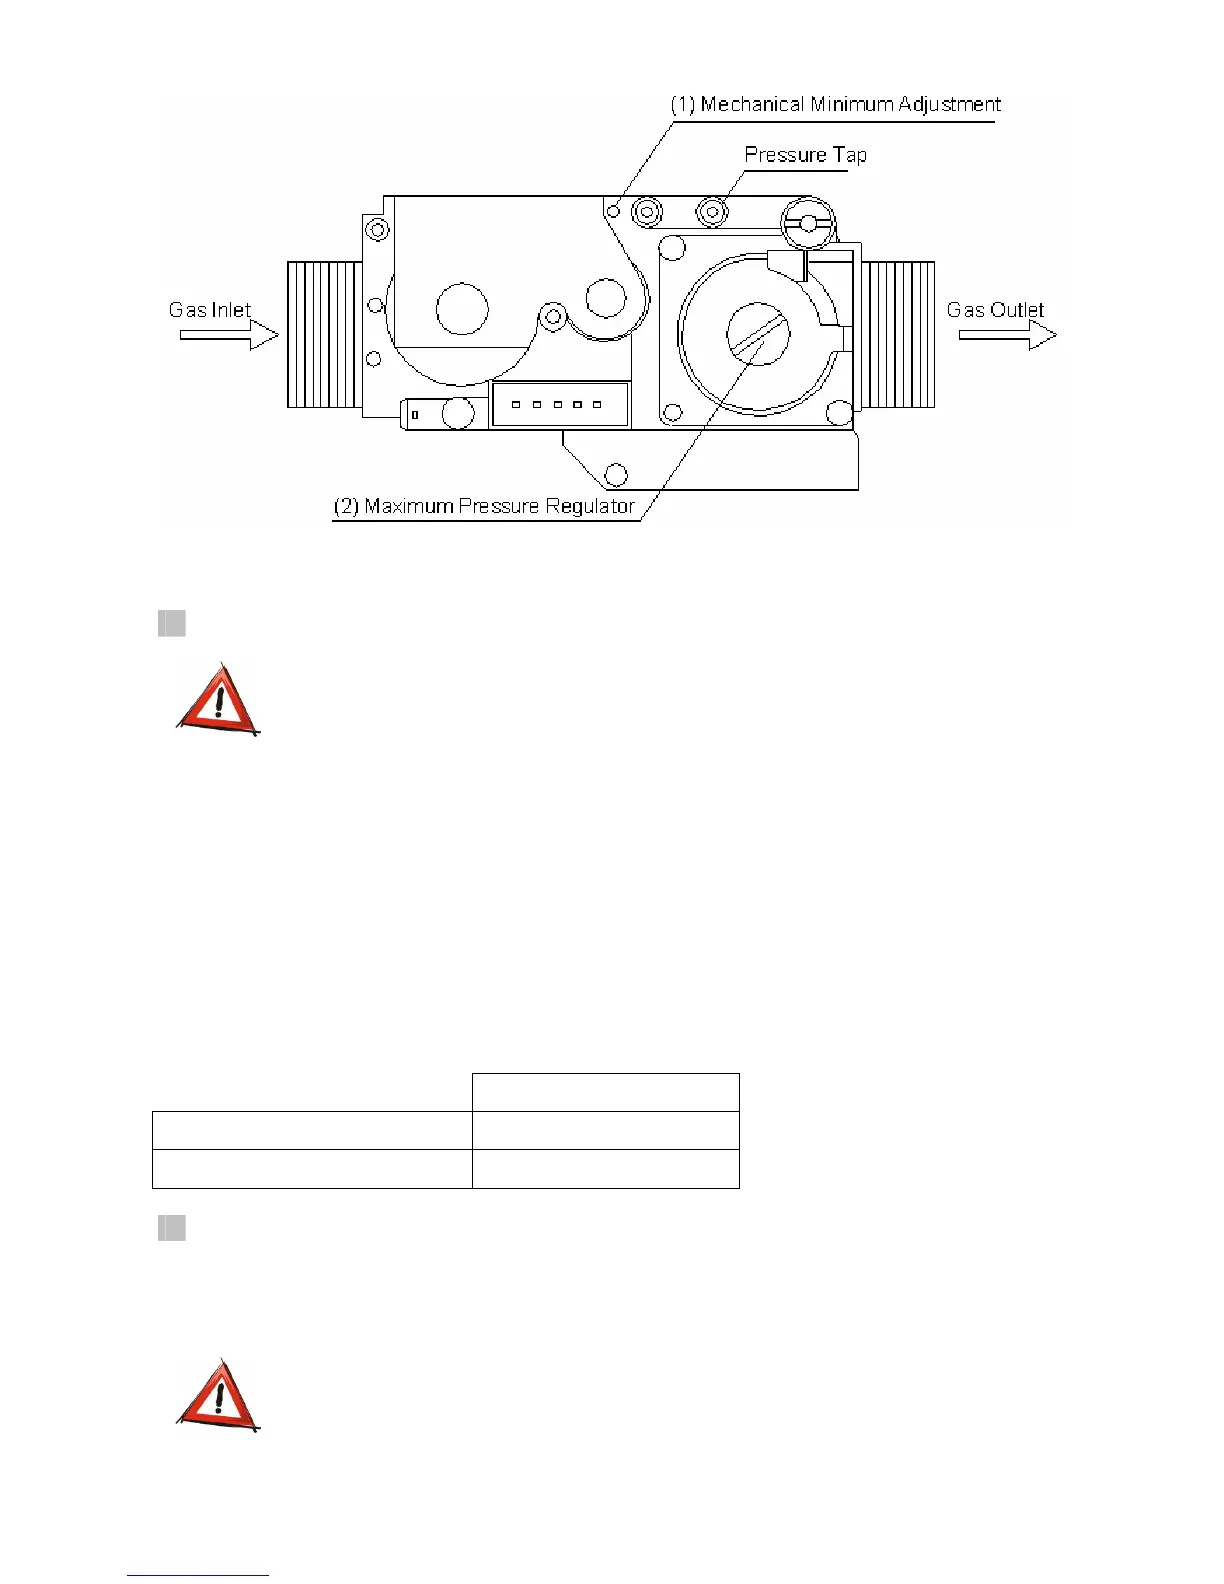
fig. 19
Replacement Of The Burner Injectors
WARNING:Keep the gas valve on the boiler and electricity supply closed during
replacement of the burner injectors.
- Shut off the boiler by turning the ON/OFF switch to OFF position and turn off the gas valve on
the boiler.
- Undo the 2 screws which are located on the lower edge to remove the front panel.
- Undo the 2 screws which are located on the corners of the control panel.
- Pull the control panel outwards.
- Undo the 6 screws which are located around the body to remove the combustion body cover (in
room sealed fan assisted boiler).
- Undo the 4 screws which fasten the manifold to the burner to remove the burner.
- Fix the suitable burner injectors according to type of gas (13 pieces of injectors used in 24 kW
models / 15 pieces of injectors used in 28 kW models).
- Reassemble in the reverse order.
Table 20
Injectors Diameter
Natural Gas
∅ 1,25 mm
LPG
∅ 0,75 mm
Jumper Adjustment
When the appliance is converted to LPG, jumper X7 must be short circuit. If the appliance is
supplied with natural gas, jumper X7 must be open circuit.
WARNING: Maximum pressure regulator must be sealed and the self-adhesive
conversion label must be placed on the boiler after gas type
conversion.
32