Do you have a question about the E-Mu SP-12 and is the answer not in the manual?
Fundamental terms and concepts necessary for understanding the SP-12 manual.
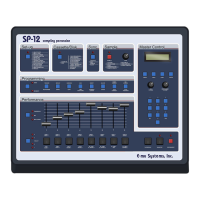
Step-by-step guide to physically connecting and powering on the SP-12.
How to choose between different banks of drum sounds using the SELECT button.
Instructions on varying individual drum levels using sliders and the MIX LED.
How to adjust pitch or decay time for individual drum sounds using sliders.
Guide to applying and removing multilevel effects to drum sounds.
Guide to applying and removing multipitch effects to drum sounds.
Setting the time signature and bar length for a new segment.
How to select the desired resolution for Auto Correct timing.
Step-by-step guide to recording drum patterns in real-time performance.
Method for recording drum patterns note-by-note for precise control.
Step-by-step process for arranging segments sequentially to form a song.
Methods for modifying song steps: stepping, inserting new steps, and deleting existing ones.
Creating accelerandos and ritardandos by changing tempo over song steps.
Procedure for setting input gain and monitoring levels for optimal sampling.
How to assign a sampled sound to a user slot and output channel.
Configuring the signal level trigger to start sampling automatically.
Programming the fixed duration for a recorded sample.
Starting and stopping the sampling process, including threshold and forced modes.
Editing samples by trimming start/end points and creating loops.
Instructions for connecting external storage devices to the SP-12.
Procedure for preparing new or used disks for use with the SP-12.
Detailed steps for saving, loading, verifying, and cataloging data on disks/cassettes.
Setting up MIDI communication parameters for controlling the SP-12.
| Type | Drum Machine |
|---|---|
| Polyphony | 8 voices |
| MIDI | Yes |
| Pads | 12 velocity-sensitive pads |
| Storage | Floppy disk |
| Sequencer | Yes |
| Year Released | 1985 |
| Synthesis Type | Sample-based |
| Effects | None built-in |
| Outputs | 8 individual outputs, stereo master output |
| Sampling Time | 2 seconds standard, up to 10 seconds with expansion |