Quick Start Guide
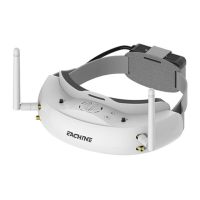
1.Instal the antenna and faceplate.
2.Use power cables to connect batter y to the goggles, Goggles can power by 2~6cell lipo batter y, hold
the power button to turn on.
3.Focus adjustment: Move the focus adjustment wheel to focus, close one eye to adjust the focus, you can
pop up the OSD menu as the template, when the image is clear, repeat the process with the other eye.
4.IPD adjustment: move the IPD slider until there is no double vision of the image.
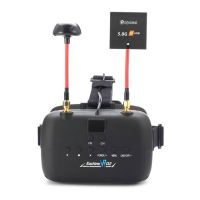
Band and Chanel setting
1. Roll right wheel to change channel, press the wheel switch to Band setting mode, then roll the wheel
to change the Band.
2.No wheel operation for 3 seconds,RF setting will back the channel setting mode.
3. Hold the right wheel to pop up search menu, press the right wheel to start auto search, after searching
all the frequency, receiver will work on the strongest signal. roll the right wheel to manually select the
channels, short press the right wheel to quit search.
Sometime the auto search channel is not accurate, user may need manually select the channel.
When in a new Field, auto search can Find which frequency is clean and not interfered.
Volume Setting
In all mode preview mode, roll the left wheel to adjust the volume.·
Volume setting is only effective on earbud. Not effective on AV OUT volume. ·
System didn't save the volume setting, in case of the volume is too high in AVIN or RF mode.·
MODE MENU
Short press the left wheel to pop up mode menu. ·
RF normal: this mode is normal 48 CH receive mode.·
RF Racing: this mode will make received only working on RaceBand.·
RF Third-Party: in this mode, the goggles button cant control the external receiver, also the OSD of the·
goggles cant read the band/channel of the receiver, third party receiver must plug into left modual bay.
AVIN: When enable the AV IN mode . The NTSC and PAL system format can be supported to be ·
automatically switched. The receiver module will be automatically turned off to save the power.
HDMI IN the receiver module and the video recording module will be·
automatically turned off to save the power.
It is recognized that the screen and the corresponding resolution information will be automatically ·
displayed in the supported resolution format.
Playback: in this mode, customer can review the DVR Files.·
3D mode: in this mode, user have side by side 3D effect, not only HDMI, also RF mode.·
DO NOT EXPOSE THE LENS DIRECT TO SUNLIGHT, OTHERWISE
THE SCREEN WILL BURN IN.
4
 Loading...