1-800-345-6007 Page 6 www.ardisam.com
Mixing FMixing F
Mixing FMixing F
Mixing F
uel and Filling Fuel and Filling F
uel and Filling Fuel and Filling F
uel and Filling F
uel Tuel T
uel Tuel T
uel T
ankank
ankank
ank
Mixing Fuel
1. Fuel must be mixed in a container outside in a well
ventilated area.
2. Fill certified fuel container 1/4 full of recommended fuel.
3. Add recommended amount of 2-cycle oil.
4. Screw container cap on straight and tight.
5. Shake the container to mix fuel and oil.
6. Unscrew cap slowly to vent. Add the remainder of fuel
requirements.
7. Wipe away any spilled fuel or oil and allow to
evaporate before moving or transporting.
Avoid injury! Never store engine with fuel in the tank
indoors. Fuel and fuel vapors are highly flammable.
CAUTION
Avoid injury! Never mix fuel and oil directly in engine
fuel tank. Use only non-metal, portable fuel containers
approved by the Underwriter’s Laboratory (U.L.) or
the American Society for Testing & Materials (ASTM).
CAUTION
Avoid injury! An adult must always handle and fill
the engine with fuel.
CAUTION
Avoid injury! Always handle gas in a well ventilated
area, outdoors, away from flames or sparks.
CAUTION
This engine uses a gas/oil mixture. DO NOT run on
straight gas only, engine damage will result.
Filling Fuel Tank
1. Shut-off engine and allow engine to completely cool
before refilling the fuel tank.
2. Move to a well ventilated area, outdoors, away from
flames and sparks.
3. Clean debris from area around the fuel cap.
4. Loosen fuel cap slowly. Place the cap on a clean, dry
surface.
5. Carefully add fuel without spilling.
6. Do not fill gas tank completely full, allow space for fuel
to expand.
7. Immediately replace fuel cap and tighten. Wipe off
spilled fuel and allow to dry before starting engine.
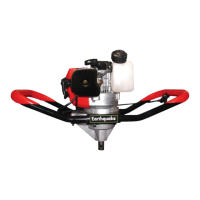
AssemblyAssembly
AssemblyAssembly
Assembly
To attach the throttle control trigger assembly (#4809) to the
handlebar, screw the provided 10-24 x 1-1/4” phillips head
bolt through the handlebar and into the trigger assembly.
There is a 10-24 square nut fastened inside the trigger
housing. Screw the bolt into the square nut and tighten
securely. DO NOT OVERTIGTEN!
To attach auger to powerhead, align hole in at top of shaft
with output shaft hole. Insert bolt and secure bolt with
provided nut or allen wrench depending on size of auger.
NOTE: The ends of the bolt should be flush with auger
collar. Bolt head and thread end should never go
beyond earth collar.
Avoid injury! DO NOT start engine if fuel is spilled.
Wipe off excess fuel and allow to dry. Remove engine
from area to avoid sparks.
CAUTION
OPERAOPERA
OPERAOPERA
OPERA
TIONTION
TIONTION
TION