EasyManua.ls Logo

East Midlands Water Company EMS Eco Premier User Manual

East Midlands Water Company EMS Eco Premier
16 pages
To Next Page IconTo Next Page
Page #1 background imageLoading...
Page #1 background image
BOX CONTENTS:
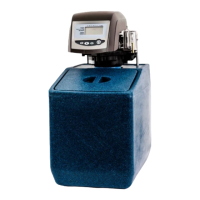
Your EMS Eco Premier
water softener
1/2” flexible hose for
waste and overflow
(approx. 1.5m
length) You cut this
into two, to create
the two hoses
Water hardness
test kit
Installation
instructions
Electrical
transformer
Your 10 year warranty details are stored digitally
1
Please check your package and ensure you have everything
you need for your installation BEFORE you start
EMS Eco Premier Water Softener
User Guide
IF YOU PURCHASED A 15mm OR 22mm FITTING KIT,
THIS IS PACKED INSIDE YOUR SOFTENER
PLEASE READ THIS INSTRUCTION BOOKLET BEFORE COMMENCING
INSTALLATION, AS IT CONTAINS USEFUL INFORMATION TO ASSUSTYOU.
Question and Answer IconNeed help?

Do you have a question about the East Midlands Water Company EMS Eco Premier and is the answer not in the manual?

East Midlands Water Company EMS Eco Premier Specifications

General IconGeneral
BrandEast Midlands Water Company
ModelEMS Eco Premier
CategoryWater Dispenser
LanguageEnglish

Summary

Box Contents and Initial Check

Understanding Your Water Softener

Regeneration Process Explained

Describes the resin cleaning process, including rinse cycles and brine solution usage.

Installation Guide

Connecting the Softener and Hoses

Connecting the Softener Valves

Instructions for setting inlet, outlet, and bypass valves and connecting hoses.

Preparing the Softener for Service

Putting into Service

Procedures for correctly setting valves and performing manual regeneration to start soft water supply.

Quick Set Up Guide

Initial Power Up and Setup Mode

Guides on plugging in the power, initial display, and entering the setup program.

Water Softener Programming

Setting Water Hardness

Inputting the local water hardness level for optimal softener performance.

Commissioning and Manual Regeneration

How to start the first regeneration cycle and perform manual regenerations.

Troubleshooting Guide

Addressing ERR3 Code

Initial steps to resolve ERR3 error messages by checking cable connections on the control panel.

Optical Sensor and Cam Arm Alignment

Detailed steps to check and re-seat the optical sensor and remove the cam arm.

Optical Sensor Re-installation

Visual guide on how to correctly re-insert the optical sensor into its housing.

Related product manuals