EN
EN - 6
Pull the locking device upwards to put the front wheel in the swivelling
posion (image 23). Ensure that both front wheels always have the same
seng: either swivelling or xed.
IMPORTANT: The ideal maximum tyre pressure is 1,4 Bar.
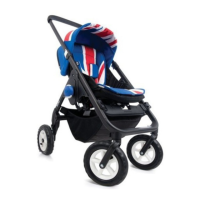
Suspension
The easywalker MINI stroller has suspended rear wheels (image 24). This
suspension gives extra comfort for your child.
Seang
WARNING! Use a harness as soon as your child can sit unaided.
WARNING! Do not change the direcon of the seang while the child is
in it.
The seat of the easywalker MINI stroller can be used facing forward or
backward. In both direcons the seat has four dierent posions.
To place the seat facing forward:
Keep the seat folded. Place the two hooks under the seat over the middle
bar (image 25). Push unl both hooks have made a “clicking” sound
(image 26). Open the seat by pulling the back of the seat upwards unl
both hooks at the back of the seat (image 27) are aached to the two
knobs on the frame (image 28). Aer a “clicking” sound the hooks are
aached. Aach the foot plate to the frame by pushing the clamps on
both sides inwards (image 29). The seat is now ready for use.
Detaching the seat:
Detach the footplate by pushing the clamps on both sides inwards (image
30). Pull the grip under the seang towards you (image 31). Li the
seang while pulling the seat and the back of the seat in the same me
(image 32).
To place the seat facing backwards:
Repeat the steps under “To place the seat facing forward:” in opposite
posion: facing backward.
To change the posion of the seat: