REPAIR AND MAINTENANCE
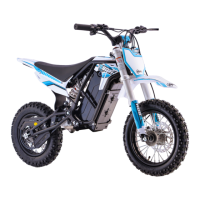
Chain Adjustment
Checking the drive chain periodically will ensure longer chain life.
Always keep it lubricated and tighten the chain correctly as follows:
Step 1
Loosen the 3 bolts used to hold
the chain cover in place. Once
undone, remove the chain cover
by sliding it around the swing
arm.
Step 2
Loosen the rear axle using a 17
and 14mm socket, you do not
need to remove it completely.
Undo the chain tensioner lock
nuts.
Step 3
Adjust the position of the rear
wheel and re-tighten the axle.
Check that your chain is
correctly tensioned, 15mm
movement up and down from
centre, then tighten your
adjuster lock nuts to the swing
arm and alloy block and torque
your axle to secure.
Make sure that your wheel is
centrally positioned within the
swing arm.
Step 4
Ret the chain cover and tighten
the bolts to secure.
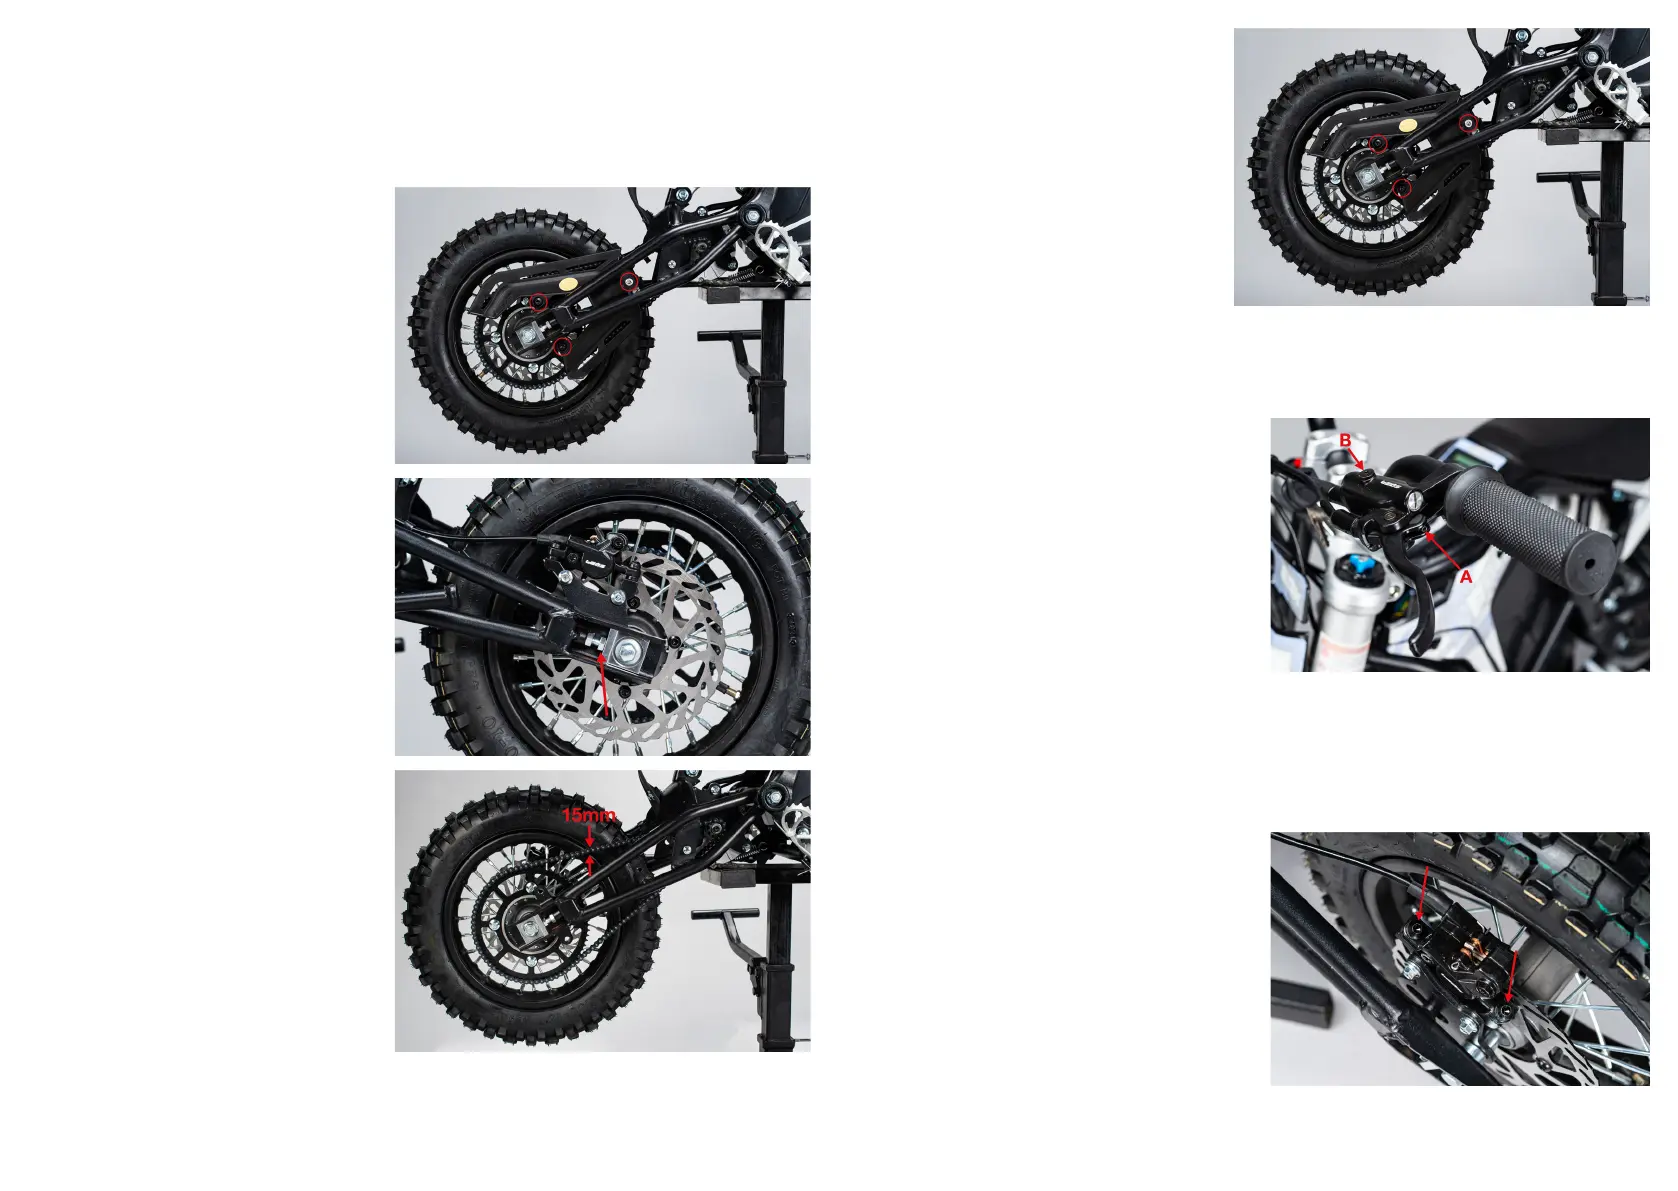
Tuning Your Brake
Step 1
Brake bite point is adjustable on the
EBOX. To adjust the bite point, wind
in/out screw A. This will enable you
to ne tune how soon your pads
start to contact the brake disc.
If your brakes start to feel soft or
stop working, they may need to be
bled. This can be done by using
screw B. It is recommended that
this process is completed by a
competent mechanic who is trained
in bleeding hydraulic brake systems.
Step 2
To make sure your brake is
performing optimally you may need
to adjust your calliper position.
Loosen the 2x 5mm allen bolts that
hold the calliper to the bracket. Pull
the brake lever, this will centre the
brake to the disc.
Re-tighten the calliper bolts, while
keeping the lever depressed. Check
that the wheel spins freely with no
interference of pad and disc. If there
is interference repeat the process.
 Loading...