13
ASSEmbLy
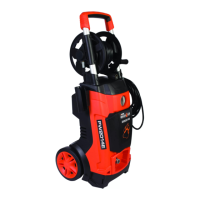
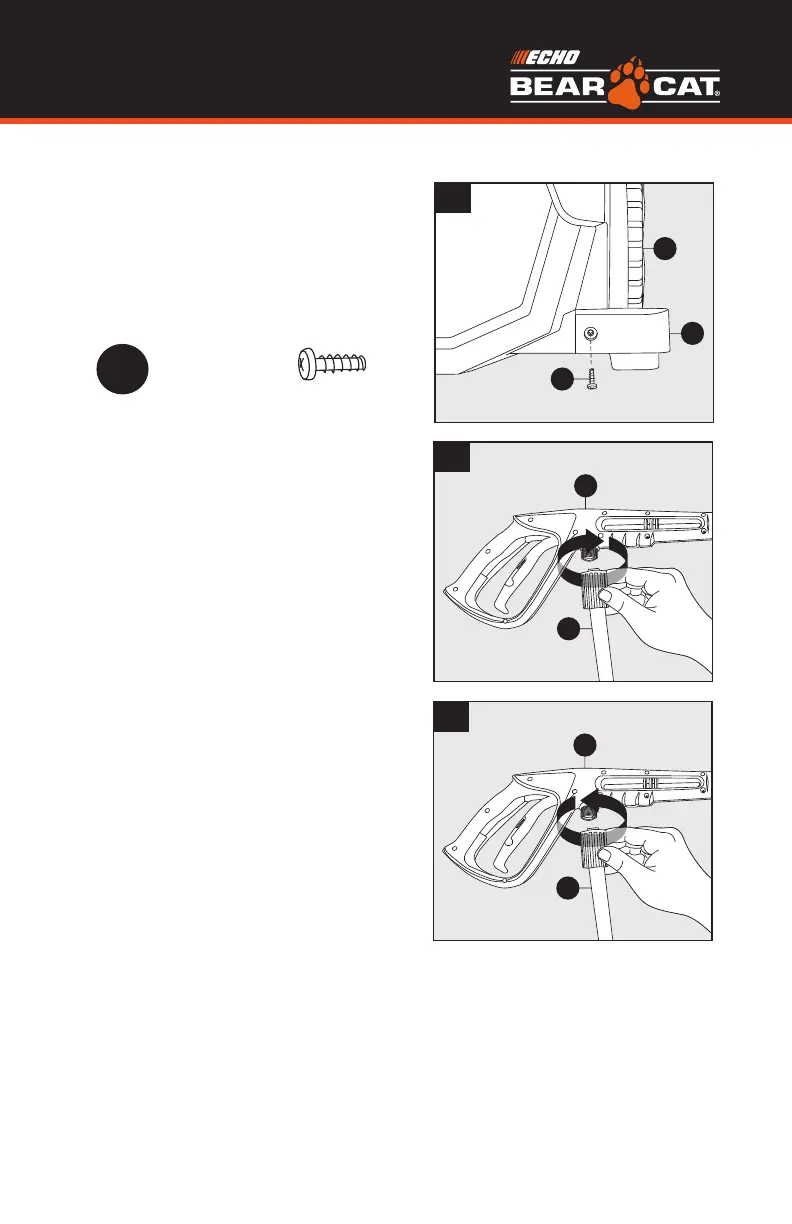
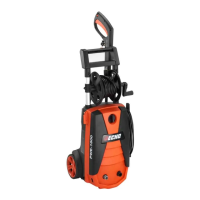
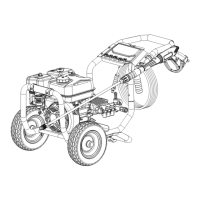
Slip tab of stabilizer foot (E) into
slot on bottom right, when facing
the unit, of power washer unit (A).
Secure with screw (AA).
Hardware Used:
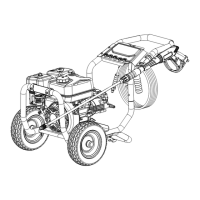
High Pressure Hose Assembly
Connect the other end of high
pressure hose (B) to spray gun (H)
by screwing collar over gun inlet.
Hand tighten (turning clockwise)
until tight. Hose is now securely
attached to the spray gun.
Note: High pressure hose (B) is
fitted to the hose reel and ready to
use. It only needs to be attached to
the spray gun (H).
To release the hose (B) from spray
gun (H), turn black collar counter-
clockwise. Remove gun.
3
E
AA
A
4
B
H
High Pressure Hose Assembly
Connect the other end of high pressure hose (B) to
spray gun (H) by screwing collar over gun inlet. Hand
tighten (turning clockwise) until tight. Hose is now
securely attached to the spray gun.
Note: High pressure hose (B) is tted to the hose reel
and ready to use. It only needs to be attached to the
spray gun (H).
Slip tab of stabilizer foot (E) into slot on bottom
righ, when facing the unit, of power washer unit (A).
Secure with screw (AA).
5
B
H
To release the hose (B) from spray gun (H), turn black
collar counterclockwise. Remove gun.
Screw x 1
AA
7
ASSEMBLY INSTRUCTIONS
3
E
AA
A
4
B
H
High Pressure Hose Assembly
Connect the other end of high pressure hose (B) to
spray gun (H) by screwing collar over gun inlet. Hand
tighten (turning clockwise) until tight. Hose is now
securely attached to the spray gun.
Note: High pressure hose (B) is tted to the hose reel
and ready to use. It only needs to be attached to the
spray gun (H).
Slip tab of stabilizer foot (E) into slot on bottom
righ, when facing the unit, of power washer unit (A).
Secure with screw (AA).
5
B
H
To release the hose (B) from spray gun (H), turn black
collar counterclockwise. Remove gun.
Screw x 1
AA
Screw 1X
AA