EasyManua.ls Logo

Echo BEARCAT SC5540 - User Manual

Echo BEARCAT SC5540
26 pages
Print Icon
To Next Page IconTo Next Page
Loading...
ENGLISH
PN: 16023
Rev. 010113
Companion to 12142
Range: D00001 - Current
SC5540 – 540 PTO
5 INCH CHIPPER/SHREDDER
OWNERS MANUAL
bearcatproducts.com

Questions and Answers

Summary

Before You Begin

PLEASE SEND US YOUR WARRANTY CARD

Register your machine's warranty by completing and returning the provided card.

FOR MACHINE SERVICE OR PARTS

Guidance on obtaining service and replacement parts for your ECHO Bear Cat machine.

FOR ENGINE SERVICE OR PARTS

Information on sourcing service and parts for the machine's engine.

IDENTIFICATION NUMBER LOCATION

How to locate and record the machine's unique serial number or VIN.

ORDERING PARTS

Details on the required information when ordering replacement parts for the machine.

HOW TO CONTACT ECHO BEAR CAT

Provides essential contact details for ECHO Bear Cat customer support and inquiries.

Limited Warranty

Demo Fleet Warranty Program

Guidelines and warranty terms for machines used within demonstration fleets.

1 SAFETY

1.1 SAFETY ALERT SYMBOL

Explains the meaning of hazard symbols and their importance for operator safety.

1.2 BEFORE OPERATING

Essential safety checks and preparation steps before starting machine operation.

1 SAFETY

1.3 OPERATION SAFETY

Key safety precautions to follow during the operation of the chipper/shredder.

1.4 PTO SAFETY

Specific safety instructions for operating the machine with the Power Take-Off (PTO).

1.5 MAINTENANCE;STORAGE SAFETY

Safety precautions to observe during machine maintenance, servicing, and storage.

1 SAFETY

1.6 SAFETY DECALS

Details and descriptions of all safety and operating decals found on the machine.

1 SAFETY

1.7 SAFETY DECAL LOCATIONS

Illustrates the specific locations of all safety and operating decals on the machine.

2 ASSEMBLY

2.1 INSTALL THE HOPPER

Step-by-step instructions for securely attaching the hopper assembly to the frame.

2.2 CONNECT THE PTO DRIVELINE

Guide on how to properly connect the PTO driveline to the tractor's PTO shaft.

2 ASSEMBLY

2.3 CONNECT CONTROL BOX WIRES TO TRACTOR

Instructions for connecting the machine's control box wiring to the tractor's power source.

3 FEATURES & CONTROLS

SHREDDER CHUTE

Details the purpose and material size limitations for the shredder chute.

CHIPPER CHUTE

Describes the purpose and material size limitations for the chipper chute.

BLADE ACCESS COVER

Information on removing the cover to access the chipper blades for maintenance.

DISCHARGE DOOR

Explains the function and purpose of the machine's discharge door.

PTO SHAFT

Guidance on connecting and operating the PTO shaft safely and effectively.

THREE-POINT HITCH CONNECTIONS

Instructions for mounting the chipper/shredder to a tractor's three-point hitch system.

4 OPERATION

4.1 STARTING THE CHIPPER

Step-by-step procedures for safely starting the chipper operation.

4.2 STOPPING THE CHIPPER

Procedures for safely shutting down and stopping the chipper operation.

4 OPERATION

4.3 CHIPPER OPERATION GUIDELINES

Best practices, safety rules, and material feeding guidelines for optimal chipper operation.

5 SERVICE & MAINTENANCE

5.1 MAINTENANCE SCHEDULE

A detailed schedule outlining required maintenance tasks and their recommended frequencies.

5 SERVICE & MAINTENANCE

5.2 CHIPPER BLADES MAINTENANCE

Instructions on checking and maintaining the sharpness and condition of chipper blades.

5.3 REMOVING THE BLADES

Step-by-step guide for safely detaching chipper blades from the rotor.

5.4 SHARPENING THE BLADES

Instructions on how to properly grind and sharpen chipper blades for optimal performance.

5 SERVICE & MAINTENANCE

5.5 INSTALLING THE BLADES

Procedures for correctly mounting and torquing chipper blades onto the rotor.

5.6 SHREDDER KNIVES MAINTENANCE

Guidelines for inspecting shredder knives for damage and wear.

5.7 REMOVING THE SHREDDER KNIVES

Step-by-step instructions for safely detaching shredder knives from the rotor.

5 SERVICE & MAINTENANCE

5.8 CHANGING THE DISCHARGE SCREEN

Procedures for removing and installing different discharge screen types.

5.9 SETTING BLADE CLEARANCE

How to adjust the clearance between the chipper blades and the anvil for optimal cutting.

5 SERVICE & MAINTENANCE

5.10 CLEARING A PLUGGED ROTOR

Steps to safely resolve rotor blockages caused by excessive material feeding.

5.11 DRIVE BELTS

Information on checking drive belt condition, tension, and replacement procedures.

5 SERVICE & MAINTENANCE

5.12 REMOVING THE ROTOR

Detailed instructions for safely removing the heavy rotor assembly from the machine.

5.13 PTO DRIVELINE LUBRICATION

Lubrication points and frequency for the PTO driveline components and shield bearing.

5 SERVICE & MAINTENANCE

5.14 LUBRICATION

General lubrication points and guidelines for maintaining the machine's moving parts.

6 TROUBLESHOOTING

Engine or rotor stalls or stops

Diagnosing and resolving issues where the engine or rotor ceases operation.

Machine chips poorly

Identifying causes and solutions for reduced chipping efficiency and quality.

Hard to feed chipper, requires excessive power to chip

Troubleshooting issues with material feeding and excessive power consumption.

Shredder requires excessive power or stalls.

Resolving problems where the shredder demands too much power or stops operating.

Engine stalls or belt squeals when engaging belt

Diagnosing and fixing problems related to engine stalling or belt squealing during engagement.

Material from chipper wraps around rotor shaft

Solutions for preventing and addressing material wrapping around the rotor shaft.

6 TROUBLESHOOTING

Excessive vibration while running

Identifying causes of excessive vibration and methods to correct them.

Rotor will not turn.

Troubleshooting steps to take when the rotor fails to rotate.

Cannot engage belt

Resolving issues that prevent the drive belt from being engaged properly.

Excessive belt wear

Identifying reasons for rapid belt wear and how to prevent it.

7 SPECIFICATIONS

Overall size, Overall weight

Provides the machine's physical dimensions and total weight.

Max chipper capacity, Max shredder capacity

Details maximum material sizes for chipping and shredding operations.

Chipper blades, Shredder knives, Rotor speed, Rotor size, Rotor weight, Drive type, Belt size

Lists technical specifications for critical machine components and systems.

3 point hitch, PTO

Information on PTO connection requirements and tractor three-point hitch compatibility.

SPECIAL TORQUE REQUIREMENTS

Specific torque values for critical fasteners during assembly and maintenance.

7 SPECIFICATIONS

7.1 BOLT TORQUE

Comprehensive tables for SAE and Metric bolt torque values based on grade and diameter.

8 OPTIONS

1-SPEED COMMERCIAL BLOWER PACKAGE

Information regarding the optional 1-speed commercial blower attachment.

Debris Screens

Lists available replacement debris screens with different mesh sizes and types.

Replacement Kits

Details kits available for replacing worn shredder knives and chipper blades.

Vacuum Hose Kit

Information on the optional vacuum hose kit for debris collection.

Overview

This document is the owner's manual for the ECHO Bear Cat 5 Inch Chipper/Shredder, model SC5540-540 PTO.

Function Description:

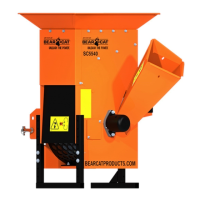
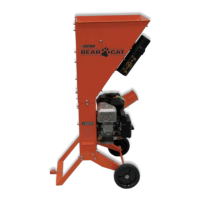
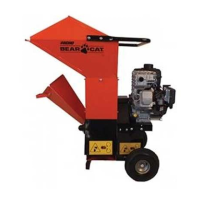
The ECHO Bear Cat 5 Inch Chipper/Shredder is a robust piece of outdoor equipment designed to process various organic materials into smaller, more manageable pieces. It features two primary operations: chipping and shredding. The chipping mechanism, located at the front of the machine, utilizes hardened steel chipper blades mounted on a rotating rotor assembly. Material fed into the chipper chute is sliced into small chips and then propelled out through a discharge tube. The shredding operation uses hardened steel shredder knives to grind material fed into the shredder chute. The shredded material exits through a discharge screen, which can be directed into a container or onto the ground. This machine is designed to be connected to a tractor via a Power Take-Off (PTO) driveline, leveraging the tractor's power for its operation.

Important Technical Specifications:

  • Overall Size: 43" x 43" x 44" (109 cm x 109 cm x 112 cm)
  • Overall Weight: 450 lbs. (204.1 kg)
  • Max Chipper Capacity: 5" (12.7 cm)
  • Chipper Blades: 4 reversible (3.125" x 2" x 0.25" or 7.9 cm x 5 cm x 0.64 cm)
  • Max Shredder Capacity: 0.75" (1.9 cm)
  • Shredder Knives: 36
  • Rotor Speed: 2000 RPM
  • Rotor Size: 19" (48.3 cm)
  • Rotor Weight: 112 lbs. (50.8 kg)
  • Drive Type: Belt
  • Belt Size: BX56
  • 3 Point Hitch: Category 1 (Category 0 may require 5/8" (1.6 cm) pins; a bushing kit must be installed for Category 2 hitches).
  • PTO: 540 +/- 10 RPM (standard 540 RPM PTO shaft required).

Usage Features:

The chipper/shredder is designed for ease of use with clear operational guidelines.

  • Starting: Connect the PTO driveline to the tractor, adjust the 3-point top link for a level chipper, start the tractor engine, engage the PTO, and increase engine speed to the rated PTO RPM.
  • Stopping: Move the tractor throttle to the slowest position, disengage the PTO lever, shut off the tractor engine, and allow the machine to come to a complete stop.
  • Material Feeding:
    • Chipper Chute: Handles materials up to 5" (12.7 cm) in diameter. Limbs should be placed butt end first and fed from the side to avoid being hit by moving brush.
    • Shredder Chute: Processes materials up to 3/4" (1.9 cm) in diameter, including grass, leaves, garden refuse, and small branches.
  • Operation Guidelines: Always run the engine at rated PTO RPM before feeding material. If the rotor slows, stop feeding and allow it to process backed-up material. If the chipper jams, remove the branch, rotate it, and reinsert it, or alternately insert and retract the limb. Alternate green/fresh cut material with dry material to lubricate blades and enhance performance.
  • Safety: Emphasizes reading the manual, wearing safety glasses and hearing protection, avoiding loose clothing, keeping bystanders at least 50 feet away, and ensuring all guards and shields are in place. Never operate under the influence of alcohol or if tired/ill. Always shut off the machine and ensure all moving parts have stopped before inspection or service.
  • PTO Driveline Connection: The driveline may need to be cut to length for proper tractor operation. Detailed instructions are provided for measuring and cutting the plastic tubes and steel shafts to ensure correct fit and prevent overlap.
  • Control Box Wires: Two electrical wires (red and white) connect to the tractor; the red wire to a 12-volt power source and the white wire to ground.

Maintenance Features:

Regular maintenance is crucial for optimal performance and to prevent warranty voidance.

  • Maintenance Schedule: A detailed schedule outlines checks for tightness of nuts and bolts, chipper anvil clearance, chipper blade sharpness and torque, shredder knife condition, overall machine cleanliness, PTO cross journal and inner tube lubrication, PTO shield retaining bearing lubrication, drive belt condition, tension, and alignment, and grease zerks.
  • Chipper Blades:
    • Inspection: Check sharpness every 5-15 hours. Replace if cracked, broken corners, or nicks greater than 1/8", or if the cutting edge no longer extends past the chipping slot after repeated sharpening.
    • Removal: Requires removing the discharge door, discharge screen, and access cover, then rotating the rotor to access and remove the blade bolts.
    • Sharpening: Blades can be ground on a bench grinder or by a professional. Regrind the angled edge to 45 degrees, avoiding the mounting surfaces. Prevent overheating during grinding.
    • Installation: Secure blades with bolts, torque to 25 ft-lbs, and reinstall the discharge screen and door.
  • Shredder Knives:
    • Inspection: Do not sharpen shredder knives. Inspect frequently for cracks or damage and replace immediately if found.
    • Removal: Involves removing the discharge door, screen, and rear side access cover, then driving out the knife shaft to remove spacers and knives.
    • Reassembly: Ensure serrated edge faces the same direction as chipper blades. Install new #10-24 bolt and nut, torque to 36 in-lbs, and maintain the original order of spacers and knives for rotor balance.
  • Discharge Screen: Instructions for removal and installation are provided for changing or cleaning the screen.
  • Blade Clearance: The chipping blades should clear the chipper anvil by 1/16" to 1/8". Adjustment involves loosening bushing bolts, tapping the rotor shaft, and then replacing lock collars and tightening set screws.
  • Clearing a Plugged Rotor: Requires removing the discharge door and screen to clean debris from the screen area.
  • Drive Belts: Check annually or every 50 hours. Replace if cracked, frayed, or worn. Replacement involves removing the PTO shield and shaft, loosening jackshaft pillowblock bearings, and sliding the jackshaft to remove/install the belt. Ensure pulleys are aligned and belt deflection is 7/16" under a 20 lb. load.
  • Rotor Removal: The rotor is heavy (over 100 lbs.) and requires support during removal. Steps include removing various covers and components, loosening bolts, and driving the shaft out.
  • Lubrication:
    • PTO Driveline: Lubricate PTO cross journals, inner tubes, and shield retaining bearing every 8 hours.
    • General: Lubricate the machine periodically with lithium-based grease, especially every 50-100 hours of operation. Avoid mixing polyurea and lithium-based greases. Do not over-grease bearings.
  • Troubleshooting: A comprehensive chart lists common problems, possible causes (e.g., dull blades, obstructed discharge, loose belts), and remedies (e.g., flip/sharpen blades, clear obstructions, adjust belt tension).
  • Bolt Torque: Detailed tables provide torque specifications for various SAE and Metric bolts, emphasizing that figures are for non-greased/non-oiled threads unless otherwise specified.

Echo BEARCAT SC5540 Specifications

General IconGeneral
BrandEcho
ModelBEARCAT SC5540
CategoryChippers/Shredders
LanguageEnglish

Related product manuals