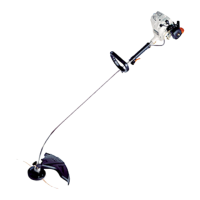
6
NOTE
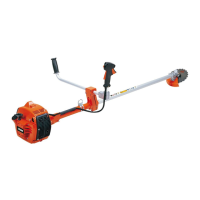
The drive shaft is fitted with left hand threads.
Turn locking nut counterclockwise to tighten.
Assemble cutter blade properly
Adapter plate (B)
Cup washer
Nut
Adapter plate (A)
Shield
Cutter blade
INSTALLATION OF CLEARING BLADE
• Place the blade on the adapter plate (A).
• Place the adapter plate (B) atop the axle.
• The flat side of adapter plate (B) should be on the
blade.
• Put the cup washer on the adapter plate (B) and
secure the lock nut counterclockwise.
• To fasten or loosen the lock nut, use the spanner
(across flats 19).
• Inserting a locking tool into the holes of the
adapter plate (A) and gear housing should block
the axle.
Adapter plate (B)
Adapter plate (A)
Locking tool
Cup washer
Nut
Cutter blade
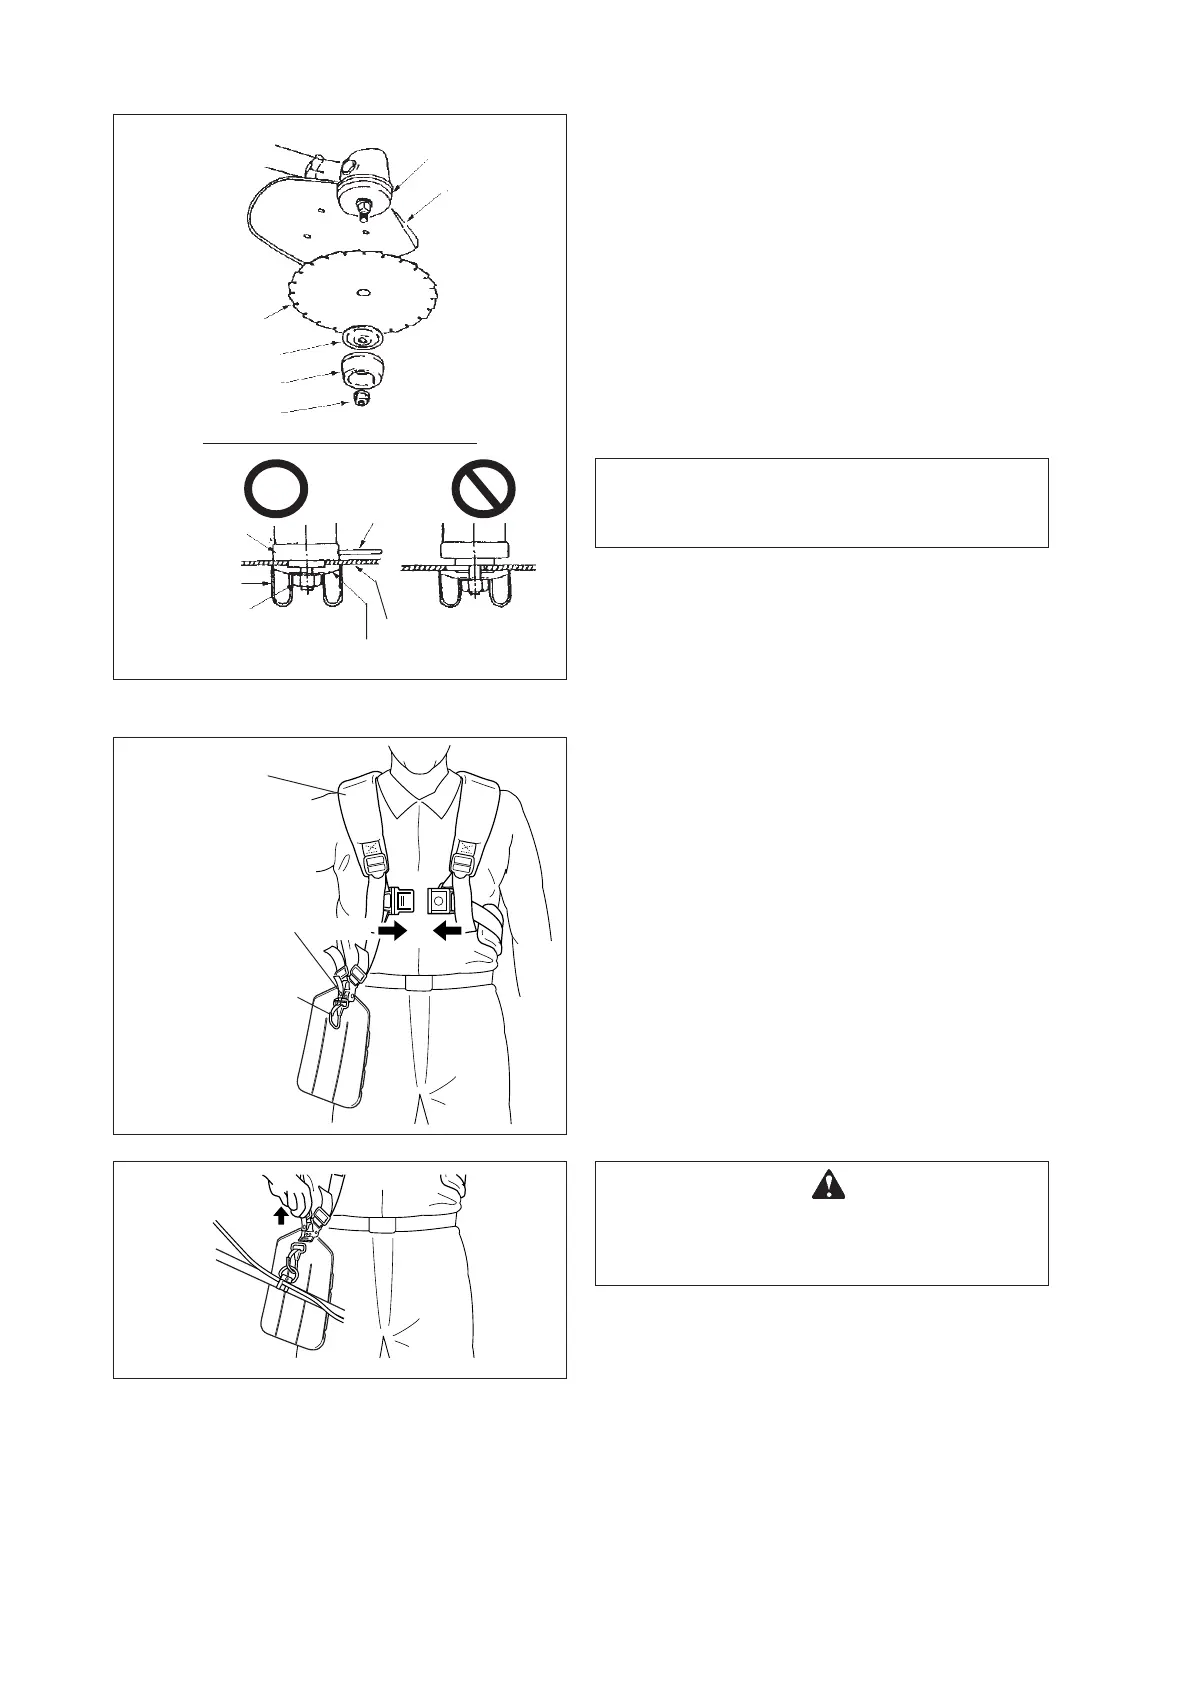
Shoulder strap
Push
Hook
SHOULDER HARNESS
•Install the harness over the both shoulders and
adjust shoulder straps so that the quick release
latch rests low on the right hand side.
•Attach the trimmer/brushcutter to the harness by
means of the quick release latch.
•Make some practice sweeps as with a scythe and
readjust the harness as necessary for comfort
and to maintain the cutter parallel to the ground.
WARNING DANGER
IN CASE OF EMERGENCY, PULL THE QUICK
RELEASE LATCH TO DISCONNECT THE
TRIMMER FROM THE HARNESS.
Quick release latch
Never fasten while applying your weight. Otherwise
the thread of nut could be broken.