173 INCH CHIPPER/SHREDDER
SERVICE & MAINTENANCE
WARNING
BEFORE INSPECTING OR SERVICING ANY PART OF THIS MACHINE, SHUT OFF POWER SOURCE,
AND MAKE SURE ALL MOVING PARTS HAVE COME TO A COMPLETE STOP.
4. Using a rubber mallet tap the end of the rotor shaft to
obtain 1/16" to no greater than 1/8" clearance. Rotate
the rotor and check the clearance on all chipping
blades.
5. Once clearance has been set, the lock collars must
be replaced and retightened. Using a punch and a
hammer, tap the lock collars in the direction of shaft
rotation (clockwise on the engine side bearing and
counterclockwise on the chute side bearing) and
set them with a hammer tap. Tighten the lock collar
set screws.
6. Loosen the set screws holding the belt pulley on the
rotor shaft. Move the pulley on the shaft so it is aligned
with the engine drive pulley. The pulley should be
moved the same amount the rotor was moved, only
in the opposite direction. Torque pulley set screw to
160 in-lbs.
7. Insure the pulley drive key is completely seated under
the pulley and tighten the set screws.
8. Check pulley alignment by laying a straightedge
across the pulley faces. Pulley faces should line up.
If not, repeat steps 6 and 7 until the pulley is lined up.
Feeding too large or too much material at once may plug
the chipper. To clear a plugged rotor, proceed as follows:
1. 6KXWRႇHQJLQHDQGDOORZDOOPRYLQJSDUWVWRFRPHWR
a complete stop.
2. 5HPRYH WKH î FDUULDJH EROW DQG ÀDQJH
nut securing the discharge screen to the frame and
remove the shredder screen.
3. Clean the debris away from the chipper rotor. Turn
the rotor by hand to be sure it is free to rotate. Be
careful to avoid the chipper blades when cleaning out
the debris.
4. Install discharge screen and retaining hardware.
5.10 CLEARING A PLUGGED ROTOR
There are several optional discharge screens available
LQ GLႇHUHQW VL]HV VHH 6HFWLRQ 2SWLRQDO GLVFKDUJH
VFUHHQV SURGXFH GLႇHUHQW VL]HG FKLSV 7R FKDQJH WKH
discharge screen, proceed as follows:
1. 6KXWPDFKLQHRႇ PDNHVXUHDOO PRYLQJSDUWVKDYH
completely stopped and disconnect spark plug wire.
2. Lift discharge door/shield to gain access to the
discharge screen.
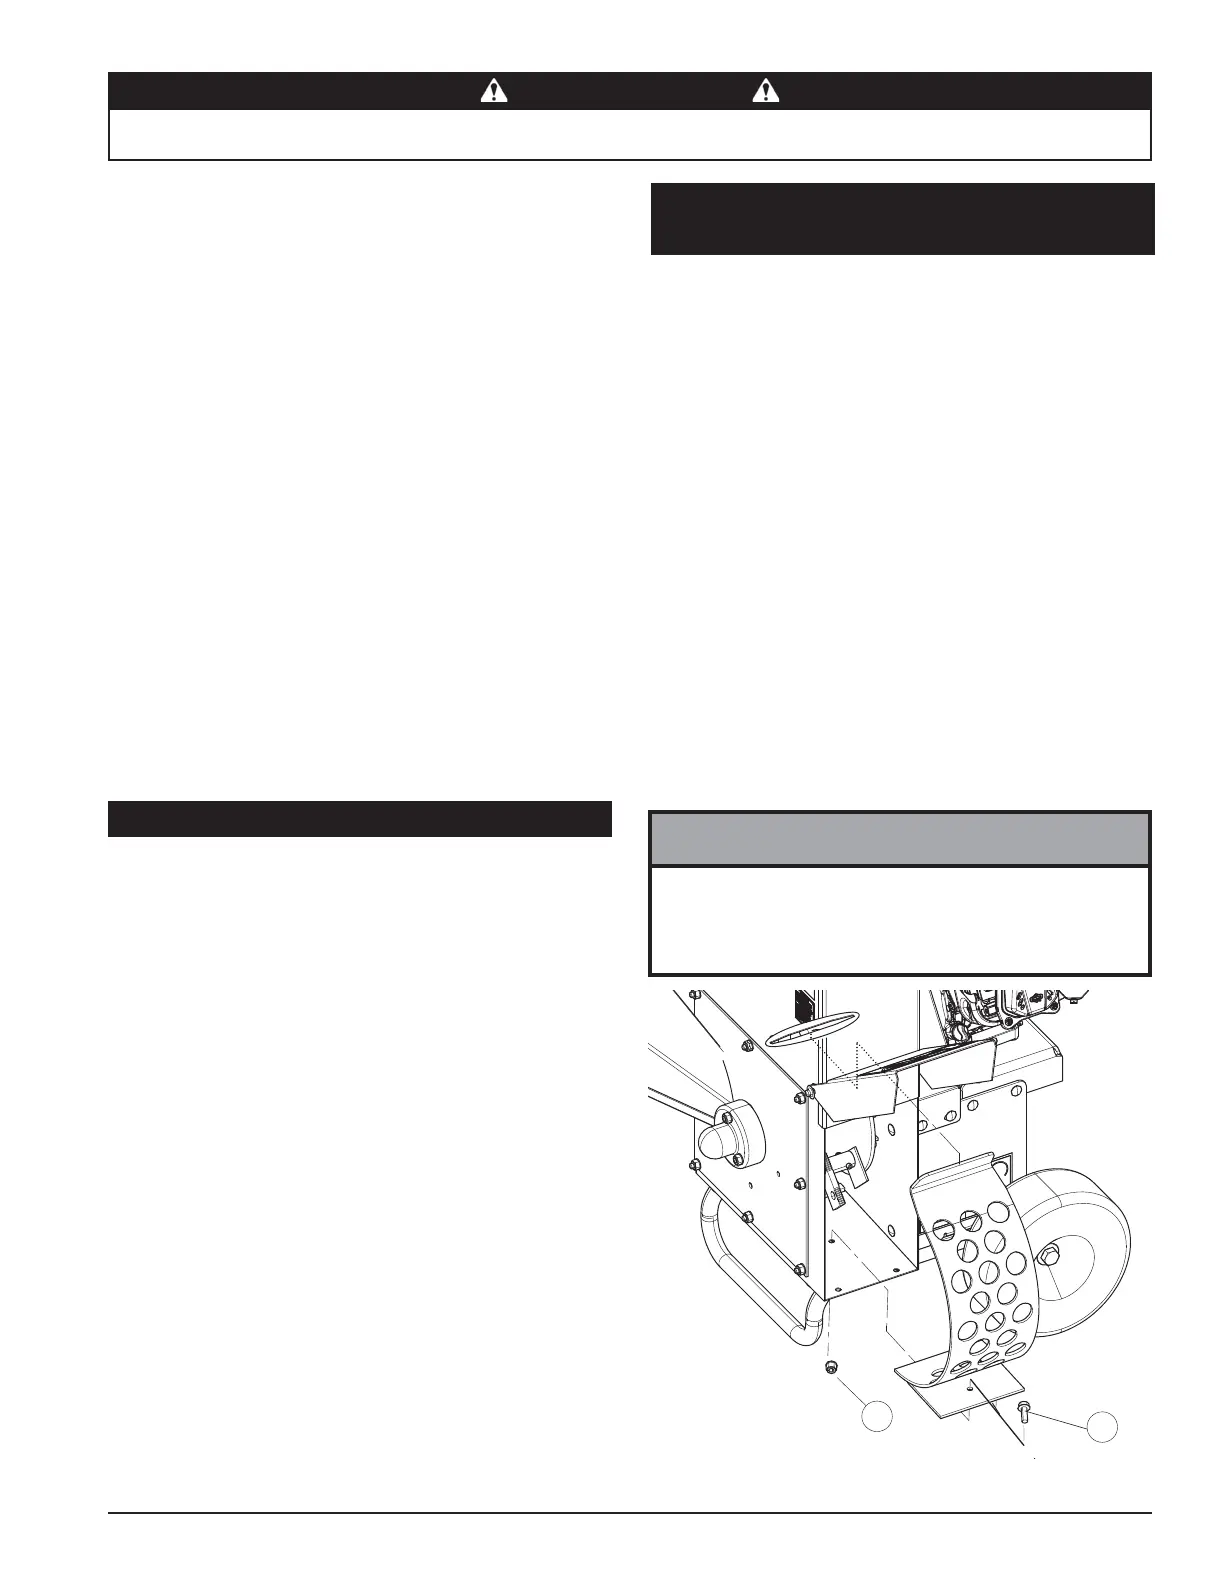
3. 5HPRYHWKHîFDUULDJHEROWDQGÀDQJH
nut (2)securing the discharge screen to the frame
(Figure 5.8). Pull discharge screen out from the
bottom and rotate the top downward to remove.
4. Clean any trash or debris out from the screen area.
5. Insert the top of the replacement screen into the slot
in the chipper body and push the bottom of the screen
inward so bolt holes align.
6. Install the bolt through the screen and down through
WKHIUDPHDWWDFKÀDQJHQXWDQGWLJKWHQVHFXUHO\
5.11 CHANGING THE DISCHARGE
SCREEN
0DNHVXUHWKH WRSÀDQJHRI WKHGLVFKDUJH VFUHHQ LV
properly and completely installed into upper slot of the
housing. Failing to do so may cause knives to make
contact with discharge screen during operation.
NOTE
1
2
Figure 5.8, Changing the Discharge Screen
*Model Shown SC-2013
ENGLISH