Part 9 - Electrical connections
Opening the front cover
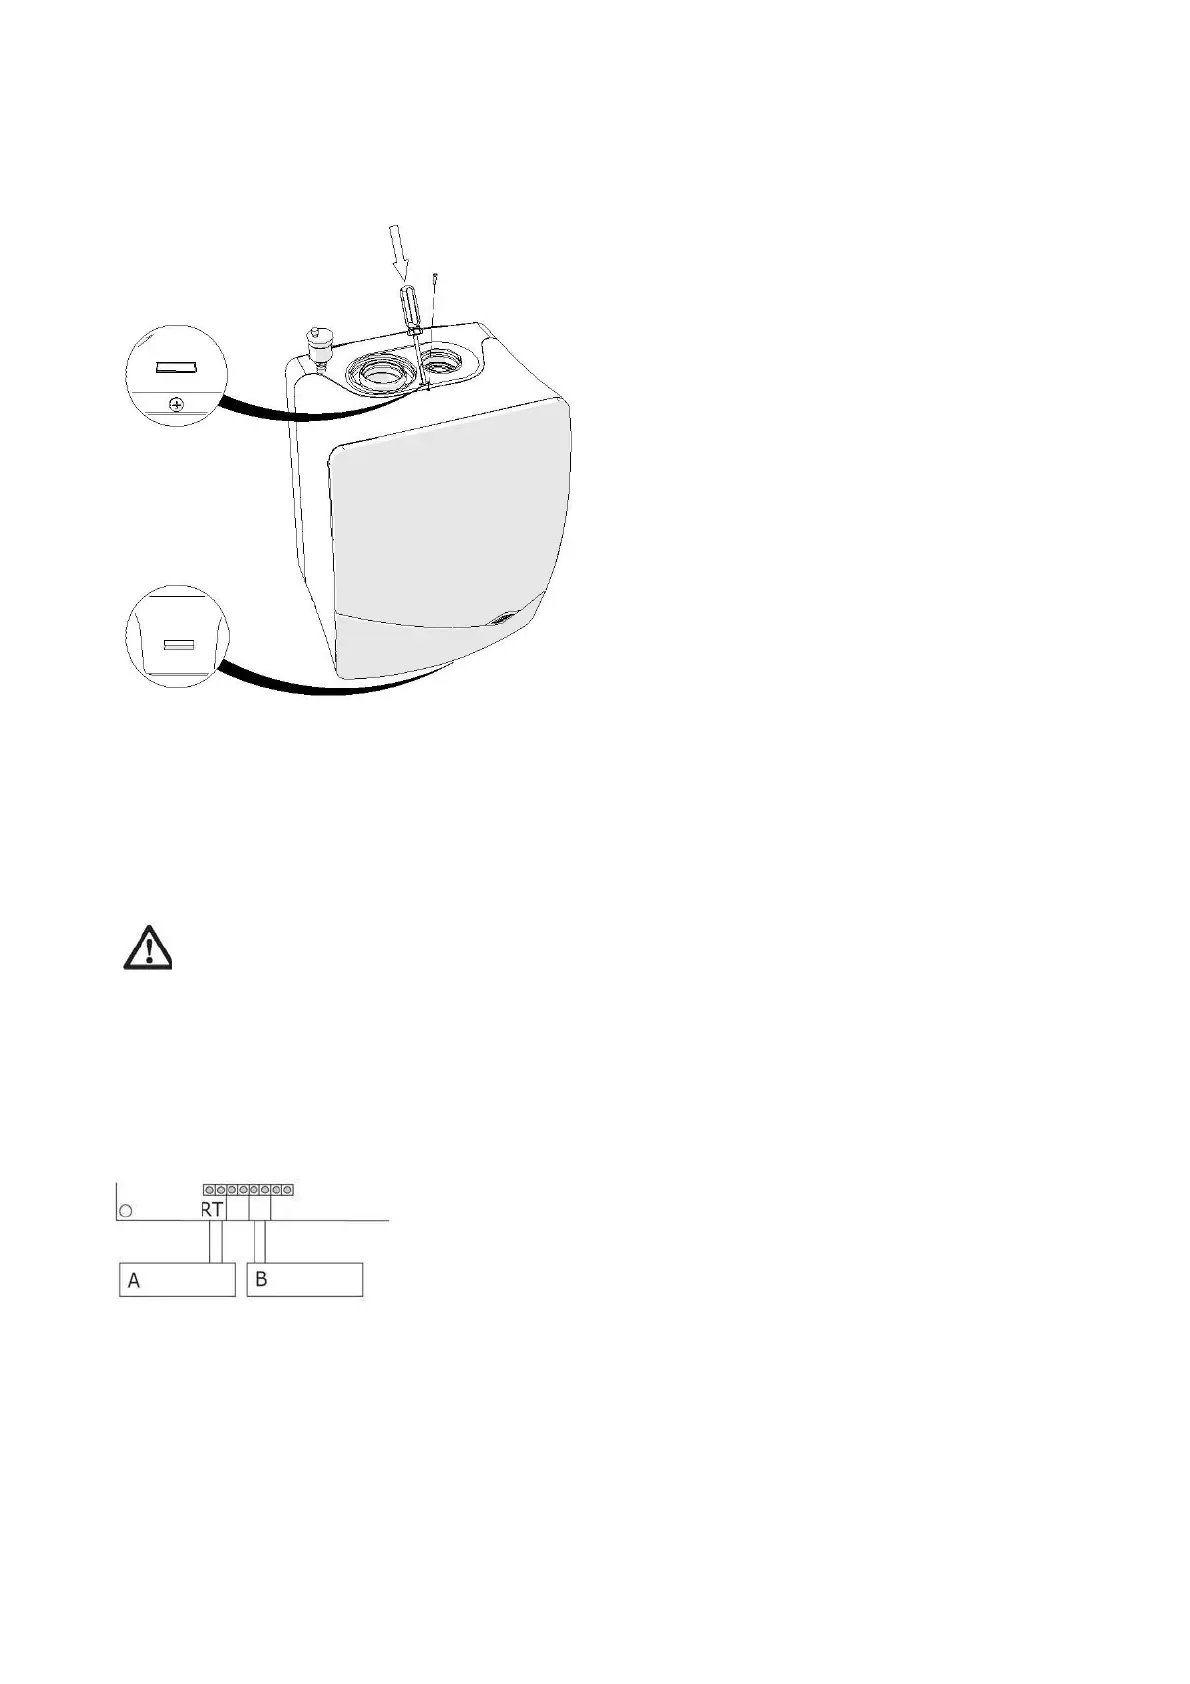
Remove the safety screw at the top side of the hood. Use a screw driver to push back the safety latches at
the bottom and top side of the appliance to be able to release the hood by pulling it forward. To put the hood
back in place, push it back over the safety latches and put back the safety screw.
Safety screw
Figure 9.1 Safety screw location
Power connection
The appliance has been equipped with a grounded line cord. Therefore the Eco-King boiler must be connected to a
grounded wall socket. in accordance with the requirements of the authority having jurisdiction or, in the absence of
such requirements, with the Canadian Electrical Code Part I, CSA C22.1, Electrical Code.
Warning
In case the line cord gets damaged it must be fully replaced with an official Eco-King line cord (See section
13 for part numbers). The line cord and wall socket must be at any time reachable with regard to service
purposes. Failure to follow these instructions may result in serious injury or death.
Connect the room thermostat
Figure 9.2 Room thermostat and outside sensor connection
After removing the front cover of the Eco-King boiler, get access to the print circuit board by manually pushing the
plastic clips at the sides of the plastic print housing and subsequently pulling forward the drop down box.
Connect:
A: Room thermostat (on/off end switch/dry contact connection)
B: Outside sensor (optional)
Connect the room thermostat (A) and, if present, the outside sensor (B) to the terminal strip (see figures
9.2 and 9.3). Outdoor sensor is optional, does NOT have to be installed for the Eco-King to function.
48
 Loading...