Do you have a question about the ECO-WORTHY 100W Solar Panel Kit and is the answer not in the manual?
Follow local regulations, use insulated tools, disconnect power, ensure secure connections to prevent hazards.
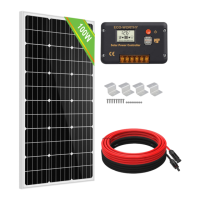
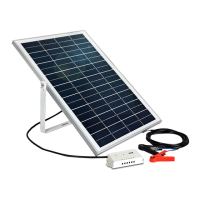
Introduction to the ECO-WORTHY 100W Solar Panel Kit for off-grid solar systems.
Install controller in a dry, cool, and ventilated area with proper clearance for airflow.
Drill holes, ensure correct sizing, use expansion anchors for drywall, orient unit correctly.
Choose a spot with direct sunlight and no shading; align panels to the south (N. Hemisphere).
Use Z-brackets and well-nuts for secure flat mounting on RV roofs, ensuring a watertight seal.
Well-nuts secure panels in blind holes by expanding against hole walls for a strong hold.
Wire solar panels to the charge controller using MC4 connectors and copper cable.
Regular cleaning, checking electrical/mechanical connections, and inspecting components for longevity.
Contact ECO-WORTHY for technical problems, warranty claims, or product support.
The ECO-WORTHY 100W Solar Panel Kit is a renewable energy product designed to provide quiet power production and grid independence, making it ideal for off-grid solar systems. This kit is particularly suited for customers looking to get started with solar energy, offering a comprehensive solution for generating power in remote or mobile settings. The manual provides detailed instructions for the installation and maintenance of the solar module kit, ensuring users can effectively set up and manage their system.
The primary function of the ECO-WORTHY 100W Solar Panel Kit is to convert sunlight into electrical energy, which can then be used to power various devices or charge batteries. The kit includes a 100W solar panel and a charge controller, which are essential components for a functional solar power system. The solar panel captures solar radiation and converts it into direct current (DC) electricity. This DC electricity is then fed into the charge controller.
The charge controller plays a crucial role in managing the power flow from the solar panel to the battery (not included in the kit but implied for system functionality) and to the load. It regulates the voltage and current coming from the solar panels to prevent overcharging of the battery, which can extend battery life and ensure system safety. Additionally, the charge controller often includes features to prevent reverse current flow from the battery to the solar panel at night and to protect against short circuits and overloads. The system is designed to be user-friendly, allowing for straightforward connection of solar panels to the controller and subsequent power distribution. The inclusion of MC4 connectors facilitates easy and secure connections between the solar panels and the rest of the system, minimizing the risk of accidental disconnections and ensuring protection against dust and water ingress.
The ECO-WORTHY 100W Solar Panel Kit is designed for versatile usage, particularly in off-grid scenarios such as RVs, boats, or remote cabins. The installation process is detailed to guide users through setting up the solar panel and charge controller.
For solar panel installation, the manual emphasizes selecting a location that receives direct sunlight and is free from shading by obstacles like trees or roof overhangs. To maximize power output, it is recommended to position the panels to face true south (in the Northern Hemisphere) at a tilt angle approximately equal to the latitude of the installation location. For instance, in Miami, Florida (latitude 25 degrees), a tilt angle of 25 degrees is ideal. The kit supports "Flat Mount" installation on RV roofs using Z-Brackets and well-nuts, which are designed to secure the panel safely on thin roofs while preventing water leakage. The well-nuts expand to create a secure, watertight bond, and additional sealant can be used for enhanced protection. The Z-Brackets can also be used on house roofs, provided proper roof penetration sealant is applied to prevent leaks.
The charge controller installation requires careful attention to location. It should be mounted in a dry, cool, and well-ventilated area, with ambient air temperatures between 30°F and 105°F (0°C and 40°C). Adequate clearance (at least 2 inches above and below, and 1 inch on each side) is necessary for proper airflow to prevent overheating. While mounting is optional, placing the charge controller as close as possible to the panels is recommended for optimal performance. The controller can be mounted on vertical or horizontal surfaces, but it should be oriented so that any open ends are at the top to prevent foreign material from settling inside. When mounting on drywall, expansion anchors are suggested to ensure a secure fit. All electrical connections must be clean and tight to prevent arcing and overheating, ensuring the system operates safely and efficiently.
To ensure optimum performance and longevity of the solar system, regular maintenance is recommended. The manual outlines several key maintenance tasks that users should perform:
The ECO-WORTHY 100W Solar Panel Kit is backed by a 1-year warranty, allowing for refunds or replacements for products with defects at the discretion of ECO-WORTHY Ltd. For any technical problems or issues not covered in the manual, customers are encouraged to contact ECO-WORTHY support for further assistance via phone or email. This comprehensive approach to maintenance and support ensures that users can rely on their solar system for consistent performance and a long operational life.
| Power Output | 100W |
|---|---|
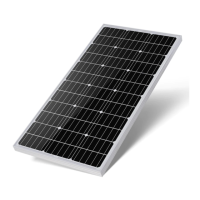
| Type | Monocrystalline |
| Voltage | 12V |
| Open-Circuit Voltage (Voc) | 21.6V |
| Maximum Power Voltage (Vmp) | 18V |
| Maximum Power Current (Imp) | 5.56A |
| Warranty | 1 year |
| Maximum System Voltage | 600V |
| Material | Aluminum frame, tempered glass |