11
SR Series
The SR is easy to install. The standard SR models include an 8 ft long chimney system. It can go
vertically straight up or horizontally out through the wall and then vertically up along the
wall to the outside air.
- must be located inside a weatherproof building.
- must be installed on a non-combustible level and even base.
- must not be operated in areas where there is a risk of accumulation of flammable vapors or dusts.
- At no times should the flue be obstructed i.e. overhanging branches.
When the chimney system has been installed, one only has to connect the
power supply and fuel (Propane, Natural Gas, or Diesel). The toilets need to be placed inside a
weather proof building/structure, and they need a minimum of 12 inches clearance from any wall.
Furthermore, the SR should not be operated in any area where there is a risk of an accumulation
of flammable vapors or dust
• Catalytic converter - a catalytic converter may be installed in the chimney pipe; the catalytic
converter cleans the outgoing air and ensures that there are no harmful agents going out. (optional)
• Chimney fan - an extra fan may be installed in areas where extra draft is needed. (optional)
WC Series
The installation of the system can be done in a few easy steps. The WC models can be installed up
to 10 feet from the toilet and 3 feet above the ground. The incinerator and waste tank must be
placed within 10 feet from each other. When the chimney system has been installed, connect the
power supply (120V AC or 12VDC as an option for WC5) and the fuel source. The WC must be
installed inside a weather proof building/structure. A minimum of 12 inches clearance from any
outside wall is required. Furthermore, it should not be operated in an area where there is a risk of an
accumulation of flammable vapors or dust. The chimney has to be a minimum of 4 ft long. It can go
vertically up or horizontally out through the wall to the outside air.
• Catalytic converter - a catalytic converter may be installed in the chimney pipe; the catalytic
converter cleans the outgoing air and ensures that there are no harmful agents going out. (optional)
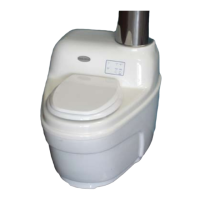
BASIC Series
The BASIC is extremely easy to install. The first step in the installation process is to install the vent pipe
through the roof or out through the wall. Next, one only has to connect the power supply and
decide what to do with the liquid waste hose. There are three options of how the liquid waste hose
can be installed (see BASIC Series Section)
When installing the liquid waste hose, it is imperative that it has an adequate
drop through its entire length to prevent it from getting clogged up. This is
especially important when the toilet is being installed where the temperature
gets below freezing. Note: Check with your local authorities for any restrictions
regarding installing a drain pit.
Installation
Click anywhere in the top portion of this page for updated/expanded articles on septic system design, inspection,
testing, maintenance, and repair online at InspectAPedia.com
 Loading...