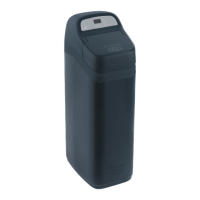
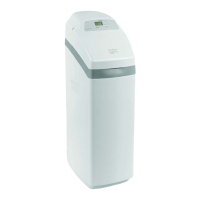
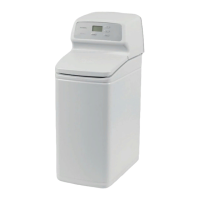
This document is the owner's manual for EcoWater Systems Electronic Demand Water Softeners, specifically models ESD2750R25, ESD2752R30, and ESD2752R39.
Function Description
The EcoWater Systems Electronic Demand Water Softener is designed to remove hardness minerals (such as calcium and magnesium), barium, and radium 226/228 from water. It operates on a demand-initiated regeneration (D.I.R.) feature, which means it regenerates only when necessary based on water usage, minimizing salt and water consumption. The system is intended for use with microbiologically safe water.
Important Technical Specifications
General:
- Power: 24V DC electrical power, supplied by a direct plug-in power supply (included). Requires a nominal 120V, 60 Hz household outlet in a dry, grounded, and overcurrent-protected location.
- Minimum Water Flow: 3 gallons per minute at the inlet.
- Maximum Allowable Inlet Water Pressure: 125 psi. A pressure reducing valve may be necessary if daytime pressure exceeds 80 psi, ensuring flow remains above 3 gpm.
- Water Temperature Range: 40-120 °F. Operating with water over 120°F or allowing freezing temperatures will void the warranty.
- Drain Hose: Minimum 1/2" inside diameter for the valve drain. Must provide a 1-1/2" minimum air gap at the drain point. Do not elevate the drain hose more than 8 feet above the floor to prevent back pressure.
- Brine Tank Overflow Hose (Optional): 1/2" inside diameter hose. Do not elevate higher than the elbow on the brine tank or tee it to the valve drain hose.
Model-Specific Specifications:
| Model |
Model Code |
Rated Softening Capacity (grains @ lb. salt dose) |
Rated Efficiency (grains / lb. @ minimum salt dose) |
Water Used During Regeneration @ Minimum Salt Dose |
Amount of High Capacity Resin |
Resin Tank Nominal Size (dia. x height) |
Service Flow Rate |
Pressure Drop at Rated Service Flow |
Intermittent Flow @ 15 psi |
Intermittent Flow @ 30 psi |
Water Supply Maximum Hardness |
Water Supply Maximum Clear Water Iron |
Max Drain Flow Rate |
| ESD2750R25 |
S525 |
14,900 @ 3.4, 28,900 @ 11.1, 33,000 @ 18.2 |
4,360 @ 3.4 |
2.9 gal. / 1,000 grains |
59.3 lbs. (1.14 cu. ft.) |
10 x 35 in. |
6.0 gpm |
8.0 psig |
9.0 gpm |
13.8 gpm |
95 gpg |
5 ppm |
2.0 gpm |
| ESD2752R30 |
O30 |
11,800 @ 2.4, 25,100 @ 7.8, 30,000 @ 13.1 |
4,815 @ 2.4 |
2.4 gal. / 1,000 grains |
42.6 lbs. (0.82 cu. ft.) |
9 x 35 in. |
7.0 gpm |
11.9 psig |
8.0 gpm |
11.9 gpm |
95 gpg |
4 ppm |
2.2 gpm |
| ESD2752R39 |
H40 |
12,000 @ 2.4, 31,700 @ 8.9, 40,200 @ 15.4 |
5,000 @ 2.4 |
4.5 gal. / 1,000 grains |
58.8 lbs. (1.13 cu. ft.) |
10 x 47 in. |
7.0 gpm |
7.0 psig |
11.8 gpm |
18.1 gpm |
110 gpg |
5 ppm |
2.3 gpm |
Performance Claims (NSF/ANSI 44 certified):
- Barium Reduction: Influent Challenge Level 10 ±10% mg/L, Maximum Allowable Product Water Level 2.0 mg/L.
- Radium 226/228 Reduction: Influent Challenge Level 25 pCi/L, Maximum Allowable Product Water Level 5 pCi/L.
- Hardness Reduction and Efficiency: Certified for hardness reduction and efficiency, and certified to NSF/ANSI Standard 372.
Usage Features
Installation:
- Location: Install close to the main water supply inlet, upstream of all other plumbing connections (except outside faucets). Place near a floor drain or other acceptable drain point. Avoid locations where freezing temperatures occur or where water damage is likely.
- Bypass Valve: Always install an EcoWater Systems bypass valve or a 3-valve bypass system to allow water shut-off to the softener for repairs while maintaining water supply to the house.
- Plumbing: Use 1" pipes to and from the softener fittings for maximum flow. Copper, brass, or PEX plastic pipe and fittings are recommended. Use lead-free solder and flux for sweat-solder connections. Support plumbing to prevent weight on valve fittings.
- Cold Water Pipe Grounding: If using a plastic bypass, ensure ground continuity is restored by either using an EcoWater ground clamp kit or installing a #4 copper wire across the removed section of main water pipe.
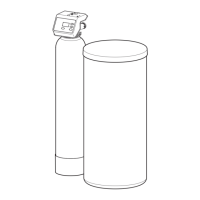
- Brine Tank Assembly (ESD2752R30 & ESD2752R39 only): Snap rim onto the brine tank, lower brinewell with slots at the bottom, fasten brinewell with screw and nut, route brine valve tubing through the brinewell top slot and rim hole, install brinewell cover, and attach hose adaptor elbow with grommet.
- Pressure Testing: After plumbing, open softened cold water faucets, place bypass valve(s) in bypass position, fully open main water supply valve, and watch for steady flow without air bubbles. Open a hot water faucet for one minute. Close all faucets and check for leaks.
- Sanitizing: Before first use, pour 1.5 oz (2-3 tablespoons) of common household bleach into the brinewell. Start a manual recharge to draw the bleach through the system. After recharge, run 50 gallons of water through a cold water faucet.
- Water Heater Restart: After sanitizing, turn on the electric or fuel supply to the water heater.
Electronic Controller Programming:
- Initial Setup: After plugging in the power supply, the display will show a model code and version number, then "PRESENT TIME" flashing with 12:00 PM.
- Set Present Time: Use UP/DOWN buttons to set the correct time (AM/PM).
- Set Water Hardness Number: The display will show "HARDNESS." Use UP/DOWN buttons to set the water hardness in grains per gallon (gpg). Compensate for iron by adding 5 gpg for each 1 ppm of iron.
- Set Regeneration Starting Time: The display will show "RECHARGE TIME." The default is 2:00 AM. Use UP/DOWN buttons to adjust in 1-hour increments if desired.
Normal Operation:
- The display shows the present time of day.
- Recharge Now: Press and hold the RECHARGE button for 3 seconds to initiate an immediate regeneration cycle. This is useful when expecting higher water usage.
- Recharge Tonight: Touch (do not hold) the RECHARGE button to schedule a regeneration for the next preset regeneration time (default 2:00 AM).
- Vacation Note: The softener regenerates only when water is used and capacity needs restoration, so it will not regenerate during extended periods of absence.
- Power Outage Memory: Most settings (hardness, recharge time) are retained. If the clock is flashing after power is restored, reset the present time. The softener will finish any regeneration cycle in progress when power returns.
Controller Features / Options:
- Salt Efficiency: When ON, the softener operates at salt efficiencies of 4000 grains per pound of salt or higher (may recharge more often with smaller salt dosage). The softener is shipped with this feature OFF. In California, this feature must be ON.
- Adjust Backwash Time and Rinse Time: Backwash and fast rinse times can be adjusted from 0 to 30 minutes.
Maintenance Features
Refilling with Salt:
- Check salt level frequently (every 2-3 weeks initially).
- Keep the brinewell cover on.
- In humid areas, keep the salt level less than half full.
- Recommended Salt: Cube, pellet, or coarse solar water softener salt (high purity evaporated crystals with less than 1% insoluble impurities).
- Potassium Chloride (KCl): If using KCl, increase the hardness setting by 25% and place only one bag (max 60 lbs) at a time.
- Salt with Iron Removing Additive: Some salts with additives can help keep the resin bed clean, but may release corrosive fumes. Iron Out salt is safe for two-tank models.
Breaking a Salt Bridge:
- A hard crust or salt "bridge" can form in the brine tank, creating an empty space between water and salt, preventing regeneration.
- Check for a salt bridge by pushing a broom handle down into the salt. If a hard object is felt before reaching the bottom, it's likely a bridge.
- Carefully push into the bridge in several places to break it. Do not pound on the outside of the tank.
Cleaning the Nozzle & Venturi:
- A clean nozzle & venturi is crucial for proper softener operation.
- To access, remove the top cover, place bypass valve(s) in bypass position, and ensure the main valve is in "service" position.
- Unscrew the cap, remove the screen support, screen, nozzle & venturi disc, gasket, and flow plug.
- Wash all parts in warm, soapy water and rinse with fresh water. Use a small brush for iron/dirt. Do not scratch or misshape parts.
- Reassemble carefully, lubricating the o-ring seal. Ensure the small hole in the gasket is centered over the small hole in the nozzle & venturi housing, and numbers face up.
- Recharge the softener after cleaning to reduce water level and confirm proper operation.
Resin Bed Cleaning:
- If the water supply contains clear water iron, regular resin bed cleaning is needed.
- Use resin bed cleaner (available from EcoWater Systems) following directions on the container.
- Clean the resin every six months, or more often if iron appears in the conditioned water supply.
Troubleshooting (Electronic Diagnostics):
- Automatic Diagnostics: The system has a self-diagnostic function. Error codes (Err01, Err03, Err04, Err05) appear in the display for malfunctions related to the motor, valve position switch, wire harness, or electronic control board.
- Removing an Error Code: Unplug the power supply, correct the problem, plug back in, and wait 8 minutes for the valve to cycle. The code will return if the problem persists.
- Manually Initiated Diagnostics: Remove the top cover to observe cam and switch operation. Press and hold SELECT for 3 seconds to enter diagnostic screens.
- Water Meter Operation: The first 3 digits indicate water meter operation (000 steady for no flow, 000-199 continual for flow).
- Position Switch Operation: The last 2 digits indicate valve position (e.g., "--" for service/fill/brining/backwash/fast rinse, "P" for valve rotating).
- Advance Valve: Use the RECHARGE button to manually advance the valve through positions and check switch operation.
- Information Display: In diagnostic mode, UP button shows days the control has had power; DOWN button shows automatic/manual recharges initiated.
- Resetting to Factory Defaults: Press and hold SELECT until "CODE" and a flashing model code appear. Press UP until "SoS" flashes. Press SELECT to restart the controller. Then reset time, hardness, etc.