5
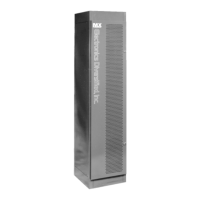
MX System Dimmer Bank
To move from profile to profile: press S2.
To change the incoming value: press Level up/down.
To change the dimmer level out: press Dimmer up/down.
5. Setup
In this set of screens, the Preheat, Profile, Proportional
Patch and Non-dim and Hold Time information may be
accessed and modified.
With the exception of Hold Time, each of these items
may be changed on a dimmer by dimmer basis.
Preheat sets the minimum SETUP Dim.01
level of the dimmer. Preheat: 000
The value range is
from 0 to 255.
Profile sets which profileSETUP Dim.01
the dimmer uses. Profile: 000
The range is 1 to 7.
Proportion sets the SETUP Dim.01
output level of the dimmer Proportion: 000
as a value which is some
proportion of the 0 to 100% value of the input level.
Example: If the value is set to 204 (80%), the
dimmer actual out put will be 80% of the possible total,
the input value will show 100%.
Nondim will set the dimmer SETUP Dim.01
to turn on or off at the Nondim: 000
50% input value.
A value of 001 sets the dimmer to nondim.
To switch from each screen to the next:
press S2.
To step through the dimmers:
press Dimmer up / down.
To change the value:
press Level up / down,
or type in a number.
To copy a value to the next dimmer:
press S1.
The Hold Time screen SETUP * 3 sec
access the DMX signal Hold Time : 100
processing. This screen sets
the time the dimmer will hold a DMX value after the input
stops. The time is expressed in multiples of 3 seconds.
Example: An entered value of 100 equals 300
seconds, or 5 minutes.
Example:
To assign a one to one patch, using the S- keys:
Clear patch by pressing Clear twice.
Note that the ":" is on IN1, and that the Dimmer is on 01.
(See the illustration above)
If starting the rack at dimmer 97:
type 097, press S1.
The screen should now show the dimmer as 02 and IN1
should show 98. The value of 97 @ 1 has been recorded.
Continuing to press S1 will step through the rack in order,
assigning the input on a one to one basis.
2. Patch B : Patch B* Dim.01
IN1:001 IN2.001
This patch screen operates in the same way as Patch A.
3. Backup
Analog Inputs
BACKUP Analog 01
( 0-10vdc ) Dim01:000
Digital Inputs BACKUP Digital01
Closed contact(s) Dim01:000
Constants BACKUP Constant
Dim01:000
This screen allows editing and recording the available 12
analog inputs, and the 4 digital inputs. Also accessible
here are the constant values.
To switch from Analog, to Digital, to Constant:
press S2.
To step from one dimmer to the next:
press Dimmer up/down.
To change the level value:
press Level up/down.
The changes are recorded automatically.
It is possible to copy the current dimmer levels present in
the system. To copy these active incoming values:
press S1 twice.
The word "save" will appear in the bottom left of the
screen.
4. Profile PROFILE 1
Lev.000:000
This screen gives access to the output profiles of the
dimmers. There are seven slots in this screen, three are
open in the standard MX rack.
The four standard slots are assigned as follows:
Linear
Square Law
Advance MX
User defined
The bottom line of the screen indicates the:
incoming value (left side) of 0-255 and:
dimmer level (right side) at 0-255.
The dimmer check screen SETUP Dim. 01
makes it possible to step Dimmer Check
through the dimmers,
bringing each to full output.
The value of up full is 255.
To step through the dimmers:
press Dimmer up / down.
 Loading...