THERE IS ONE FOR EVERYBODY
01
Open the top cover and
take out the empty ribbon
cartridge.
02
Prepare the ribbon and rib-
bon cartridge.
03
Install supply core and
take-up core to the halls
and press the opposite sides
until they click.
04
Install a disposable clean-
ing roller in the ribbon
cartridge.
05
Peel the protective paper off
on the disposable cleaing
roller.
Quick Start Guide
06
Install the ribbon cartridge
to the printer and close the
top cover.
07
Open the hopper cover and
place the card.
08
Connect the power cord and
USB.
09
Insert Installation CD.
10
Click “Driver Install”.
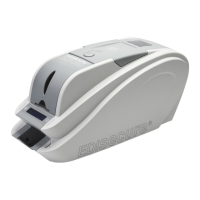
DCP 350 Direct Card Printer
This printer package contains,
EDIsecure® DCP 350 Direct Card Printer / Power Adaptor / Power Cord / USB Cable /
Ribbon Cartridge (included in Printer) / Qucik Start Guide (this document) / Software Installation CD
11
Select ”English” and Click
“Next” in STEP 1.
This step may take a few mo-
ments.
12
Click “Next”in STEP2.
13
When the software installation
window appears click “Con-
tinue Anyway”.
14
Plug in your card printer, check the printer is con-
nected and turned on. This step may take a few mo-
ments. In case of USB connection, click “Next” and
move to No.16. In case of Network, move to No.15.
15
Search DCP 350 connected in the network.
Click “OK” after selecting and click “Next”. If
the printer is not found, please do network
setting by referring to “DCP 350 user manual”.
16
Select “Yes, this time only” and click
“Next”. Select “Install the software auto-
matically” and click “Next” in ‘Found New
Hardware Wizard’ window.
17
When Hardware Installation window
appears click “Continue Anyway”. When
installation is completed click “Finish”.
This step may take a few moments.
18
Right click on “DCP 350” Card
Printer and select “Properties”.
19
Select the “General” tab and
click “ Print test page”.
20
Check if card is printed
properly.
11
When “User Account Control”
window is opened, click “Yes”.
12
Select “English” and Click
“Next” in STEP 1. This step may
take a few moments.
13
Click “Next” in STEP 2.
14
If the Windows security warn-
ing appears click “Install this
driver software anyway”.
15
Plug in your card printer, Check the printer is con-
nected and turned on. This step may take a few
moments. In case of USB connection, click “Next” and
move to No.17. In case of Network, move to No.16.
16
Search DCP 350 connected in the network.
Click “OK” after selecting and click “Next”. If
the printer is not found, please do network
setting by referring to “DCP 350 user manual”.
17
Click “Close” after installation is
completed.
18
Open “Drivers and Printers”
and right click on “DCP 350
Direct Card Printer”. Select
“Printer Properties”.
19
Select the “General” tab.
20
Check if card is printed
properly.
Quick_Start_guide_DCP350_A2_V1-1.indd 1 12.01.2012 14:55:25