Do you have a question about the Eduard MiG-21SMT and is the answer not in the manual?
Key symbols and instructions for model assembly, including masking, painting, and part manipulation.
Legend identifying original kit parts, photo-etched parts, parts to be removed, and filler applications.
Detailed steps for assembling the main and nose landing gear components.
Instructions for attaching the wings and tailplanes to the main airframe.
Steps for assembling external accessories such as ladders and antennas.
Guidance on installing the cockpit interior and canopy sections.
Instructions and placement guides for applying various decals to the model.
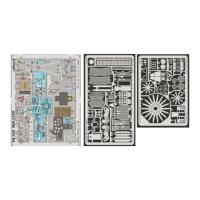
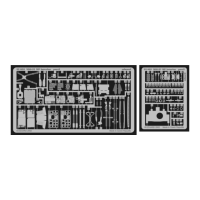
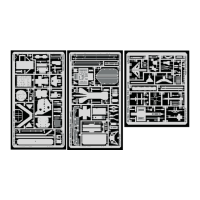
The Eduard MiG-21SMT 1/144 scale detail set is a comprehensive enhancement kit designed to elevate the realism and accuracy of the Eduard 1/144 scale MiG-21SMT model aircraft. This set is primarily composed of photo-etched (PE) parts, which are known for their fine detail and ability to replicate intricate components that are difficult to achieve with standard injection-molded plastic. The kit also includes a decal sheet for markings and stencils, further contributing to the authenticity of the finished model.
The primary function of this detail set is to provide modelers with a means to significantly improve the visual fidelity of their MiG-21SMT model. It addresses areas where the original plastic kit might lack the necessary detail, such as the cockpit, landing gear, airframe surfaces, and various external and internal structural elements. By replacing or augmenting existing plastic parts with finely crafted PE components, the set allows for a more accurate representation of the real aircraft.
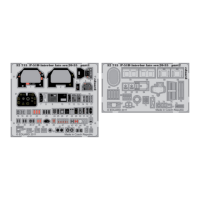
The photo-etched parts are designed to replicate thin, delicate structures like instrument panels, seatbelts, control surfaces, antennae, and various access panels. These parts are typically made from thin brass or nickel silver, allowing for a level of detail and scale thickness that plastic cannot easily achieve. The decal sheet provides markings that are often too small or complex to be painted, such as warning stencils, national insignia, and aircraft numbers, ensuring a professional and authentic finish.
The usage of this detail set requires a certain level of modeling skill and specialized tools. Modelers should be familiar with working with photo-etched parts, which involves cutting, bending, and gluing these delicate components.
Preparation of Original Kit Parts: Before applying the PE parts, modelers will often need to modify the original plastic kit parts. This can involve removing molded-in detail (indicated by the "PARTS TO BE REMOVED" symbol, often a crossed-out part), grinding down surfaces (indicated by the "GRIND" symbol), or drilling holes (indicated by the "DRILL HOLE" symbol) to accommodate the new PE components. The instructions clearly illustrate which plastic parts need to be altered or removed.
Working with Photo-Etched Parts: The PE parts themselves need to be carefully cut from their fret (the metal sheet they come on). A sharp hobby knife or specialized PE shears are recommended for this. Many PE parts require bending to achieve their correct three-dimensional shape. This is indicated by the "BEND" symbol and often requires a photo-etch bending tool for precise results. The instructions provide diagrams showing the correct angles and sequences for bending.
Adhesion: Photo-etched parts are typically attached using cyanoacrylate (CA) glue, also known as super glue, or sometimes white glue for less critical, larger surfaces where repositioning might be needed. The choice of glue depends on the specific application and the modeler's preference. Care must be taken to use minimal amounts of glue to avoid obscuring fine detail.
Painting: Many PE parts, especially those for the cockpit, require painting before assembly. The instructions may provide color call-outs, or modelers may need to research the appropriate colors for the MiG-21SMT. For parts that are to be painted after assembly, it's often recommended to prime the PE parts first to ensure good paint adhesion. The "APPLY EXPRESS MASK AND PAINT BEFORE GLUING" symbol indicates parts that should be masked and painted prior to being permanently affixed.
Decal Application: The decal sheet is applied after the model has been painted and a gloss coat has been applied to provide a smooth surface for the decals. Decals are cut from the sheet, soaked in water, and then slid onto the model. Decal setting solutions are often used to help the decals conform to surface details and eliminate silvering (air trapped under the decal).
Symmetrical Assembly: The "SYMETRICAL ASSEMBLY" symbol indicates parts that need to be assembled identically on both sides of the aircraft, such as landing gear components or wing details, ensuring a balanced and accurate build.
Optional Parts: The "?" symbol indicates an option, meaning the modeler can choose between different parts or configurations, or that a part might be optional depending on the specific variant or desired representation. The "(R)" symbol indicates a replacement part, suggesting that a PE part is intended to replace an existing plastic part.
Fill: The "FILL" symbol indicates areas that need to be filled, typically with putty, to smooth out seams or gaps, which is a common practice in plastic modeling.
The instructions are presented in a clear, diagrammatic format, guiding the modeler step-by-step through the assembly process. Each step shows the original plastic parts, the PE parts to be added, and any modifications required.
As this is a detail set for a static model, "maintenance" in the traditional sense does not apply. However, there are considerations for the longevity and preservation of the finished model:
Dust Protection: Finished models, especially those with intricate PE details, are susceptible to dust accumulation. Displaying the model in a dust-proof case or periodically cleaning it with a soft brush or compressed air is recommended to maintain its appearance.
Handling: Due to the delicate nature of photo-etched parts, the finished model should be handled with extreme care. PE parts, particularly antennae or small control surfaces, can bend or break if mishandled.
Environmental Factors: Exposure to direct sunlight or extreme temperature fluctuations can potentially damage the paint finish or cause decals to yellow over time. Storing the model in a stable environment will help preserve its condition.
Repair: In the event of accidental damage, small PE parts can often be re-glued or, if necessary, replaced if spare parts are available or can be fabricated. The thinness of PE parts makes them prone to bending, but they can often be carefully straightened with fine-tipped tweezers.
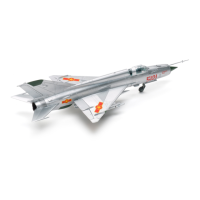
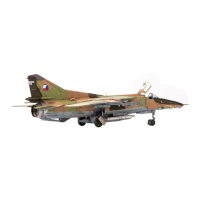
The Eduard MiG-21SMT detail set is not a standalone product but an accessory designed to enhance an existing plastic model kit. Its value lies in its ability to transform a good plastic model into an exceptional, highly detailed replica, appealing to modelers who seek the highest level of accuracy and realism in their builds. The instructions also indicate that further detail sets for other MiG-21 variants (MiG-21MF and MiG-21BIS) are available from Eduard, suggesting a comprehensive approach to detailing this iconic aircraft family.
| Type | Plastic Model Kit |
|---|---|
| Skill Level | Intermediate |
| Paint Required | Yes |
| Glue Required | Yes |
| Brand | Eduard |
| Model | MiG-21SMT |
| Decals | Yes |