EFA dehider Original operating instructions EN
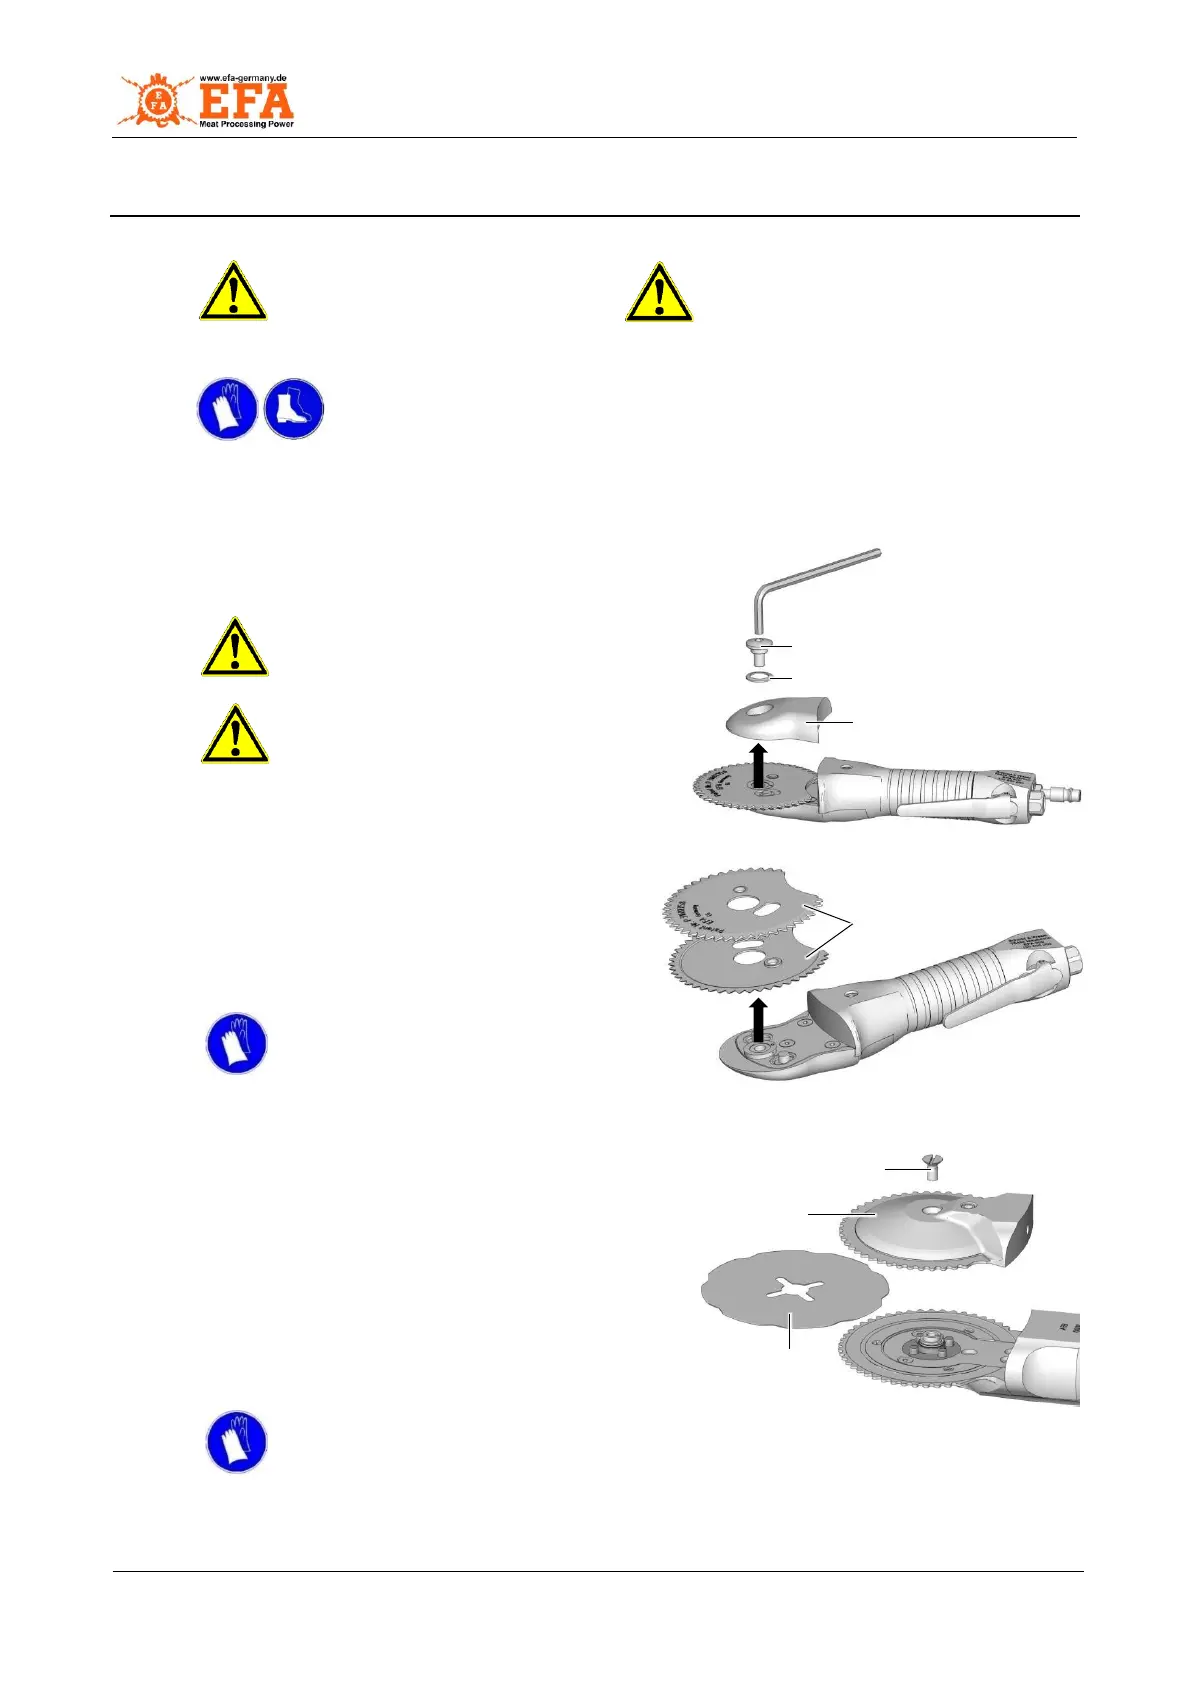
Fig. 7.2 – Removing
dehider blades
Fig. 7.3 – Removing the blades
7 Assembly
Assembly work is only
allowed to be carried out by
authorised specialist
personnel.
Disconnect the device from the
compressed air network prior to
performing any assembly work!
Wear cut-resistant gloves and
safety shoes during all assembly
work (change of blades).
The following tools and accessories are required for assembly/disassembly:
Allen wrenches 3 mm, 6 mm
Grease gun
7.1 Change of blades
Danger! Never reach into the cutting edge
area of the moving blades, otherwise
you could cut off limbs!
Danger! Only use genuine EFA
blades!
Blunt, worn blades must be replaced.
EFA 620 (see Fig. 7.1 and Fig. 7.2)
1) Loosen the retaining bolt (1) with an Allen wrench
and remove it together with the lock washer (2).
Remove the blade cover (3).
2) Remove the pair of blades (4).
Warning! Cutting hazard!
Remove/change blades only when
wearing cut-resistant gloves!
3) Sharpen the blades or replace them with new ones.
4) Lubricate and mount the blades and dehider as described in
chapter 8 – Cleaning and lubrication.
EFA 2000 (see Fig. 7.3 and Fig. 7.4)
1) Unscrew the countersunk screw (1) with a screwdriver
(right-hand thread).
2) Remove the blade cover (2).
3) Carefully remove the single blade (3).
4) Clean the blade.
5) Sharpen the blade manually with a fine oil stone.
Warning! Cutting hazard!
Only sharpen the blade with cut-
resistant gloves!
Fig. 7.1 – Removing the
blade cover