To mount the photovoltaic solar inverter, proceed as follows:
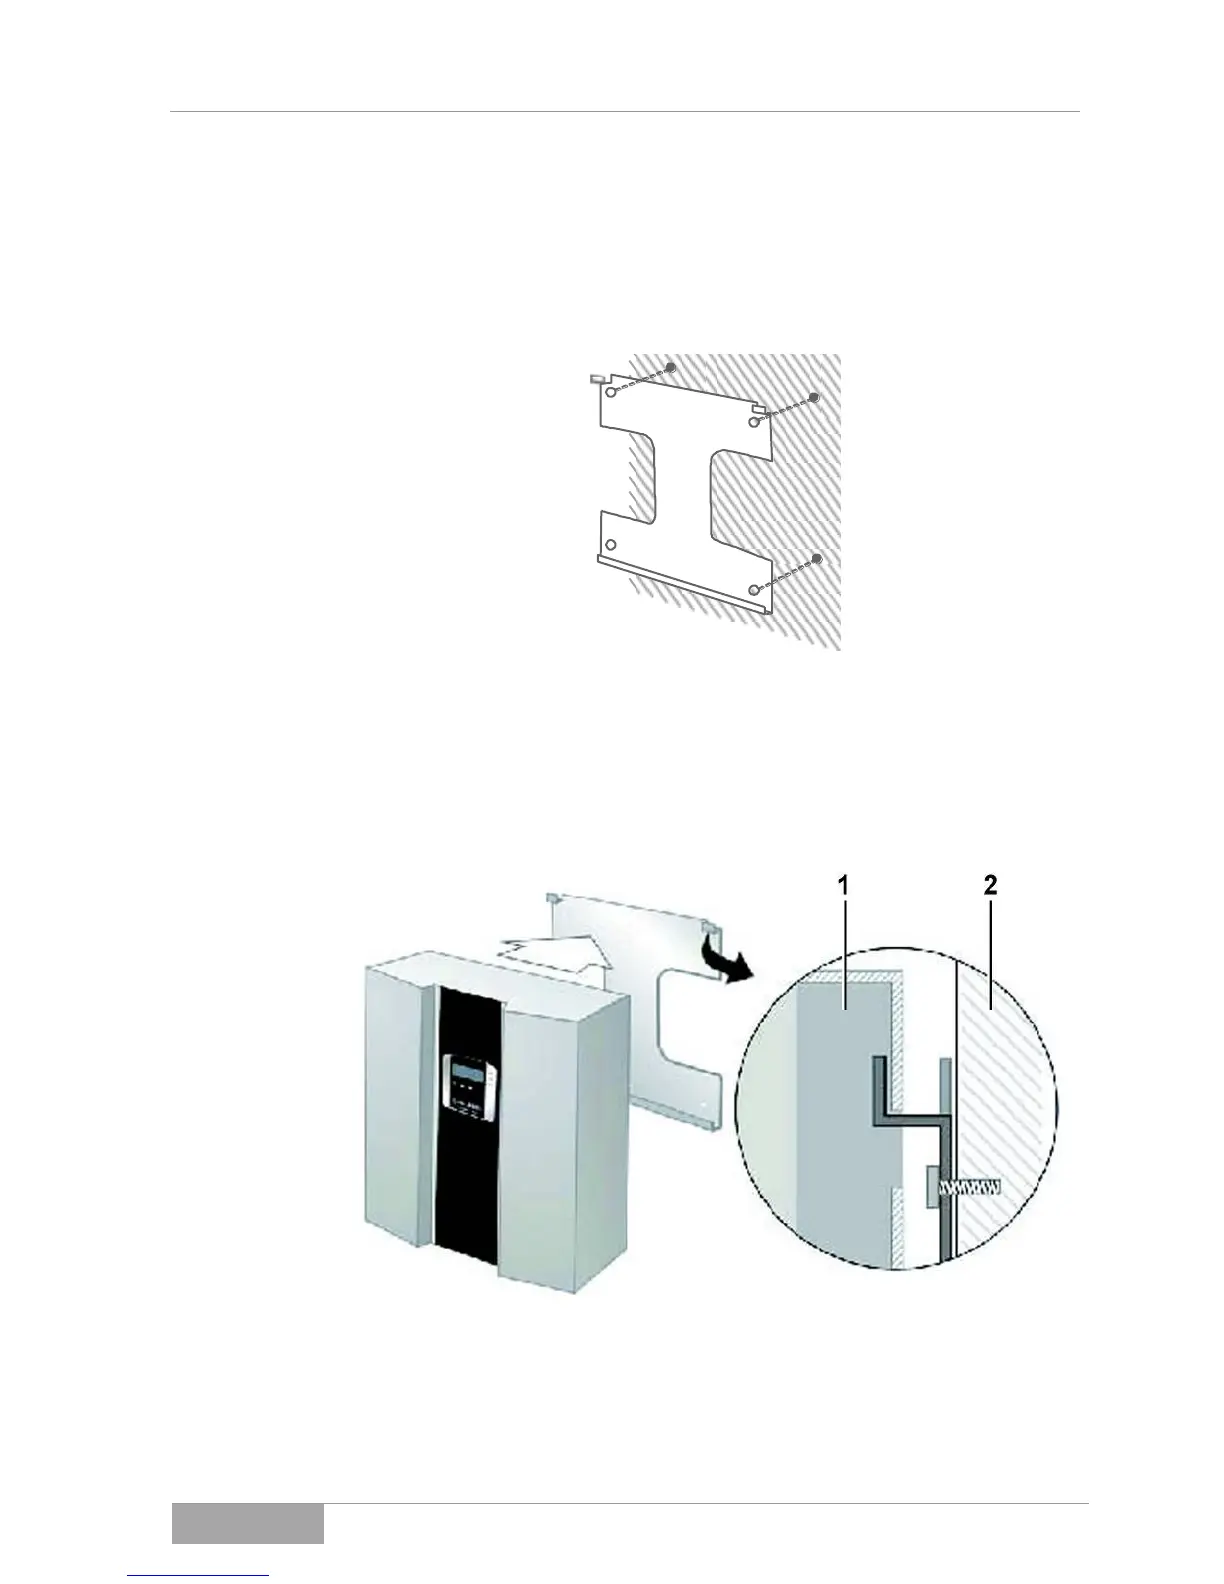
1. Mark the positions for the drill holes on the wall.
2. Drill the holes in accordance with the screws you have selected.
3. Screw on the wall mounting.
Fig. 4-3 - 1
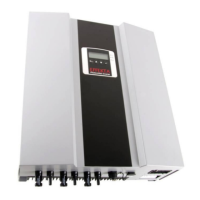
4. Hang the photovoltaic solar inverter on the wall mounting. Use the upper
carrier plate so that the photovoltaic solar inverter cannot slip.
5. Check whether the photovoltaic solar inverter is safely attached to the
mounting.
1 Photovoltaic solar inverter
2 Wall
Fig. 4-3 - 2 Assembly of the photovoltaic solar inverter in the wall-mounting