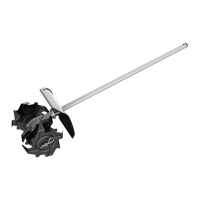
CULTIVATOR ATTACHMENT — CTA950010
Thrown materials may seriously injure the operator or
bystander. To reduce the risk of personal injury, it is
essential to take the following precautions:
◾ Inspect and clear the area of any hidden objects such
as glass, stones, rocks, concrete, fence wire, pieces of
metal, etc., which can be thrown or entangled in the
blades. Avoid contact with hard or solid foreign objects.
◾ Inspect the blades regularly and often for signs of
damage or after hitting a hard object. Do not continue
working with a damaged blade.
◾ Always hold the cultivator with both hands when
operating. Use a rm grip on both handles.
◾ Move the cultivator to the work area before starting
and start the cultivator at a lower speed.
Before each use check for damaged and/or worn
parts. Check the blades, guard, and front-assist handle
and replace any parts that are cracked, warped, bent,
or damaged in any way.
Clean the cultivator after each use
TO START/STOP THE TOOL
See “STARTING/STOPPING THE POWER HEAD”
section in the power head PH1400E
MAINTENANCE
WARNING: When servicing, use only identical
replacement parts. Use of any other parts may create
a hazard or cause product damage. To ensure safety
and reliability, all repairs should be performed by a
qualied service technician.
WARNING: Battery tools do not have to be plugged into
an electrical outlet; therefore, they are always in operating
condition. To prevent serious personal injury, take extra
precautions and care when performing maintenance, service
or for changing the cutting attachment or other attachments.
WARNING: To prevent serious personal injury, remove
the battery pack from the power head and wait for all
blades to stop before servicing, cleaning, changing add-on
attachments or when the product is not in use.
WARNING: Always wear heavy gloves when installing
or removing the blade or performing any maintenance on the
blade. Be careful of the blade and protect your hands from
being injured by the blade.
GENERAL MAINTENANCE
WARNING: Do not at any time let brake uids, petrol,
petroleum-based products, penetrating oils, etc., come in
contact with plastic parts. Chemicals can damage, weaken,
or destroy plastic, which may result in serious personal injury.
WARNING: When cleaning the cultivator attachment,
DO NOT immerse it in water or other liquids. Do not clean
your machine with a pressure washer. The solid jet of water
may damage parts of the machine.
◾ Keep all nuts, bolts and screws tight to ensure the
equipment is in safe working condition.
◾ To reduce the re hazard, keep the engine, silencer,
battery compartment free of vegetative material and
excessive grease.
◾ Replace worn or damaged parts for safety.
BLADE MAINTENCE
◾ Maintain the blades with anti-rust oil regularly.
◾ If any of the blades needs replacing due to wear, replace
all four blades for best performance.
All cultivator service, other than the items listed in these
maintenance instructions, should be performed by an
authorised service personnel.
To Replace
The cultivator has four blades – two inner blades and two
outer blades. For correct operation of the cultivator, the
blades must be installed in the correct orientation. Symbols L
and R are stamped on the blades (Fig. H & I).
NOTICE: THE BLADES THAT HAVE TINES FACING IN BOTH
DIRECTIONS MUST BE MOUNTED ON THE INSIDE, CLOSEST
TO THE GEAR BOX.
1. Wear gloves.
2. Place the inner blade, stamped “L”, which has tines
facing in both directions, to the left of the gear box.
3. Place the outer blade, stamped “L”, (tines face one
way only) on the same side. with the outer sleeve
against the inner blade.
4. To secure the blade to the drive shaft, insert the hitch
pin into the locking hole-1. See Fig. J, K, L and N for
reference.
5. Turn over the tool with the installed blade resting
against the ground.
6. Place the inner blade stamped “R”, which has tines
facing in both directions, to the right of the gear box.
7. Place the outer blade, stamped “R”, (tines face one
way only) on the same side, with the outer sleeve
against the inner blade.
 Loading...