18
english
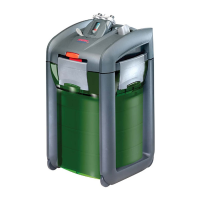
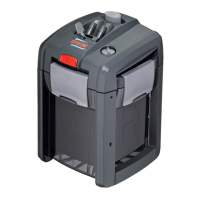
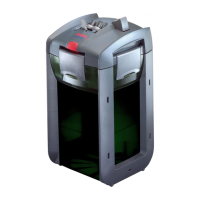
External lter 2080 for aquariums
Model:
See nameplate on top part of the lter
Subject to technical alterations.
Contents Page
Denition of individual parts / What delivery includes 18
Installing the hose 18-19
Installing the lter 19
Filling of lter materials 20
Taking into operation 21
Servicing and maintenance 21-23
what to do if... 23-25
General operating description
The EHEIM professionel 3 external lter cleans the aquarium water in a closed loop. The professionel
3 external lter has two suction channels for individual placement of suction areas in
the aquarium. The built-in maintenance-free pump ensures continuous circulation. Water from
the aquarium is passed through several lter layers where it is ltered mechanically, biologically
or by adsorption before owing back into the aquarium. For the lter to function, air has rst
to be removed from the system. This is easily done using the built-in priming aid.
Note: For optimal lter performance and trouble-free operation, it is essential to use EHEIM
original lter materials (see chapter on Filling of Filter Materials).
Denition of individual parts / What delivery includes
1. Hose guard, 2. Safety adapter with integrated shut-off valves, 3. Shut-off lever, 4. Indicator,
5. Red safety catch, 6. Pump head, 7. Priming aid, 8. Intake tting, 9. Sealing gasket,
10. Sealing rings (prelter), 11. Filter pad (blue), 12. Prelter, 13. Lattice screen cover,
14. Filter pad (white), 15. Filter inserts, 16. Transportation dish for prelter, 17. Closing clips,
18. Filter container, 19. Castors, 20. Partition, 21. Indicator lid, 22. Indicator housing, 23. Spring with
oat,
24. Brace, 25. Sealing ring, 26. Suction pipe (2x), 27. Strainer (2 x), 28. Suction head with
clamp,
29. Outlet bend, 30. Nozzle tube, 31. Hoses.
Unpacking
When unpacking, check that all parts are present. Some installation accessories are packed in
the lter container.
- Tilt out all four closing clips on the lter head, push up and fold out. Remove pump head (see
Point 7). Remove prelter, lattice screen cover and lter pad (white) from the container (see
Point 8). Pull out lter inserts by the handle (see Point 9).
Installing the hose
1 Place a strainer on each suction pipe and t at the desired locations in the aquarium with
the help of the suction holders.