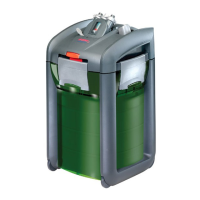
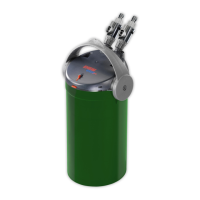
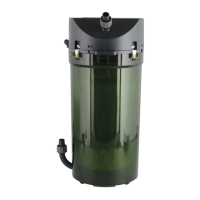
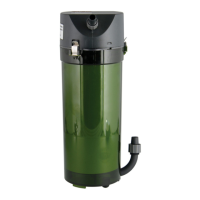
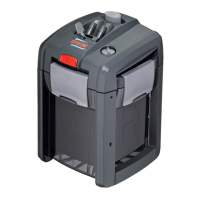
Aluminium casing
Casing cover
2 x cross-head screws M5 x 10 mm
UV-C bulb
Bulb fitting for UV-C
bulb
Ballast with mains cable
Screw sleeve
Hose connection
Union nut (hose safety)
Glass function
control window
Holder
6 x Fastenings screw for holder
A Definition
5
When unpacking, check that all parts have been included. For safety reasons, the UV-C bulb has been packed separately and
not assembled in the unit in order to prevent breakage during transport.
CAUTION: UV-C bulb contains mercury! Handle the UV-C bulb carefully DANGER OF BREAKAGE!
Do not touch the glass body directly with fingers. Be sure to use a soft cloth or similar material.
Unpacking
Read the operating and safety instructions carefully and comply with all instructions prior to assembly.
Open both cross-head screws
and lift up the casing cover
. Pull out the UV-C bulb fitting
. Carefully put the UV-C
bulb
into the fitting
until it audibly clicks in place. Carefully replace the fitting with the assembled UV-C bulb into the
casing and press down firmly. Replace the casing cover and screw down firmly.
CAUTION: Never operate UV-C bulbs outside the device.
UV-C radiation may damage the skin and eyes, even at low doses.
Fasten holder
and ballast
in a suitable location (e.g. in the cabinet beneath the aquarium) using the screws provided
and fix UV clarifier in the holder.
CAUTION: In order to avoid any water damage, remove the filtration equipment or circulation pump before fitting
the UV clarifier into the tubing system, ensuring that the piping system no longer contains any water.
Install the UV clarifier EHEIM reeflexUV on the discharge side (return water from external filter or from circulation pump).
Slip end of hose onto the hose connection
and secure with union nut
. Join the hose connection with the UV clarifier
by turning the screw sleeves
and tighten until hand-tight. Put filtration equipment or circulation pump back into operation.
Follow the manufacturer's operating instructions.
B Assembly
Plug the power socket into the mains to operate the UV-Clarifier EHEIM reeflexUV. Function control window
lights up in blue.
Initial start-up
CAUTION: Disconnect from the mains before servicing the device. In order to avoid any water damage when
cleaning and performing maintenance work, remove the filtration equipment or circulation pump before fitting
the UV clarifier into the tubing system, ensuring that the piping system no longer contains any water.
Cleaning: Disconnect the UV clarifier from the piping system by turning the screw sleeves
and removing from the
holder. Clean the glass tube inside the UV clarifier. Pull the EHEIM Universal Cleaning Brush (Order No.
4005570) through it several times.
Maintenance:
The UV-C bulb has a maximum operating period of approx. 8,000 hours – this corresponds to about one year –
and must then be replaced.
Read the operating and safety instructions carefully and comply with all instructions prior to assembly.
CAUTION: Never operate UV-C bulbs outside the device.
UV-C radiation may damage the skin and eyes, even at low doses.
Open both cross-head screws
and lift up the casing cover
. Remove the fitting with the UV-C bulb from the casing and
carefully pull the UV-C bulb out of the bulb fitting. Carefully insert the new UV-C bulb into the fitting until it audibly clicks in
place (see image B3).
CAUTION: UV-C bulb contains mercury! Handle the UV-C bulb carefully DANGER OF BREAKAGE!
Do not touch the glass body directly with fingers. Be sure to use a soft cloth or similar material.
C Cleaning and Maintenance