16
GB
Please note that our equipment has not been
designed for use in commercial, trade or industrial
applications. Our warranty will be voided if the
machine is used in commercial, trade or industrial
businesses or for equivalent purposes.
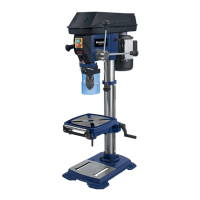
5. Technical data
Nominal input voltage 230V ~ 50 Hz
Power rating 550 W
Motor speed 1,400 rpm
Output speed (infinitely adjustable) 450 - 2,500 rpm
Drill chuck mount B 16
Spindle taper MK 2
Scroll chuck Ø 3 - 16 mm
Reach 160 mm
Dimensions of drill table 240 x 240 mm
Angle adjustment of table 45° / 0° / 45°
Drill depth 80 mm
Pillar diameter 65 mm
Height 710 mm
Base area 450 x 300 mm
Weight 43 kg
Laser class 2
Wavelength of laser 650 nm
Laser output ≤ 1 mW
Noise emission values
The noise generated by this machine is measured in
accordance with DIN EN ISO 3744; DIN EN ISO
11201. The machine may exceed 85 db (A) at the
workplace. The user will require noise protection
measures if this is the case. (Wear ear-muffs!)
Operation Idle speed
Sound pressure level L
pA
69.2 dB(A) 65.5 dB(A)
Sound power level L
WA
78.6 dB(A) 76.4 dB(A)
„The quoted values are emission values and not
necessarily reliable workplace values. Although there
is a correlation between emission and immission
levels it is impossible to draw any certain conclusions
as to the need for additional precautions. Factors
with a potential influence on the actual immision level
at the workplace include the duration of impact, the
type of room, and other sources of noise etc., e.g.
the number of machines and other neighbouring
operations. Reliable workplace values may also vary
from country to country. With this information the
user should at least be able to make a better
assessment of the dangers and risks involved.“
6. Before starting the equipment
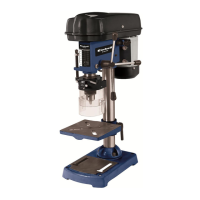
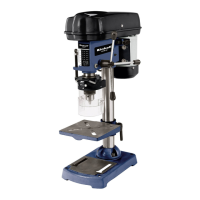
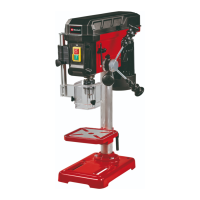
6.1.Installing the machine
Place the base plate (1) in the desired position.
Fasten the pillar (2) with flange using the
supplied bolts (A) (Figs. 3 - 4).
You can now fit the table and clamp in place with
the clamping lever. Following this, fit the crank
(27) and fasten tightly with the screw (28). (Fig.
5-7)
Finally, fit the complete bit head to the pillar.
Align the head so that it is horizontal to the base
plate and fasten it in position with the screws
(35). (Fig. 8-9)
Screw the 3 supplied handles (9) in the handle
mounts. (Fig. 10).
Screw in the speed control lever (15) as shown
in Figure 11.
Secure the roller support (3) with thumb screws
(21) (Fig. 12).
Before you mount the drill chuck with the MK
shank, check that both parts are clean. Insert the
taper mandrel in the taper of the drill chuck with
a powerful jolt. Then insert the taper in the
spindle. To do this, place the drill chuck (10) with
taper (24) in the spindle (11) and guide it to the
stop point, then turn the chuck until it slips a little
further into the spindle (11). Insert the drill chuck
(10) with taper (24) into the spindle (11) with a
jolt and check that the chuck is secure (Figs. 13 -
14).
Important: All bare parts are greased in order to
protect them from corrosion. Before mounting the
drill chuck (10) onto the spindle (11), both parts must
be completely degreased using an environmentally
friendly solvent. This ensures optimal transmission of
power.
6.2. Installing the machine
Before you use the drill for the first time it must be
permanently fixed in position. Use both mounting
holes (12) in the base plate to do this. Ensure that
the machine is freely accessible for operation,
adjustment and maintenance.
Important: The fixing screws may only be tightened
to a point where they do not distort or deform the
base plate. Excessive tension can lead to fracture.
Anleitung_BT_BD_801_E_SPK1:_ 09.05.2008 12:29 Uhr Seite 16
 Loading...