GB
- 34 -
revolver (14) so that the depth stop (19) is
above middle end stop (a). Now complete a
routing operation in this setting as well.
•
Now set the lowest end stop (a) and finish the
routing.
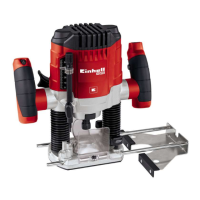
6.6 Routing circles with the compass point
(13)
Proceed as follows to route circles around a cen-
tre point:
•
Fit and adjust the compass point (13) as de-
scribed in point 5.4.
•
Place the compass point (13) on the centre
point of the circle you wish to route and apply
pressure to it.
•
Complete the routing operation as described
in point 6.4.
6.7 Routing with the parallel stop (21)
Proceed as follows to route along a straight outer
edge of a workpiece:
•
Fit the parallel stop (21) as described in point
5.3.
•
Guide the parallel stop (21) along the outer
edge of the workpiece.
•
Complete the routing operation as described
in point 6.4.
6.8 Free-hand routing
The router can also be operated without any
guide rods. You can use it for freehand routing for
creative work such as the production of logos.
•
Use a very flat cutter setting for this purpose.
•
Check the direction in which the cutter is tur-
ning as you machine the workpiece (Fig. 18).
6.9 Shape and edge cutting (Fig. 19)
•
Special cutters with a guide ring may be used
for cutting shapes (a) and edges (b).
•
Fit the cutter.
•
Carefully guide the machine on to the workpi-
ece.
•
Guide the guide journal or ball bearing (c)
along the workpiece with gentle pressure.
Important:
For deep cuts, carry out the work in several
steps according to the material in question.
Hold the router in two hands when carrying
out all cutting work.
7. Replacing the power cable
If the power cable for this equipment is damaged,
it must be replaced by the manufacturer or its
after-sales service or similarly trained personnel
to avoid danger.
8. Cleaning and maintenance
Always pull out the mains power plug before star-
ting any cleaning work.
8.1 Cleaning
•
Keep all safety devices, air vents and the
motor housing free of dirt and dust as far as
possible. Wipe the equipment with a clean
cloth or blow it with compressed air at low
pressure.
•
We recommend that you clean the device
immediately each time you have finished
using it.
•
Clean the equipment regularly with a moist
cloth and some soft soap. Do not use
cleaning agents or solvents; these could at-
tack the plastic parts of the equipment. Ensu-
re that no water can seep into the device. The
ingress of water into an electric tool increases
the risk of an electric shock.
8.2 Carbon brushes
In case of excessive sparking, have the carbon
brushes checked only by a qualifi ed electrician.
Important! The carbon brushes should not be rep
laced by anyone but a qualifi ed electrician.
8.3 Maintenance
There are no parts inside the equipment which
require additional maintenance.
Anl_SA_Anl_TC_RO_1155_E_SPK8.indb 34Anl_SA_Anl_TC_RO_1155_E_SPK8.indb 34 25.05.2018 09:23:0325.05.2018 09:23:03