A B
a
1.
7
2.
8
b
c
3.
4.
a
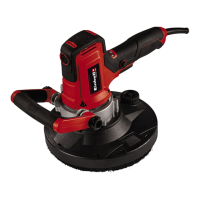
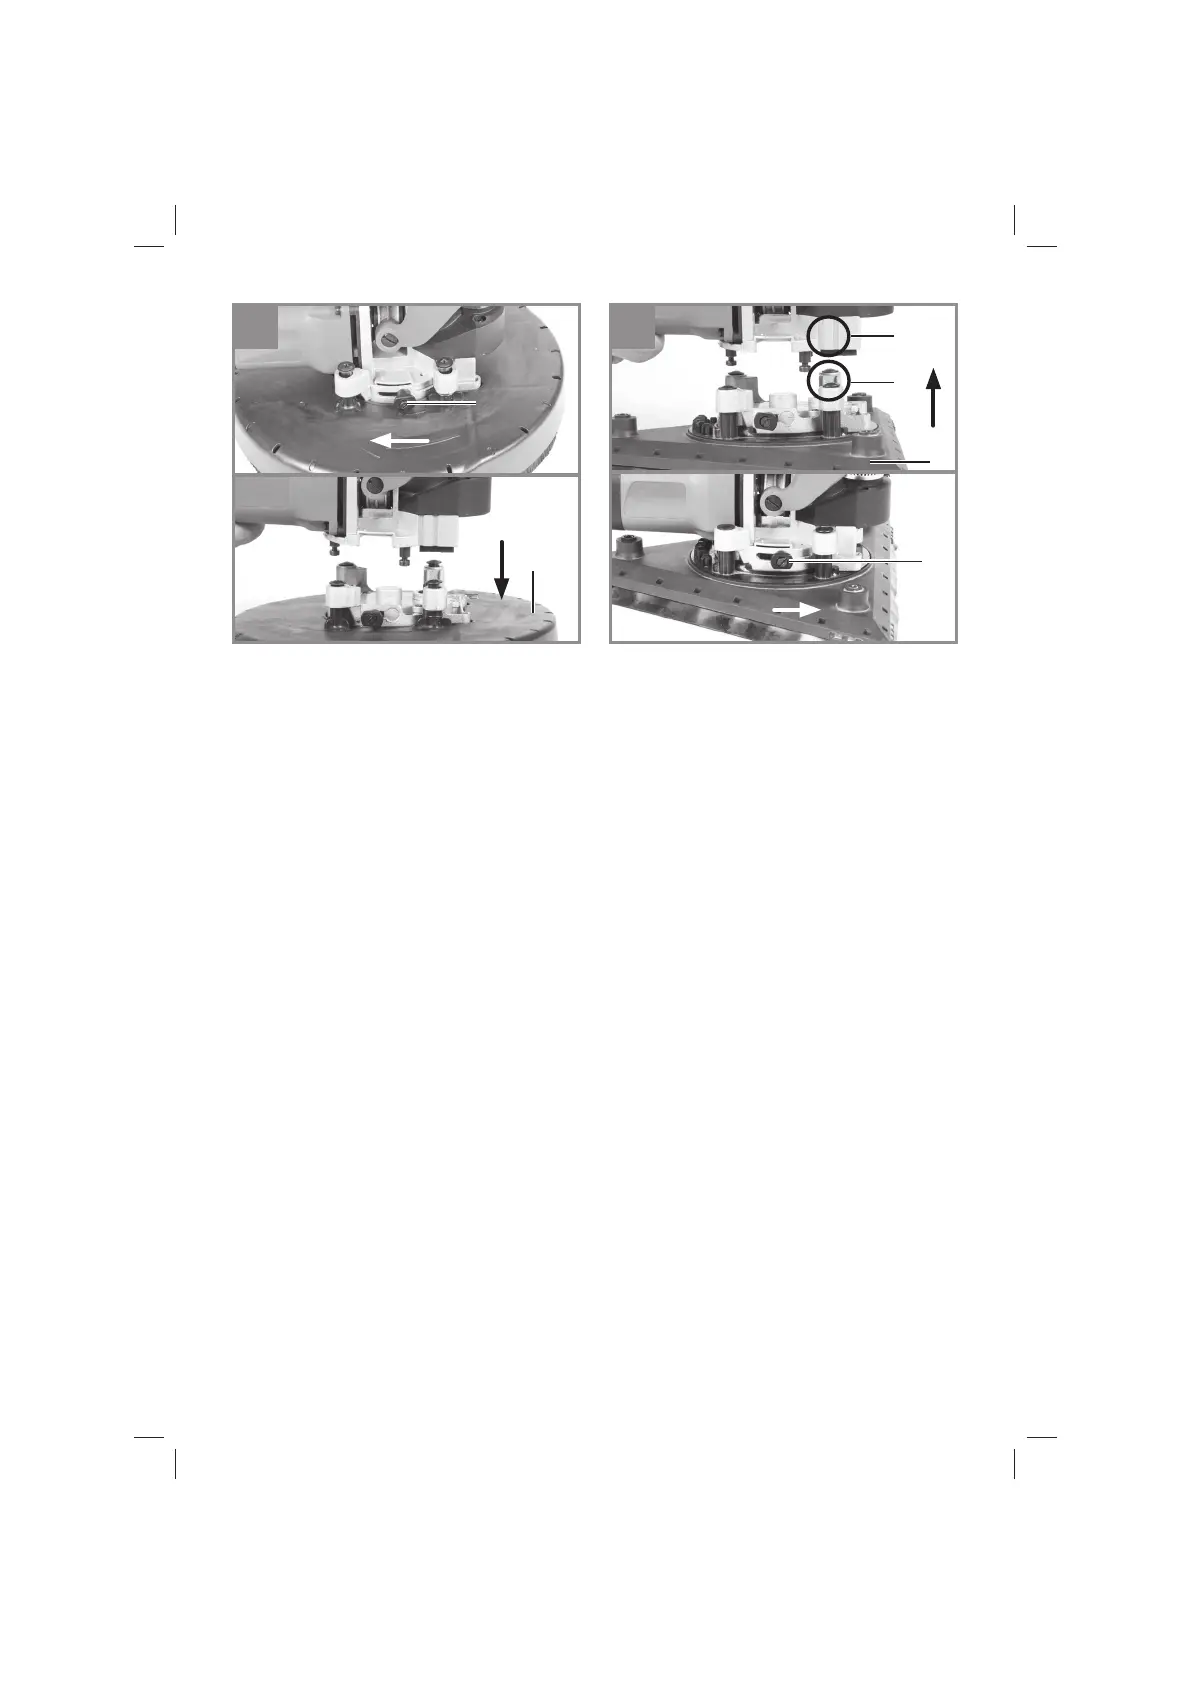
- D - Bild A
1. Ziehen Sie den Arretierungshebel (a) und schieben
Sie ihn nach links.
2. Nehmen Sie den runden Schleifkopf (7) nach unten
ab.
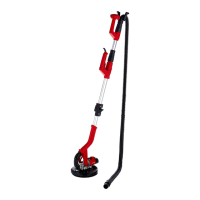
Bild B
3. Setzen Sie den eckigen Schleifkopf (8) von unten
auf. Achten Sie dabei darauf, dass die Führungen (b
+ c) übereinstimmen.
4. Schieben Sie den Arretierungshebel (a) wieder
nach rechts, um den Schleifkopf zu fi xieren.
- GB - Fig. A
1. Pull the locking lever (a) and push it to the left.
2. Pull the round sanding head (7) down and off .
Fig. B
3. Fit the angular sanding head (8) from below. As you
do this, make sure that the guides (b + c) line up.
4. Push the locking lever (a) back to the right to secure
the sanding head.
- CZ - Obr. A
1. Zatáhněte za aretační páčku (a) a posuňte ji doleva.
2. Kruhovou brusnou hlavu (7) sejměte směrem dolů.
Obr. B
3. Hranatou brusnou hlavu (8) nasaďte zespoda. Dbej-
te zde na to, aby do sebe navzájem zapadala vedení
(b + c).
4. Aretační páčku (a) opět posuňte doprava, čímž
brusnou hlavu zafi xujete.
- EE - joonis A
1. Tõmmake lukustushooba (a) ja nihutage seda vasa-
kule.
2. Võtke ümar lihvpea (7) allapoole suunaga maha.
joonis B
3. Pange kandiline lihvpea (8) suunaga altpoolt külge.
Jälgige sealjuures, et juhikud (b + c) kattuksid.
4. Nihutage lukustushooba (a) uuesti paremale, et lih-
votsak fi kseerida.
- E - Figura A
1. Tirar de la palanca de detención (a) y moverla hacia
la izquierda.
2. Quitar el cabezal abrasivo redondo (7) hacia abajo.
Figura B
3. Encajar el cabezal abrasivo angular (8) desde abajo.
Asegurarse de que las guías (b + c) coincidan.
4. Volver a desplazar la palanca de detención (a) hacia
la derecha con el fi n de fi jar el cabezal abrasivo.
- FIN - Kuva A
1. Vedä lukitusvivusta (a) ja työnnä sitä vasemmalle.
2. Ota pyöreä hiomapää (7) alaspäin pois.
Kuva B
3. Pane kulmikas hiomapää (8) alhaaltapäin paikalle-
en. Huolehdi tässä siitä, että ohjaimet (b + c) ovat
kohdakkain.
4. Työnnä lukitusvipu (a) jälleen oikealle lukitaksesi
hiomapään paikalleen.
- F - Figure A
1. Tirez le levier de blocage (a) et poussez-le vers la
gauche.
2. Enlevez la tête de ponçage ronde (7) vers le bas.
Figure B
3. Posez la tête de ponçage angulaire (8) par le bas.
Veillez ce faisant à ce que les guides (b + c) corres-
pondent.
4. Poussez le levier de blocage (a) à nouveau vers la
droite pour fi xer la tête de ponçage.
- GR - Εικ. A
1. Τραβήξτε τον μοχλό ακινητοποίησης (a) και
σπρώξτε τον προς τα αριστερά.
2. Αφαιρέστε τον στρογγυλό δίσκο λείανσης (7) προς
τα κάτω.
Εικ. B
3. Τοποθετήστε τον τετράγωνο δίσκο λείανσης (8)
από κάτω. Προσέξτε να ταιριάζουν οι οδηγοί (b +
c).
4. Σπρώξτε πάλι τον μοχλό ακινητοποίησης (a) προς
τα επάνω για να σταθεροποιήσετε τον δίσκο
λείανσης.
Beiblatt_TE_DW_225_X.indd 2Beiblatt_TE_DW_225_X.indd 2 08.04.2019 16:09:1908.04.2019 16:09:19