Lighted Mirrors
Installation Guide
ELECTRIC MIRROR®
Installation Guide ELECTRIC MIRROR®
ELECTRIC MIRROR® 425.776.4946 | electricmirror.com | sales@electricmirror.com | © 2019 Electric Mirror. All rights reserved. | 2.0419.MC
3. DETERMINE THE MIRROR LOCATION
A. Confirm proper mirror orientation.
All lighted mirrors must be mounted in the width x height orientation identified in the part number because the
mirror hanger is permanently attached to the back of the mirror and can only be installed in the designated
orientation. A leveling keyhole is located at the top center of the chassis to aid in identifying the proper
orientation.
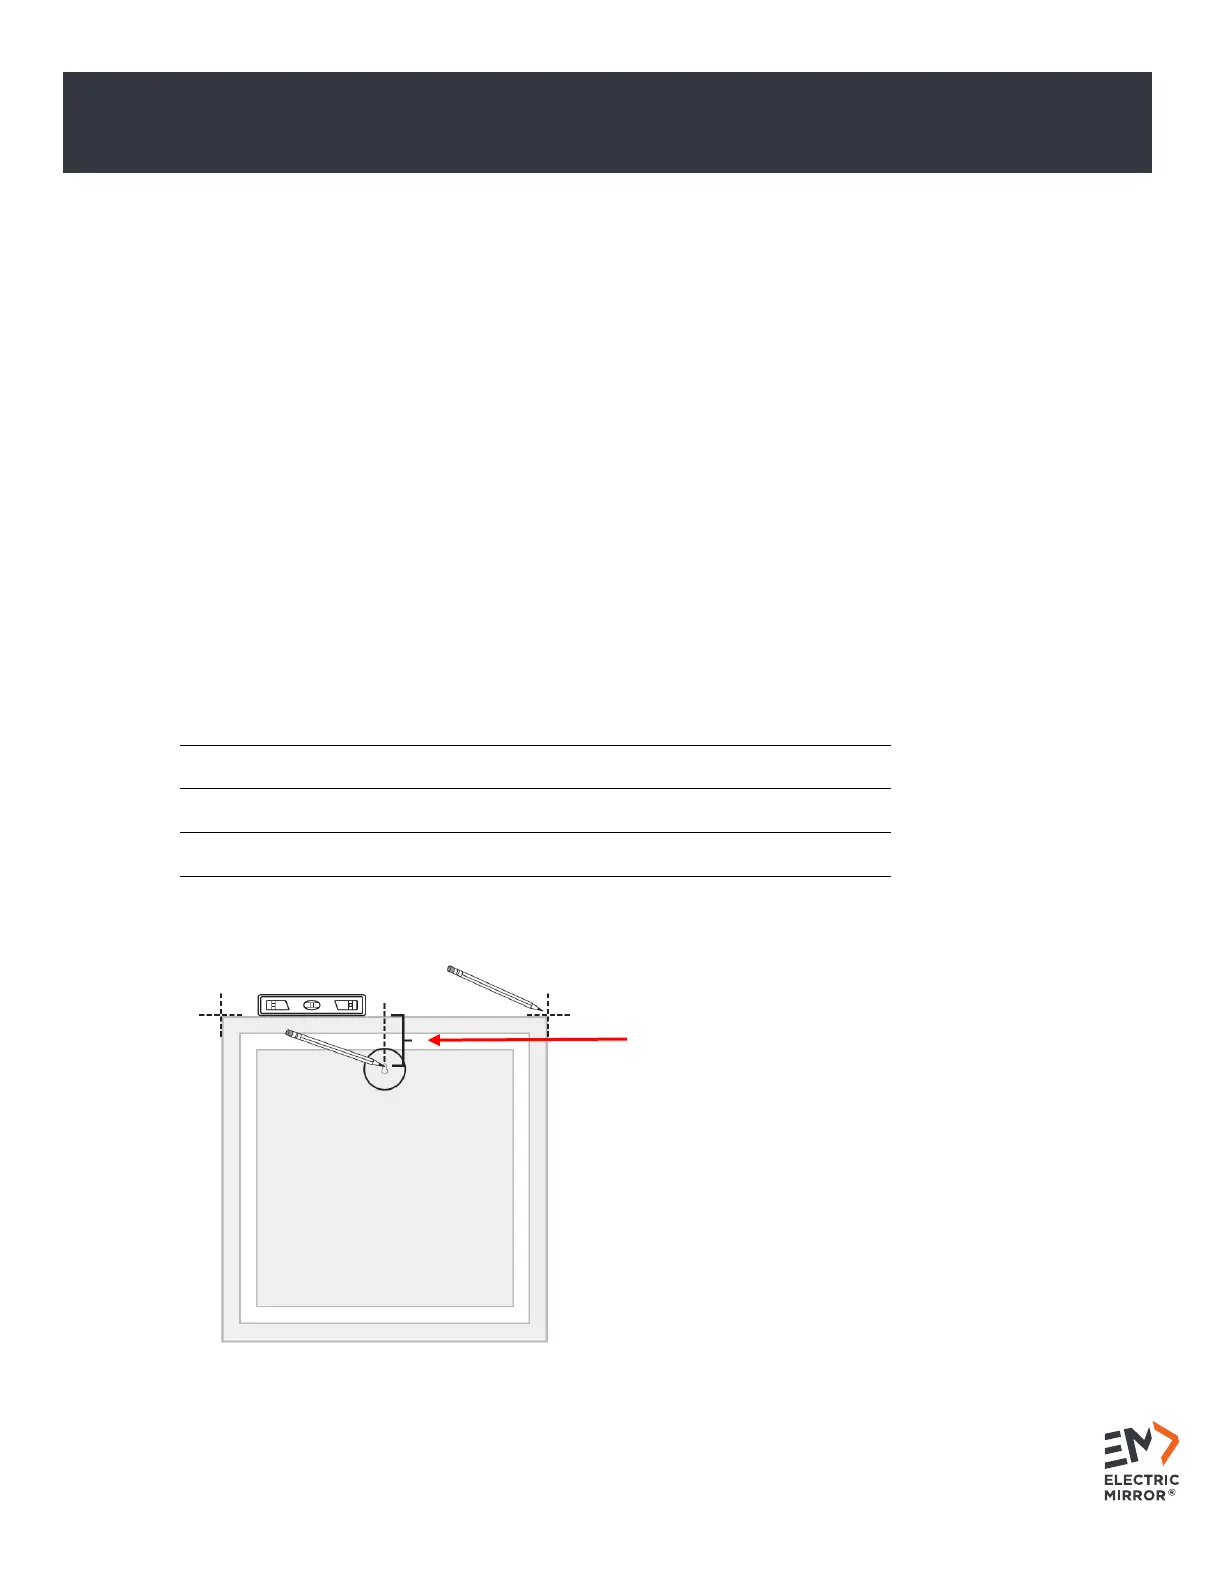
B. Determine and mark mirror location on the wall.
The top edge of the mirror glass must be a minimum of 1” from the ceiling.
To ease installation, a keyhole slot is provided in the top center of the chassis. This allows the chassis to
temporarily hang on a single screw while being adjusted.
To identify the proper location for the leveling screw, find the appropriate distance in the chart below for your
specific mirror. Measure and mark that distance on the wall. This mark must be in the horizontal center of the
mirror location. This is the minimum distance needed from the ceiling to the top of the mirror glass.
Keyhole Distance from Mirror
Top *
*This is in addition to the 1” minimum glass clearance
from the ceiling.