• Do not use or place the appliance on a hot surface or near source of heat.
• Warning: Avoid spillage on the connector.
• Attention: The heating element surface is subject to residual heat after use.
• The mains cable must not come into contact with any hot parts of the appliance.
• This appliance is intended for domestic use only. The manufacturer cannot accept any
liability for possible damage caused by improper or incorrect use.
• Do not exceed the maximum lling volume as indicated on the appliance, as there is risk
of water tank water overow from the back hole.
• Never operate appliance with open lid.
This appliances is intended to be used in household and
- sta kitchen areas in shops, oces and other working environments;
- farm houses;
- by clients in hotels, motels and other residential type environments;
- bed and breakfast type environments.
The surface with symbol : Caution, hot surface are liable to get
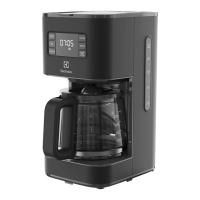
GETTING STARTED (Picture page 3)
1 Setting/changing time. Plug in the machine, the display will ash the initial time showing: 12:00. Press
the HOUR and MIN button to set the required time. Time can only be changed under standby mode,
cannot be changed under program/working mode. Simply press the HOUR and MIN button, the time
changes at once. Note: if you unplug the machine, the time needs so be set again.
2 Place the machine on a at surface. When starting the machine for the rst time, ll the tank with cold
water. Start the machine with the START/STOP button. Let a full tank of water pass through the machine
once or twice to clean it, without using paper lter or coee.
3 Making coee: open the lid and ll the water tank with fresh cold water up to the desired level. There is a
water level indicator on the water tank and on the coee jug.
4 Insert a size 1x4 paper lter in the lter holder and ll it with ground coee. For average strong coee 6-7
g coee powder per cup is sucient. Close the water tank lid and place the jug back (complete with lid).
5 Setting/changing delay time. Press PROG button, the display will ash the initial time showing: 12:00
and a clock icon. Set hours by pressing the HOUR button. Then set minutes by pressing the MIN button.
Press the PROG button again to conrm, the display will stop ashing time and clock icon. Clock icon is
constant on and the display will go back to show the current time immediately. Note: If user don’t press
HOUR or MIN or PROG button again, the display will go back to show the current time after 5 seconds,
and setting delay time is cancelled, clock icon will disappear.
6 Start the machine with the START/STOP button. The power indicator light will come on and hot water will
ow into the lter. If the machine is not turned o manually, the Safety Auto-O function turns it o after
40 minutes.
7 If the jug is removed, the lter valve prevents coee from dripping onto the warming plate. (While pre-
paring coee, the jug must not be removed for longer than 30 seconds or the lter will overow.)
8 The Aroma Selector extends the brewing time to maximize the avour extraction and get a stronger cof-
fee for a small number of cups (normally less than 6).
9 The machine is compatible with Electrolux PureAdvantage
TM
water lter. If you choose to use the water
lter, it’s recommended to change lter after 60 brew cycles. Before using the new lter, place the new
lter into a container of clean cool water, and let soak for 10 minutes. Then rinse the lter for 10 to 15
seconds under the running tap water.
6 www.electrolux.com



 To Next Page