15
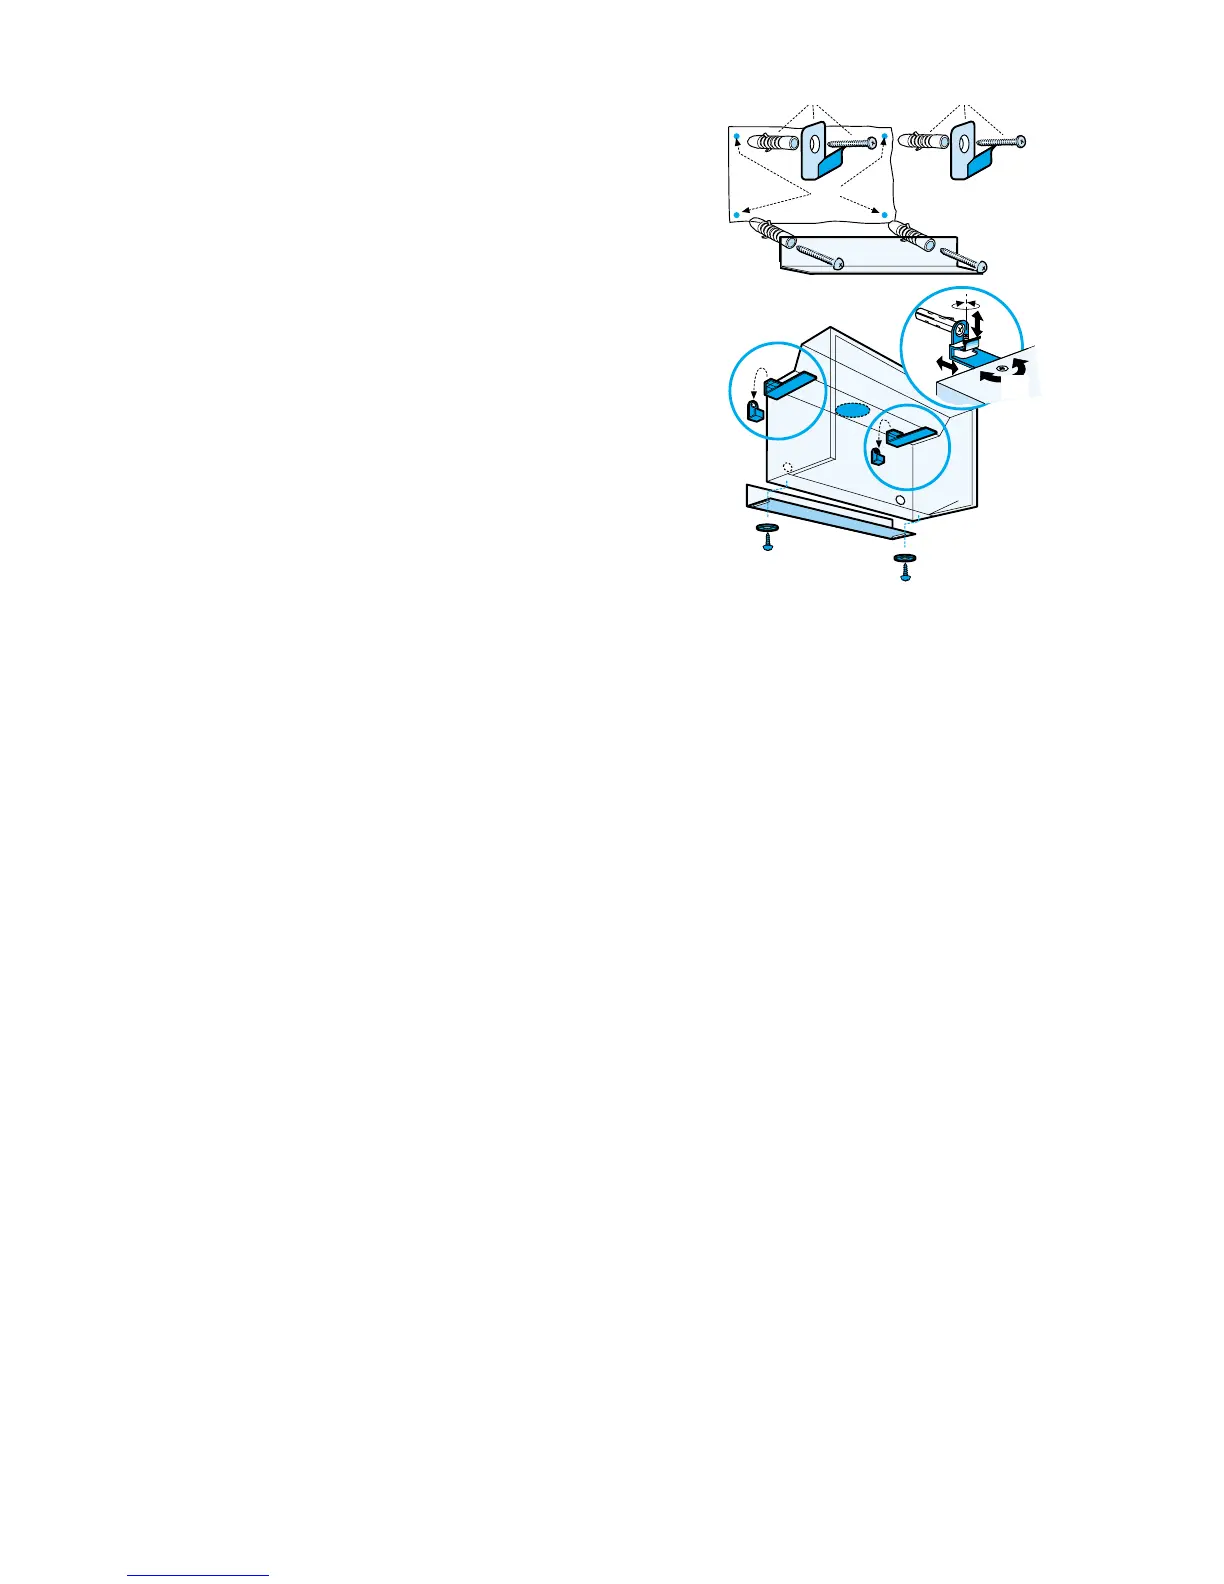
Installing the hood to the wall
• Use the drill holes diagram N1, drill as
indicated, insert two hooks in the upper drill
holes (Fig. 14,R1) and two dowels in the lower
drill holes (Fig. 14,R2).
• Fasten the lower bracket to the wall with two
screws (Fig. 12-14,Q).
• Hang the cooker hood on the wall, regulate the
position of the cooker hood (Fig. 14 - screws
S1 for vertical regulation, screws S2 for depth
regulation)
• Place connection ring and discharge pipe (or
deflector if supplied) to the cooker hood outlet
(see “Use” section), fasten the cooker hood to
the lower bracket (Fig. 12-14,Q) with two
screws and plastic washers (Fig. 14,T).
• Access to the screws that secure the lower
bracket may be through the drill holes located
inside the cooker hood (Fig. 14,U).
N1
R1R1
R2
R2
Q
Q
S1
U
U
S2
T
T
Fig. 14