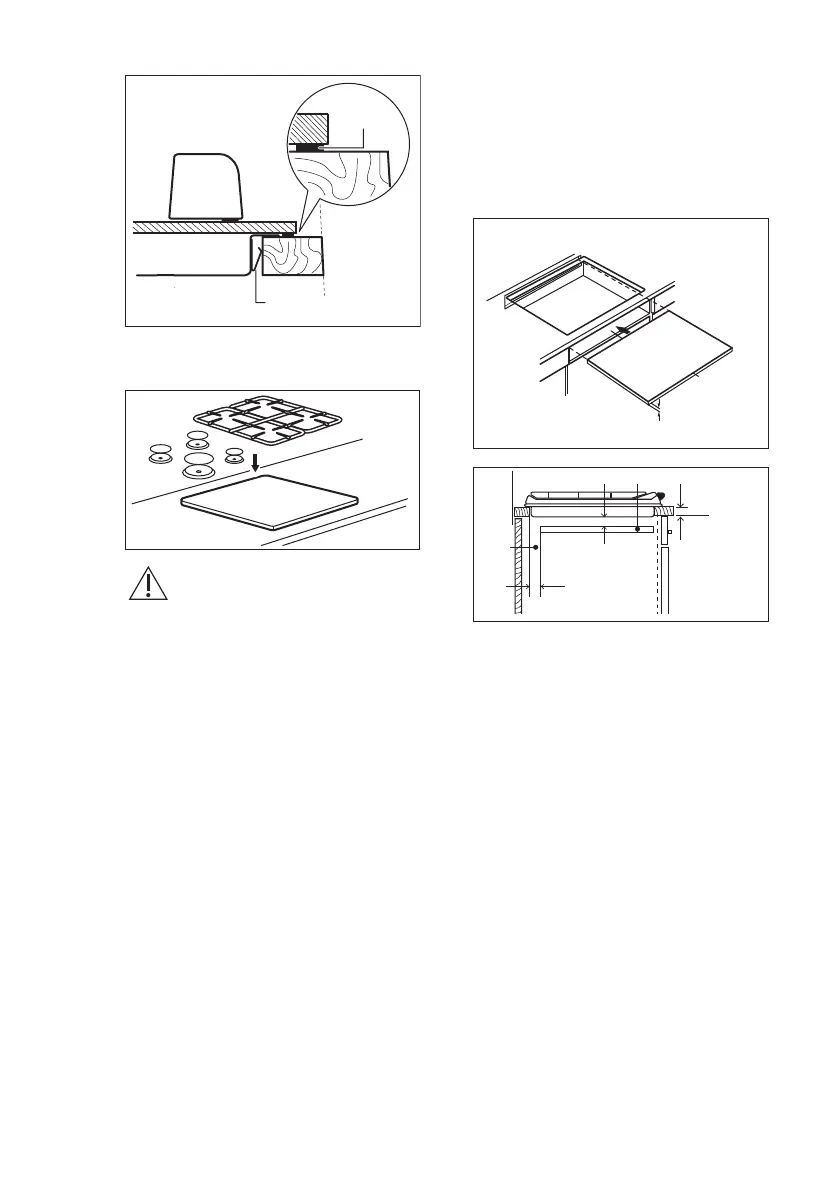
A) supplied seal
B) assembled bracket
7.
CAUTION!
Install the appliance only on
a worktop with flat surface.
3.9 Installation of more than
one hob
If several hobs are to be installed side by
side into the same cut out, an assembly
kit including a support side bracket and
supplementary seals is available at our
Authorised Service Centres. The relevant
installation instructions are supplied
within the kit package.
3.10 Possibilities for insertion
The panel installed below the hob must
be easy to remove and let an easy
access in case a technical assistance
intervention is necessary.
Kitchen unit with door or drawer
min 30 mm
60 mm
B
A
min 20 mm
(max 150 mm)
A. Removable panel
B. Space for connections
Kitchen unit with oven
The electrical connection of the hob and
the oven must be installed separately for
safety reasons and to let easy remove
oven from the unit.
www.electrolux.com12
 Loading...