Do you have a question about the Electrolux EOB2200COX and is the answer not in the manual?
This document is a user manual for Electrolux ovens, specifically models EOB2200BAX and EOB2200COX. It provides comprehensive instructions for safe installation, daily operation, maintenance, and troubleshooting.
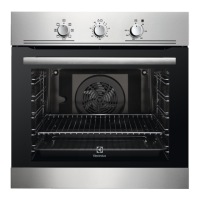
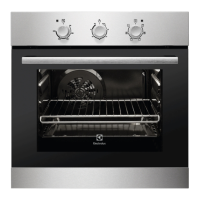
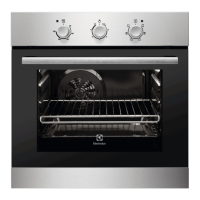
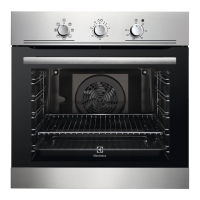
The Electrolux oven is designed for household cooking purposes, offering various heating functions to cater to different culinary needs. It features a control panel with knobs for selecting heating functions, setting the timer, and adjusting the temperature. An integrated lamp illuminates the oven cavity during operation. The oven also includes an Aqua Cleaning container for a specialized cleaning procedure.
The available heating functions include:
The oven is equipped with a cooling fan that automatically turns on during operation to keep the external surfaces cool and may continue to run after the oven is turned off until it cools down. A safety thermostat is integrated to prevent dangerous overheating, automatically interrupting the power supply and reactivating when the temperature drops.
The oven offers five shelf positions, counted from the bottom of the oven floor, allowing for flexible placement of cookware. Accessories such as a wire shelf and a grill-/roasting pan are provided. The wire shelf is inserted between the guide bars with its feet pointing down, and features small indentations to increase safety and prevent cookware from slipping. The deep pan can be used for baking, roasting, or collecting fat. The wire shelf and deep pan can be used together, with the wire shelf placed on the guide bars above the deep pan.
For setting cooking times, the oven includes a Minute Minder + End of Cooking programmer. This allows users to set an automatic switch-off time for an oven function. To operate the appliance manually without a set time period, the timer knob can be turned to the continuous operation symbol. After the set time, an acoustic signal sounds, and the appliance deactivates.
The manual provides detailed baking and roasting tables with recommended temperatures, shelf positions, and cooking times for various foods, including cakes, bread, pizza, flans, and different types of meat and fish. Specific recommendations are given for baking cakes (e.g., not opening the door too early, using one empty level between two baking trays), cooking meat and fish (e.g., using a deep pan for fatty food, adding water to prevent smoke), and general cooking times.
For grilling, the oven should be preheated for 3 minutes, and the fourth shelf position is recommended. The manual also includes a table for Moist Fan Baking, providing suggestions for accessories, temperature, shelf position, and cooking time for specific dishes to achieve optimal results. Additionally, there are guidelines for drying food using the Fan Cooking function, including recommendations for covering trays and allowing food to cool overnight for complete drying.
Regular cleaning is crucial for maintaining the oven's performance and preventing the deterioration of its surface materials. The front of the oven and metal surfaces should be cleaned with a soft cloth, warm water, and a mild or dedicated cleaning agent. The oven interior should be cleaned after each use to prevent fat accumulation and food remains, which can pose a fire risk, especially for the grill pan. All accessories should be cleaned after use with a moist soft cloth and neutral detergents, but not in a dishwasher, especially nonstick accessories, to avoid damage. Stubborn dirt can be removed with a special oven cleaner.
The oven door has two glass panels that can be removed for cleaning. Before removing the glass panels, the oven door itself must be removed. The process involves opening the door fully, lifting and turning levers on the hinges, and then lifting the door from its seat. Once the door is placed on a soft cloth, the door trim can be pushed inwards and pulled off to release and remove the internal glass panel. The glass panels should be cleaned with water and soap and dried carefully, avoiding dishwashers. When reinstalling, the screen-printing zone of the glass panel must face the inner side of the door, and the internal glass panel must be correctly seated.
The shelf supports are also removable for easier cleaning of the oven cavity. They can be pulled away from the side wall from both the front and rear ends.
The oven features an Aqua Clean cleaning procedure that uses humidity to help remove fat and food particles. This involves pouring 300 ml of water into the cavity embossment, setting the oven to the Conventional Cooking function at 90°C for 30 minutes, and then cleaning with a soft cloth once the oven has cooled.
The door gasket should be checked regularly for damage, and the oven should not be used if the gasket is damaged. The manual advises contacting an Authorised Service Centre for replacement.
For internal lighting, the light bulb or halogen lamp can be replaced. Before replacement, the oven must be turned off, cooled down, and disconnected from the mains. A cloth should be placed at the bottom of the cavity, and the lamp glass cover should be turned to remove it. The lamp should be replaced with a suitable 300°C heat-resistant lamp, and the glass cover reinstalled. Halogen lamps should always be handled with a cloth to prevent grease residue from burning on the lamp.
In case of issues, a troubleshooting section provides common problems, possible causes, and remedies, such as activating the oven if it doesn't heat up, setting the Minute Minder + End of Cooking programmer, checking for blown fuses, or replacing a defective lamp. For more complex issues, users are advised to contact their dealer or an Authorised Service Centre, providing the model, product number, and serial number found on the rating plate.
| Brand | Electrolux |
|---|---|
| Model | EOB2200COX |
| Category | Oven |
| Language | English |