CCoommppoonneenntt TTeeaarrddoowwnn
4-6
LLEEDD RReemmoovvaall
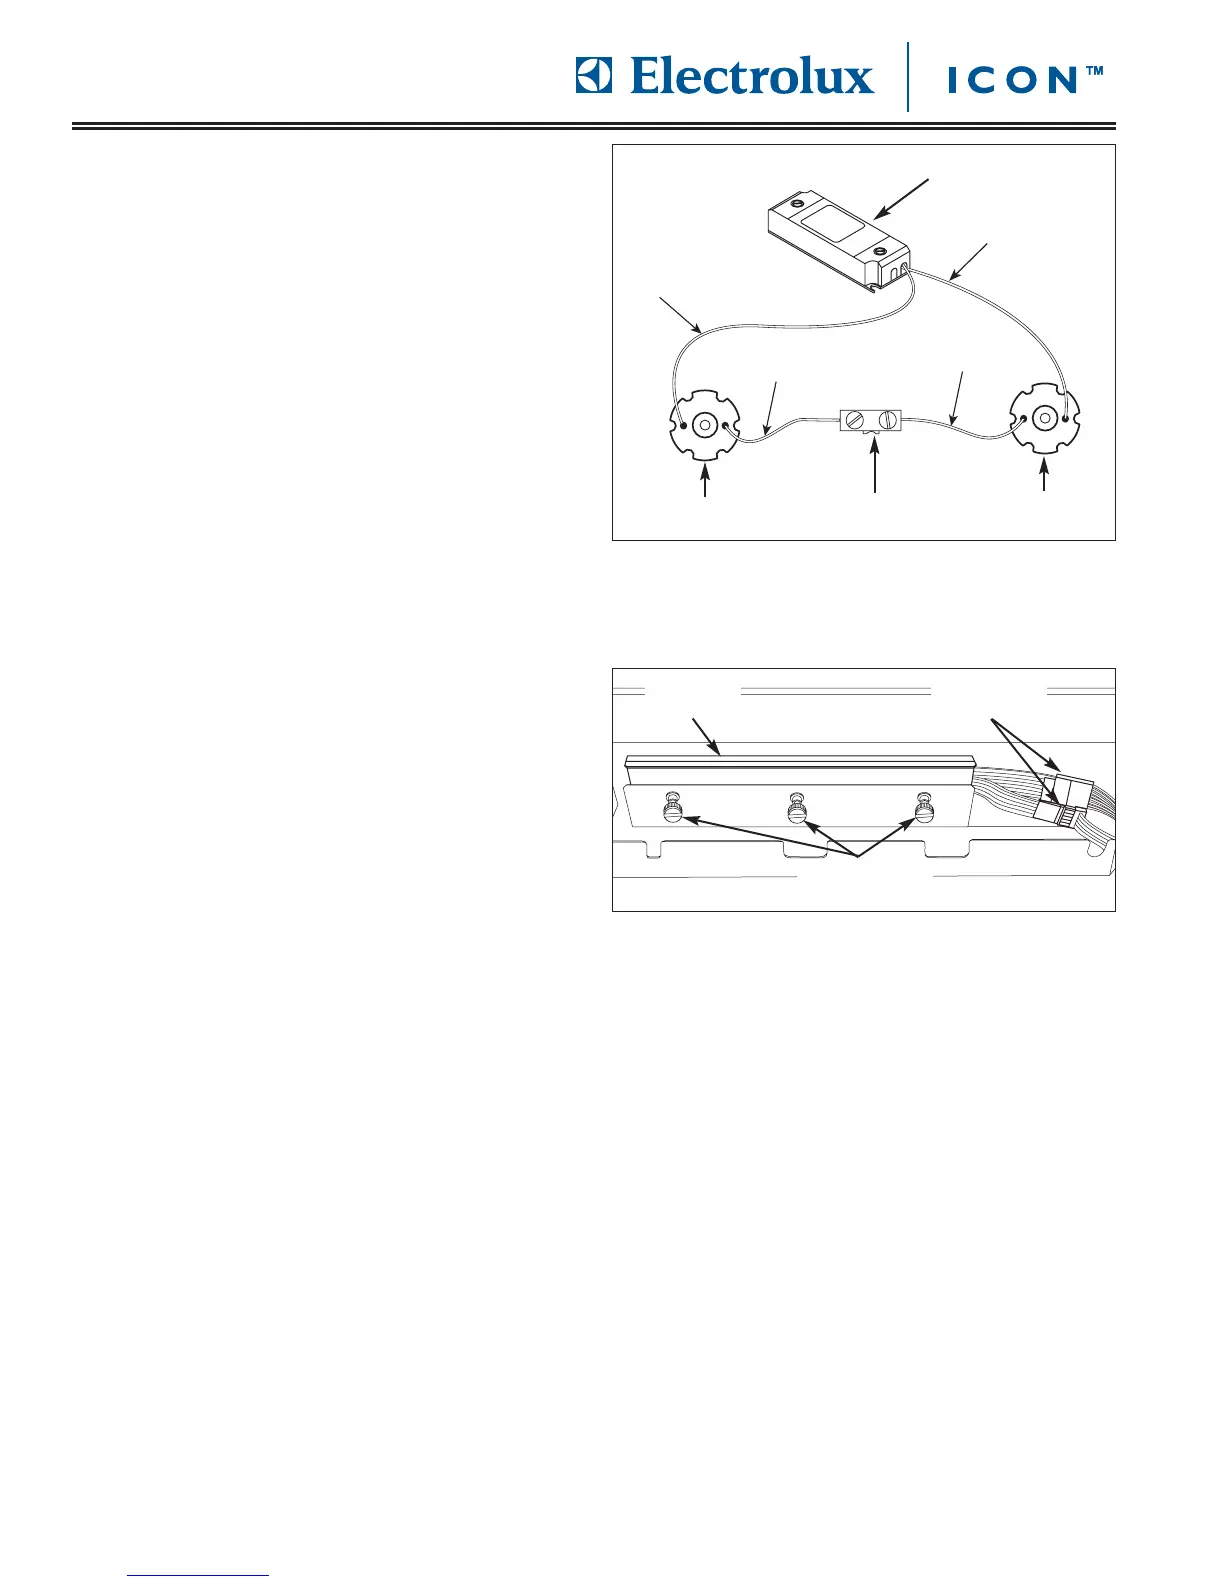
The LED light fixtures are pressed into the underside of
the control compartment. The LED is mounted to a
cover plate that is pressed into the light fixture.
To remove an LED (See Figure 4-9):
1. Remove drip tray, open door and remove control
panel cover.
2. Using a small flat-bladed screw driver, disconnect
wire leads of LED to be replaced from wire terminal.
3. Disconnect wire leads from transformer.
4. If replacing just the LED with cover plate, use a
small flat-bladed screwdriver to pry the cover plate
with LED from inside control compartment.
If replacing the entire fixture, from the underside of
control compartment, use a small flat-bladed
screwdriver to pry the fixture out of its installation
position.
CCoonnttrrooll PPaanneell RReemmoovvaall
The control panel is secured to the front face of the
door assembly with three thumb screws. Two ribbon
cables connect from the right side of control compart-
ment.
To remove the control panel (See Figure 4-10):
1. Remove drip tray, open door and remove control
panel cover.
2. Disconnect ribbon cables from the right hand side
of the control compartment.
3. Using fingers, loosen thumbscrews securing the
control panel to door frame.
4. Pull control panel away from door frame until the
push buttons clear the holes in door frame. Then
pull control panel from door frame.