7
Removing The Doors
Getting Through Narrow Spaces
If your refrigerator will not fit through an entrance area, you can reduce its size by removing the doors.
Check first by measuring the entrance.
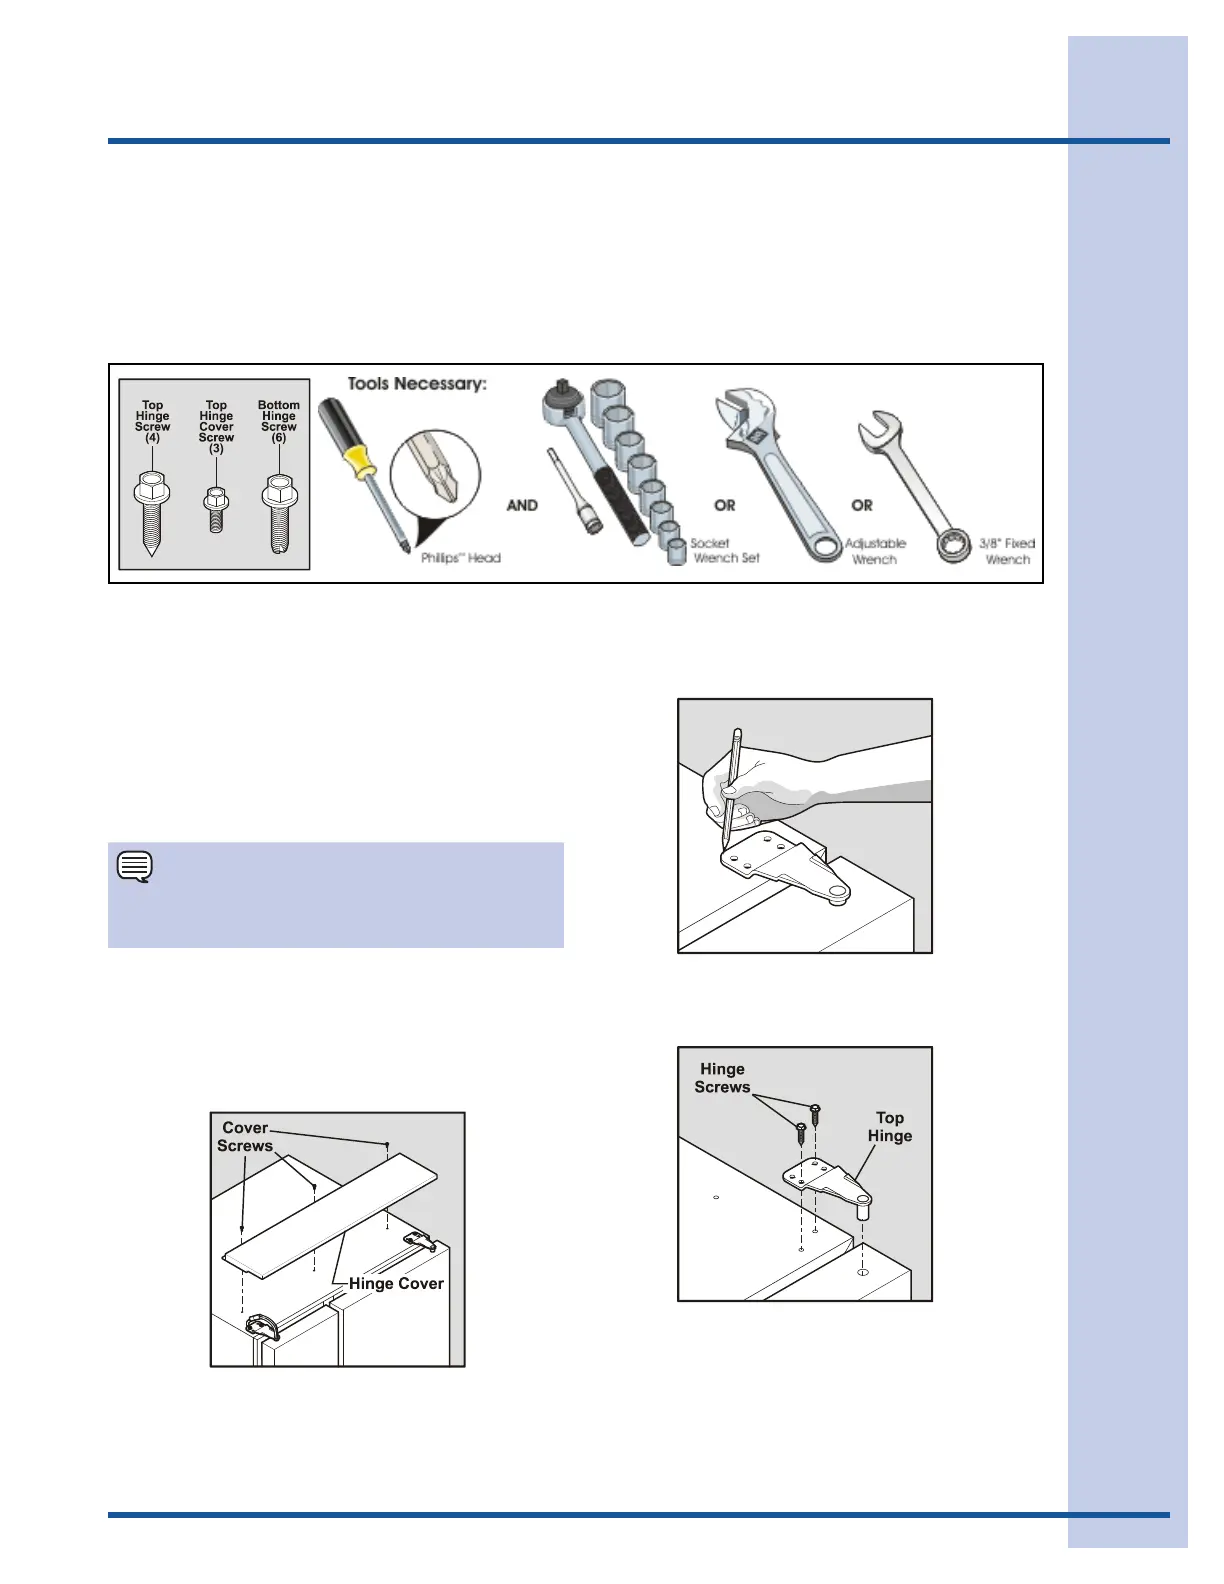
Required Tools
You will need the following tools:
To prepare for removing the doors:
1 Make sure the electrical power cord is
unplugged from the wall outlet.
2 Open both doors and remove the toe grille
(as explained in the Installation Instructions
that came with your appliance).
3 Remove any food from the door shelves.
4 Close the doors.
To remove the top hinge cover:
1 Remove the three screws from the cover over
the top door hinges.
2 Pull the cover forward about a half-inch and
lift it off.
To remove the refrigerator door:
1 Tracelightlyaroundthedoor’stophingewith
a pencil. This makes reinstallation easier.
2 Remove the two screws from the top hinge.
Lift the door off of the bottom hinge and set it
aside.
3 Remove the two bottom hinge screws and
hinge if necessary.
To reinstall the refrigerator door, reverse the above
steps. Once both doors are in place, also replace
the top hinge cover.
NOTE
For more information on removing the toe grille,
please refer to the Installation Instructions.
 Loading...