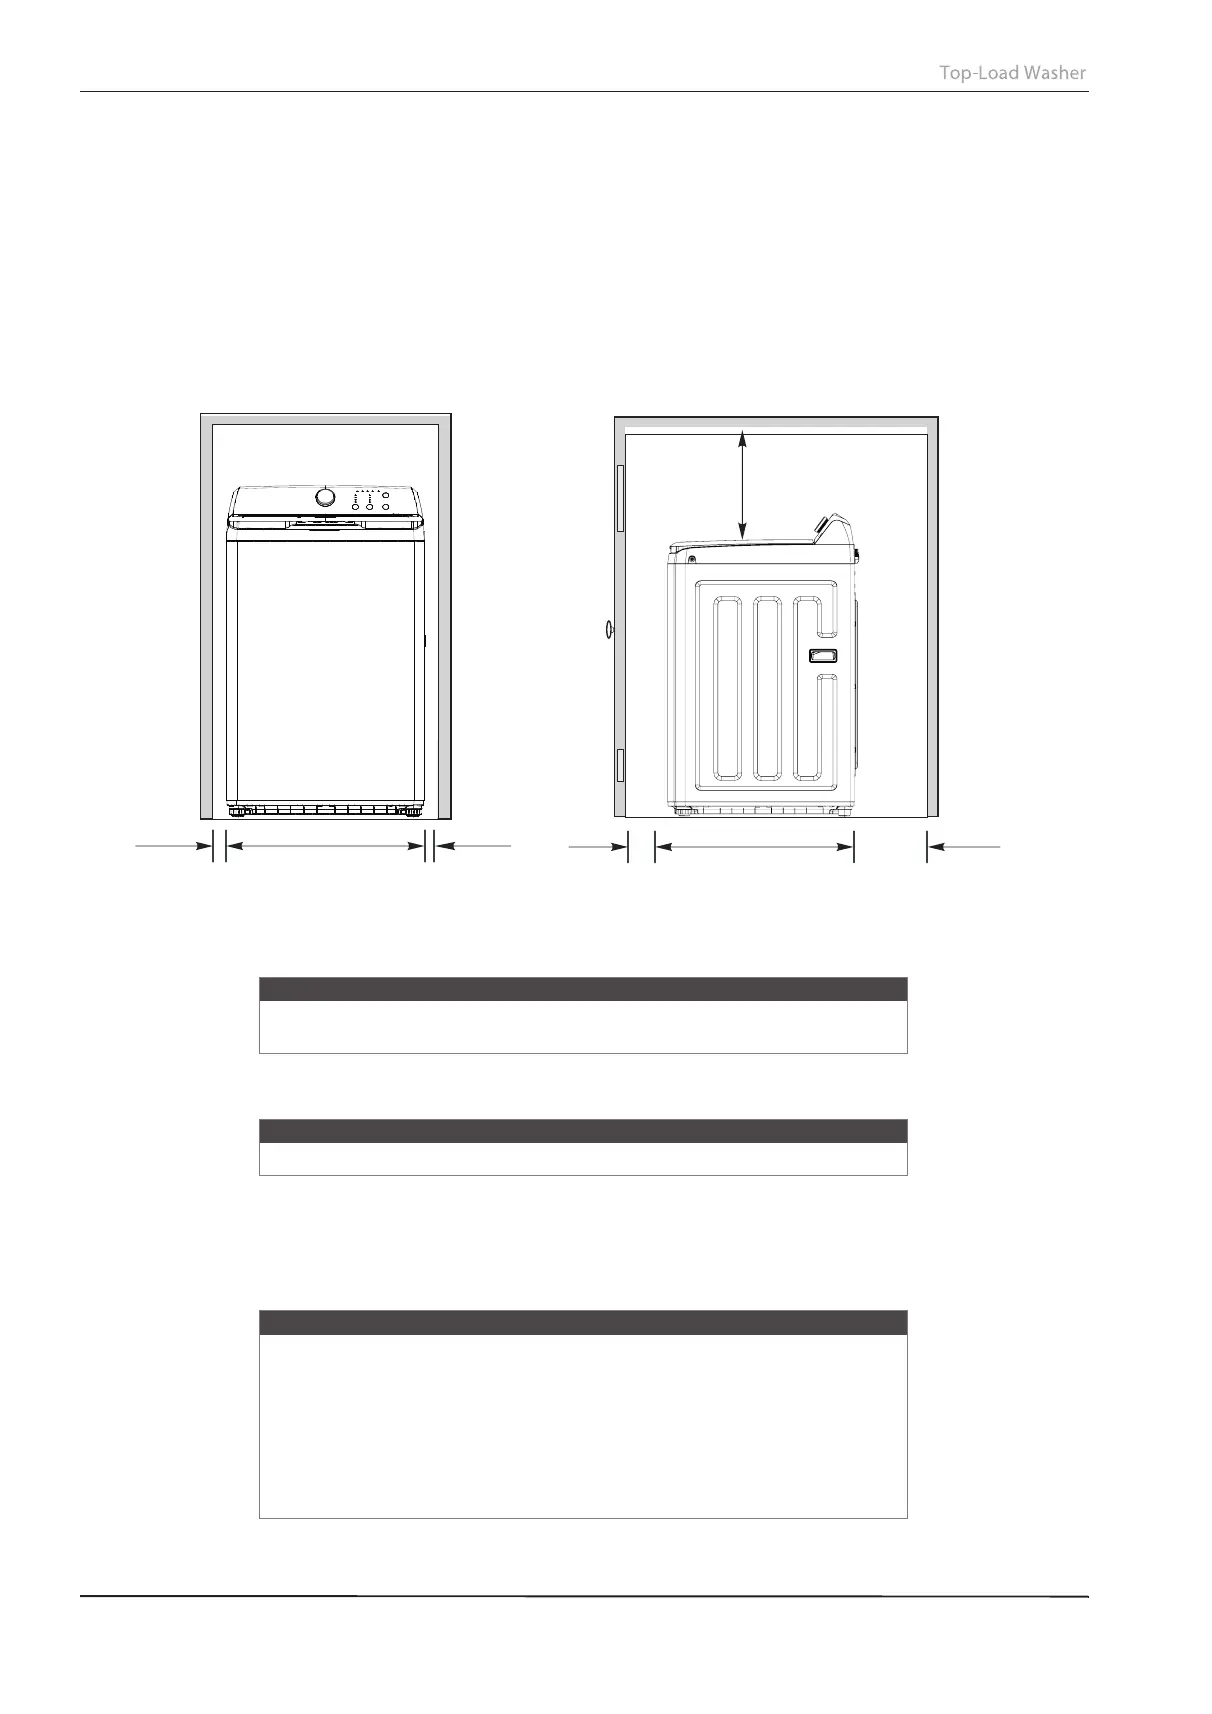
Installing in an alcove or closet
Minimum clearances between your washer and adjacent walls or other surfaces are:
•
Either side: 1 in. (2.5 cm)
•
Rear: 6 in. (15.2 cm)
•
Closet Front: 2 in. (5.1 cm)
•
Top: 24 in. (61 cm)
• Gap between the end of water valve and the wall:
•
Case 1: If you connect the supply hose after you install your washer: Over 3.9 in. (10 cm)
•
Case 2: If you connect the supply hose before you install your washer: Over 2.8 in. (7 cm)
If you install your washer and dryer side-by-side in a clos
et, the closet front must have an unobstructed air opening
of at least 72 square inches (465 square cm).
1 in.
25.2 in. (64 cm)
1 in.
2.5 cm
2.5 cm
2 in.
5.1 cm
27 in. (68.4 cm)
6 in.
24 in.
61 cm
(15.2 cm)
Electrical requirements
Use a 120 Volt, 60Hz, 15 amp fuse or circuit breaker. We recommend an individual branch circuit that serves only
your washer.
Electrical grounding is required for your washer.
You must ground your washer. In the event of a malfunction or breakdown, grounding reduces the risk of electric
shock by providing a path of least resistance for the electric current.
Your washer is equipped with a power cord with a three-pronged grounding plug for use in a correctly installed
and grounded outlet.
Warning
To reduce the risk of fire, electric shock, or injury to persons, read the
IMPORTANT SAFETY INSTRUCTIONS before operating this appliance.
Warning
Never use an extension cord.
Warning
• You are responsible for providing adequate electrical services for your
washer.
• To prevent unnecessary risk of fire, electrical shock, or personal injury, all
wiring and grounding must be done in accordance with the National
Electrical Code ANSI/FNPA, No.70 Latest Revision and local codes and
ordinances.
• Never connect the ground wire to plastic plumbing lines, gas lines, or
hot water pipes.
INSTALLATION INSTRUCTIONS
12


 To Next Page