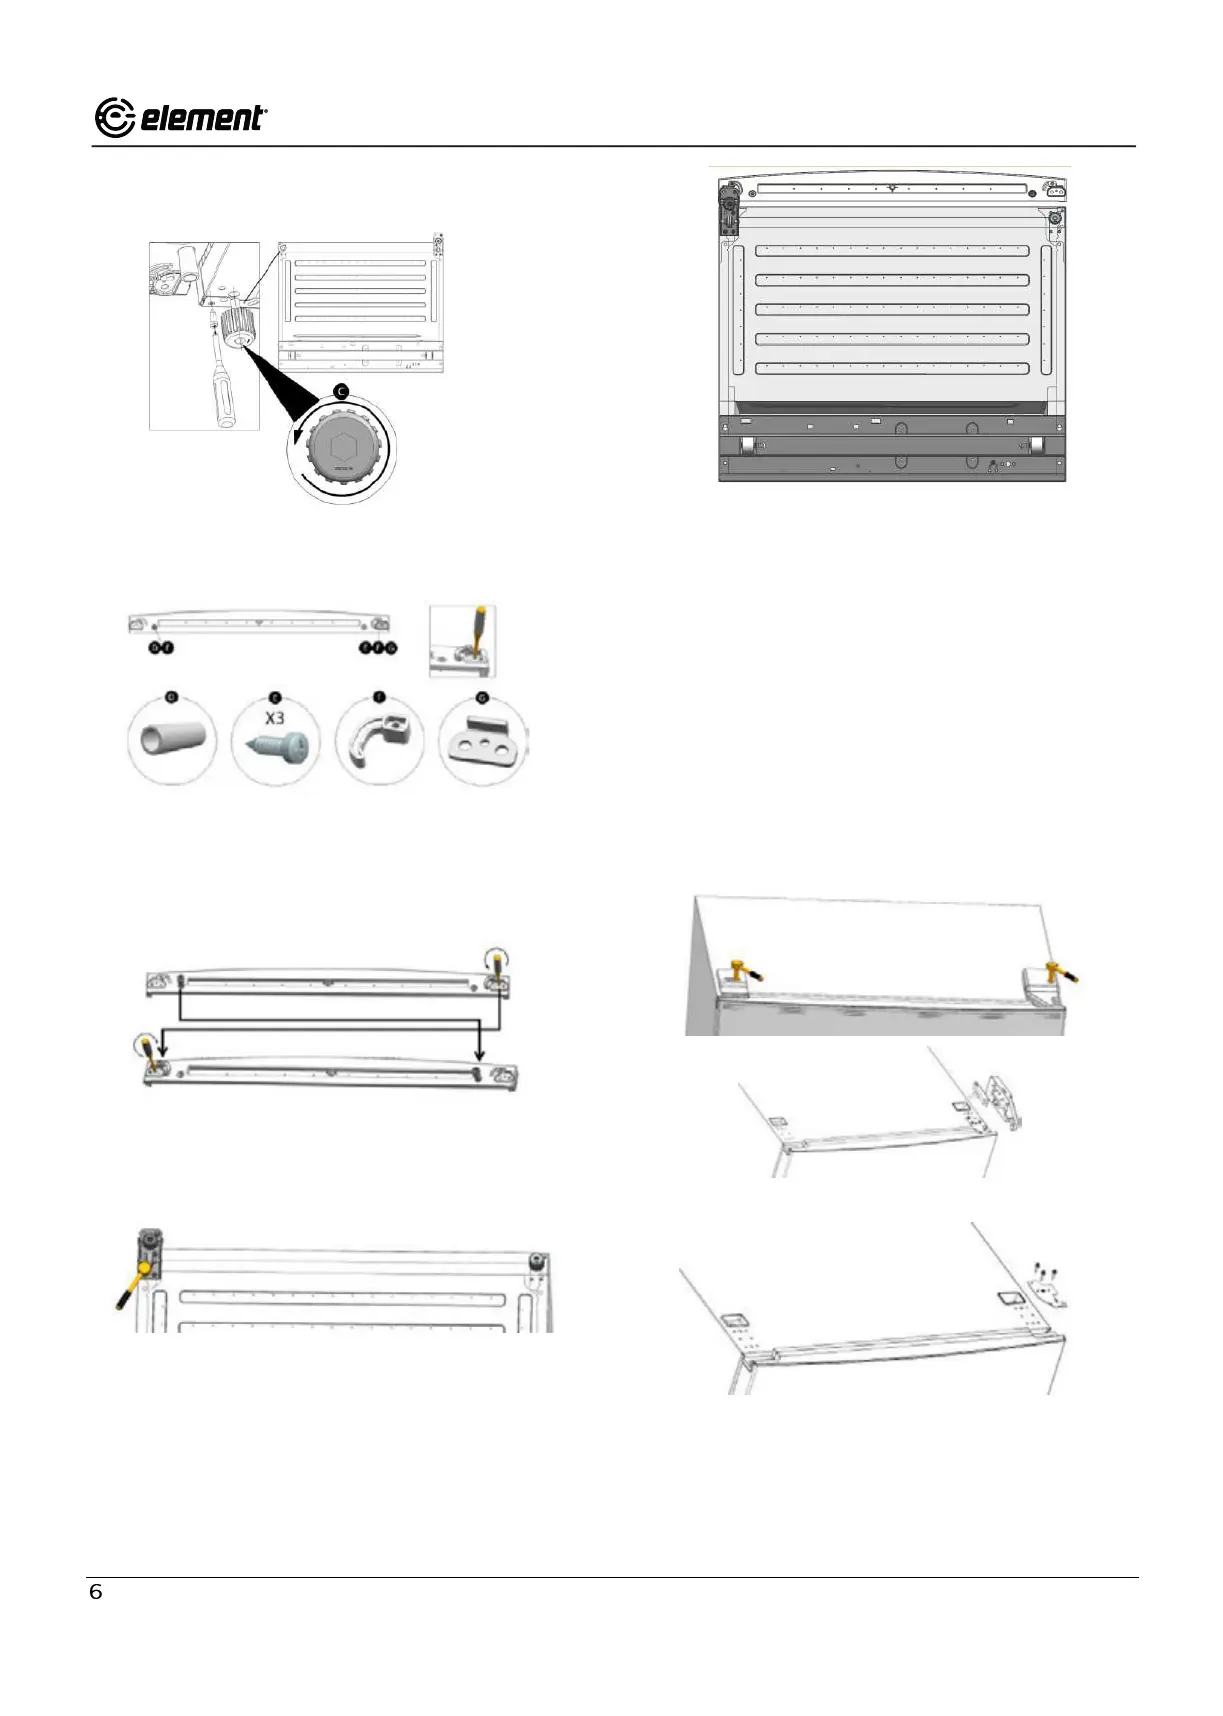
4. Unscrew t
he left adjustable leveling foot
and loosen the screw.
5. Remove
the aid-clo
ser (F)
, metal block
(G
),
and the supporter (D).
6. Reinstall the aid-closer (F)
, metal block (G)
onto the left side, and the supporter (D) onto
the right side.
7. Attach the bottom hinge (A) with 3 screws
(B) and the adjustable leveling foot (C) on the
left side of the cabinet.
Important Note
:
W
hen you screw on the bottom hi
nge:
Move the door slightly to
the left or right to
make sure the hinge hole is aligned with the
cabinet hole. Insert the 3 screws by half depth,
and then align the hinge and fully tighten.
8. Using an 8 mm socket with a ratchet:
a. Un
screw right top hinge cover a
nd left top
decorative cov
er, and disconnect the door
switch and display.
b. Remove the
top hinge from the right side.
9. Remov
e the front top decorative door
cover, turn the cover (together with the
connecting wire) 180°and install it.