Rev. 041818BR 5 www.elitescreens.com
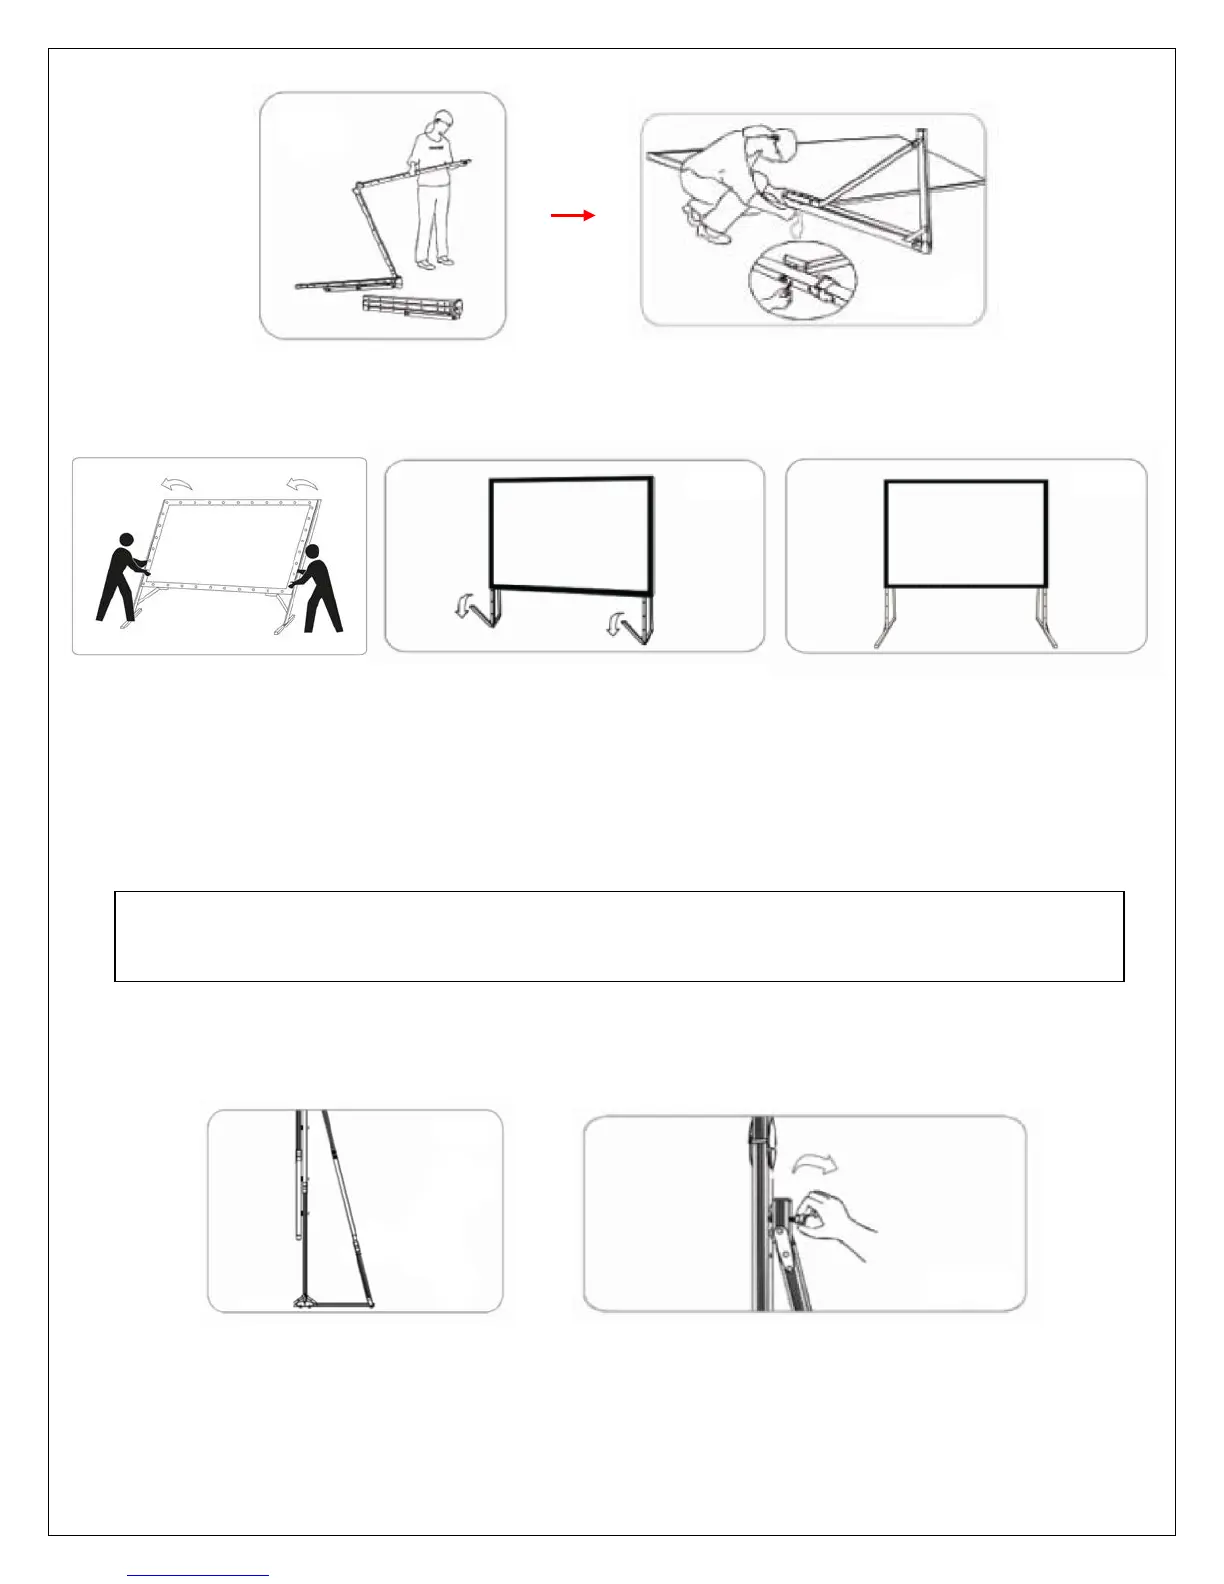
3. After making sure the legs are secure to the frame, using two people, lift the screen up in a
vertical position. While the screen is in a vertical position, fold the front feet of the legs out.
4. The assembly is now complete and the projection screen will be stable on a flat surface.
Leg Attachment for 135” – 200” Models
1. Starting from step 2 on the previous procedure, lay the frame on the floor and position the legs
over both sides of the frame. Use the knob screws (C) to attach the frame to the legs.
2. Next, carefully unfold the extra support leg behind the leg and attach it securely using a knob screw (C).
Then repeat steps 3 and 4 on the previous procedure.
Warning: When attaching the legs, make sure to screw the top of the leg to the last hole of the frame to reach max
height. Attaching the legs lower to the frame and leaving an extra space on top may cause the screen to tip over
 Loading...