HOW TO USE THE
P
P
R
R
E
E
S
S
S
S
U
U
R
R
E
E
C
C
O
O
O
O
K
K
T
T
I
I
M
M
E
E
:
Setting your own cook time is ideal for cooking meat or poultry that weighs more than 3-pounds.
It is also suggested for slow-cooking certain recipes that require cooking for more than 30-
minutes. The programmed cook time can be set up to 90-minutes.
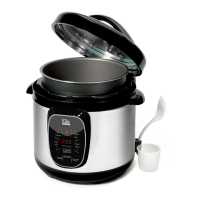
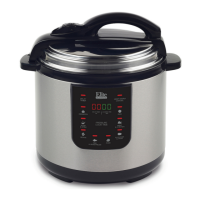
1) Prepare desired food and place into cooking pot.
2) Secure the lid onto the unit, turn it Counter-clockwise to lock it in place properly.
3) Make sure the Pressure Limiting Valve (3) is set to the “Airtight” position.
4) Plug the power cord into a 120V power outlet.
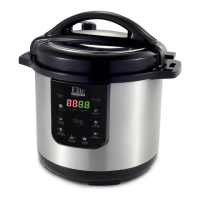
5) The LED screen will display 0000
.
6) Press “Pressure Cook Time” button to the desired time frame.
(EX: If you set the cook time to 30-minutes, the LED screen will display 0030)
7) The “Pressure Cook Time” indicator light will flash for 5-seconds and automatically
stop and set on its own if no other buttons are pushed.
NOTE: The LED screen will not immediately display a P until the proper pressure has been
achieved. This may sometimes take up to approximately 5-minutes.
8) The pressure cooker will begin to operate.
9) When optimum pressure is achieved, the LED screen will display P030
10) When the unit has pressurized, it will begin to pressure-cook the food. The programmed
time will begin to count down until it reaches zero.
11) When cooking is complete, the pressure cooker will beep 3-times and automatically go to
Keep Warm.
12) The Keep Warm indicator light will begin to flash/flicker. This indicates the Pressure
Cooker is Naturally Releasing the pressure
. (See Notes & Tips #4)