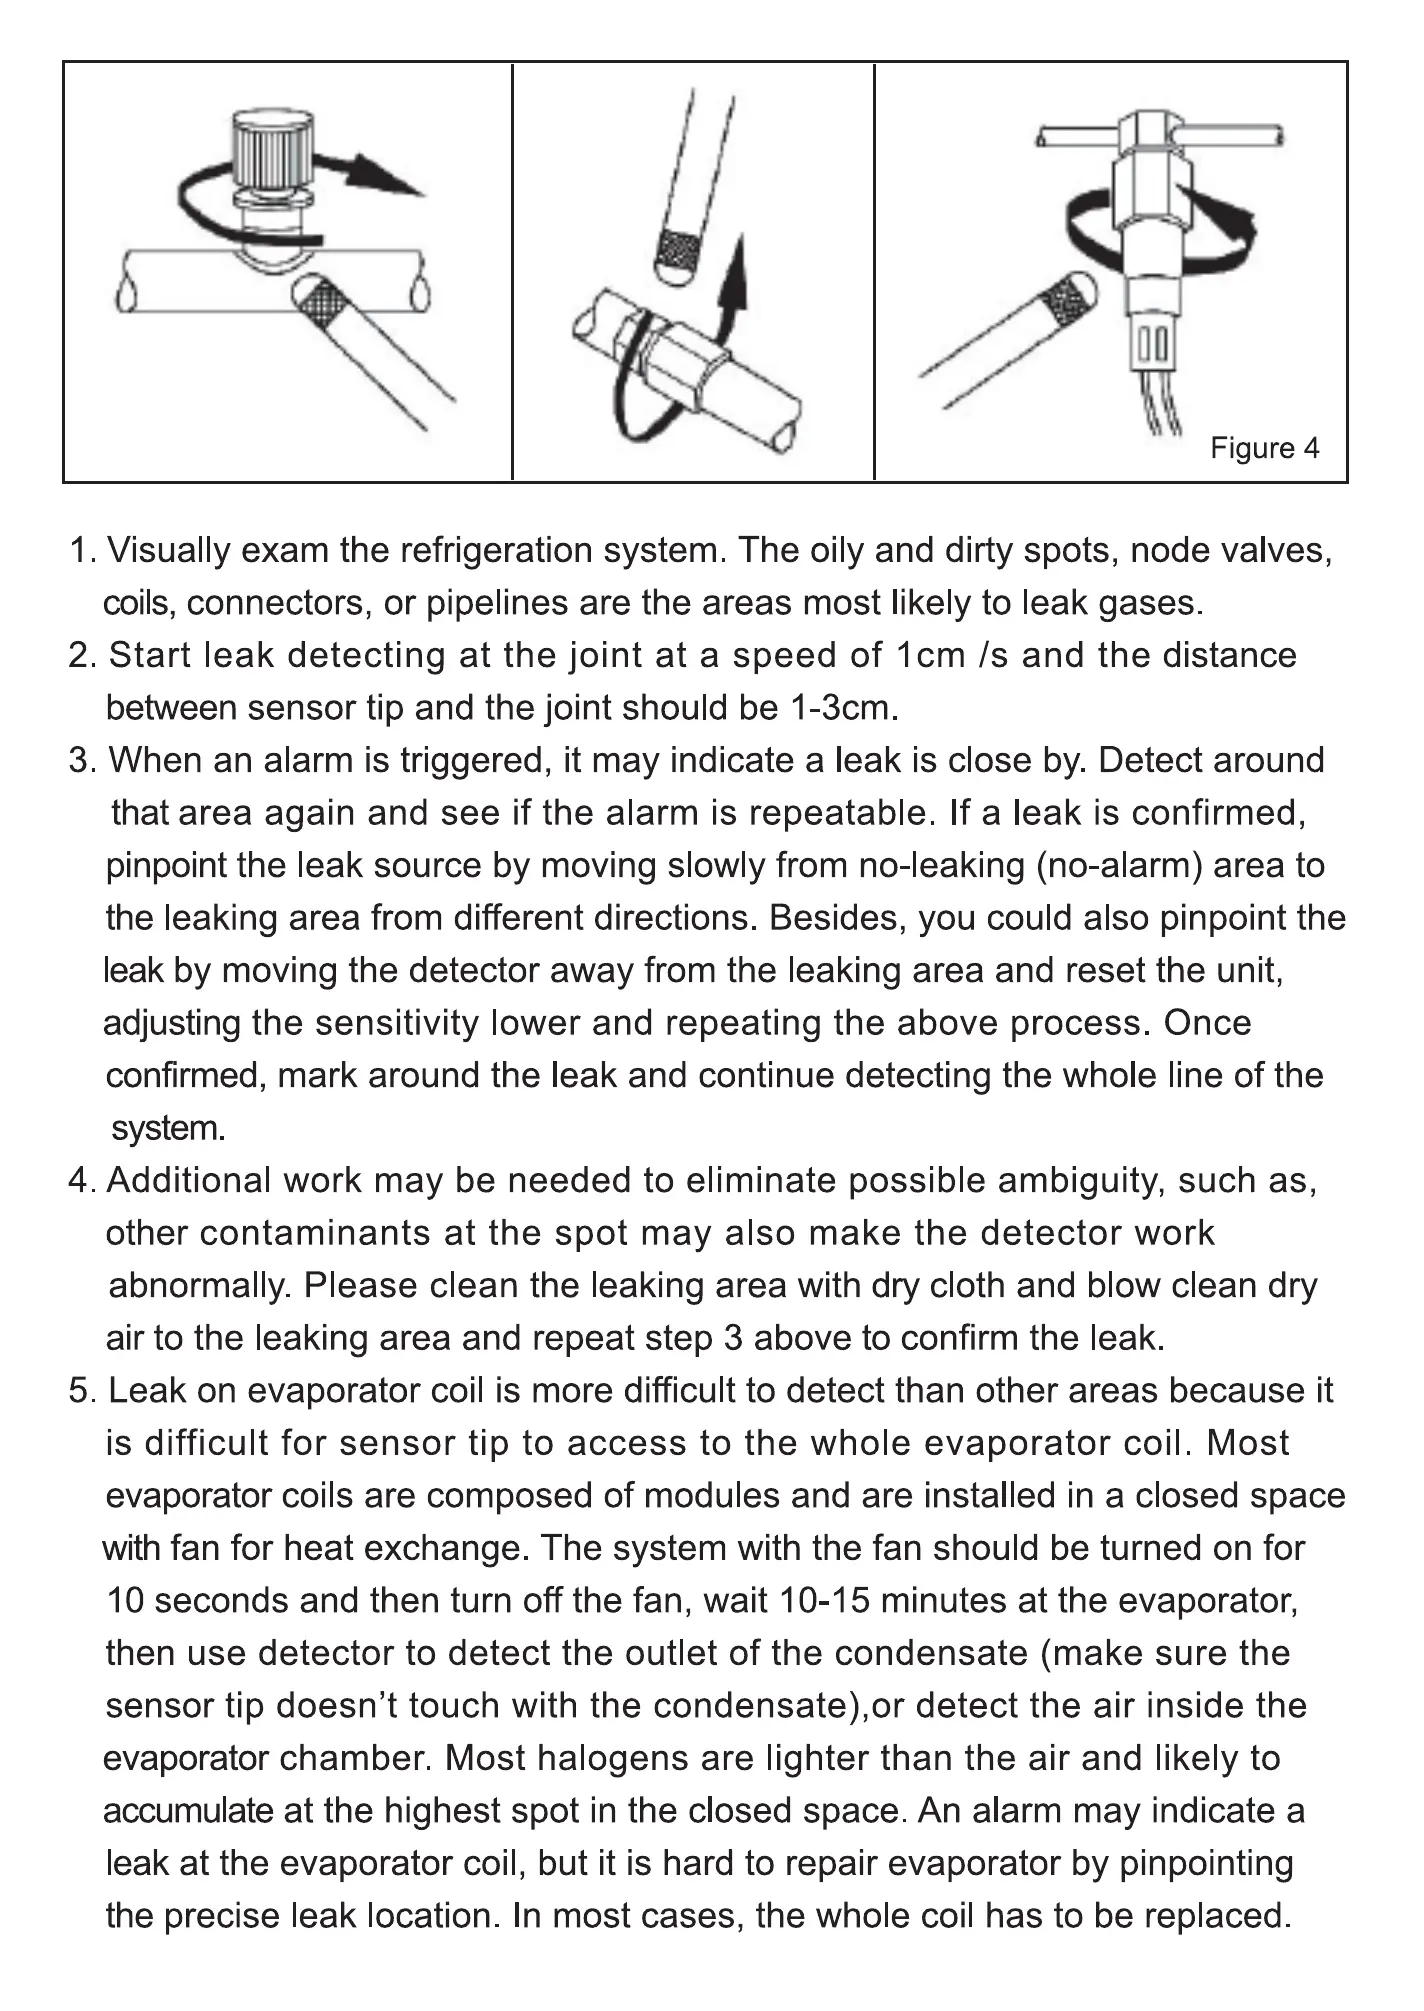
Figure 4
1. Visually exam the refrigeration system The oily and dirty spots, node valves,
coils, connectors, or pipelines are the areas most likely to leak gases
2 Start leak detecting at the joint at a speed Of lcm Is and the distance
between sensor tip and the joint should be 1-3cm
3. When an alarm is triggered, it may indicate a leak is close by. Detect around
that area again and see if the alarm is repeatable. If a leak is confirmed,
pinpoint the leak source by moving slow y from no-leaking (no-alarm) area to
the leaking area from different directions Besides, you cou d also pinpoint the
leak by moving the detector away from the leaking area and reset the unit,
adjusting the sensitivity lower and repeating the above process. Once
confirmed, mark around the leak and continue detecting the whole line of the
system.
4 Additional work may be needed to eliminate possible ambiguity, such as,
other contaminants at the spot may also make the detector work
abnormally. Please clean the leaking area with dry cloth and blow c ean dry
air to the leaking area and repeat step 3 above to confirm the leak.
5. Leak on evaporator coil is more difficult to detect than other areas because it
is difficult for sensor tip to access to the whole evaporator coil _ Most
evaporator coils are composed of modu es and are installed in a closed space
witl fan for heat exchange. The system with the fan should be turned on for
10 seconds and then turn off the fan, wait 10-15 minutes at the evaporator,
then use detector to detect the outlet of the condensate (make sure the
sensor tip doesn't touch with the detect the air inside the
evaporator chamber. Most halogens are lighter than the air and likely to
accumulate at the highest spot in the closed space. An alarm may indicate a
leak at the evaporator coil, but it is hard to repair evaporator by pinpointing
the precise leak location. In most cases, the whole coil has to be replaced
6


 To Next Page
 Loading...