EasyManua.ls Logo

Elkay Avado LKAV1031CR User Manual

Elkay Avado LKAV1031CR
6 pages
To Next Page IconTo Next Page
Page #1 background imageLoading...
Page #1 background image
SAVE FOR CONSUMER
INSTALLATION / OWNER’S MANUAL
Avado - Pull-Down Kitchen Faucet
LKAV1031CR
LKAV1031NK
LKLFAV1031CR
LKLFAV1031NK
Includes:
Tools:
A
B
D
D
1
D
1
D
2
B
1
B
2
B
3
C
1
C
2
E
1/2”
[13 mm]
13/16”
[20 mm]
5/8”
[16 mm]
13/16”
[21 mm]
C
NOTE: only 1 D1 washer is
used with this faucet model
NOTE: these washers are not
used on this faucet model
Question and Answer IconNeed help?

Do you have a question about the Elkay Avado LKAV1031CR and is the answer not in the manual?

Elkay Avado LKAV1031CR Specifications

General IconGeneral
BrandElkay
ModelAvado LKAV1031CR
CategoryPlumbing Product
LanguageEnglish

Summary

Includes

Tools

Installation Steps

Install Faucet Body and Mounting Hardware

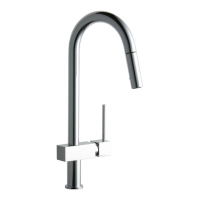
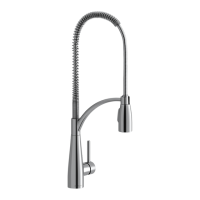
Install the single lever group, ensure gasket positioning, and secure with mounting nut.

Connect Hoses and Check Valve

Attach the check valve to the outlet hose and connect flexible hoses to supply.

Attach Counterweight and Test Connections

Secure the counterweight and test for leaks after connecting hoses.

Cartridge Replacement

Disassemble Faucet for Cartridge Access

Remove the handle, finishing ring nut, and cartridge nut to access the cartridge.

Replace and Reassemble Cartridge

Insert new cartridge, align pins/gaskets, and reassemble the faucet.

Hand Shower Replacement

Disconnect Hand Shower Components

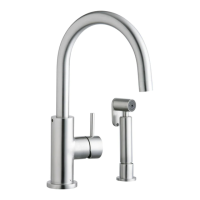
Unscrew fastening pin, hose carrier connection, and hose connection.

Remove and Reassemble Hand Shower

Detach hand shower for replacement and reassemble the unit.

Aerator Cleaning and Replacement

Prepare for Aerator Service

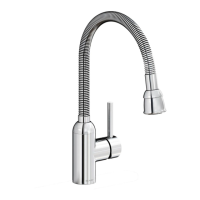
Ensure the faucet is turned off before removing the aerator.

Service the Aerator

Unscrew, rinse, and reassemble the aerator as needed.

Care and Cleaning Instructions

Daily Cleaning Procedure

Wipe gently with a damp cloth and dry with a soft towel.

Maintenance and Protection

Remove standing water and apply protective coatings for finishes.

Warranty Information

Replacement Parts List

Related product manuals