GB
41
Configuration:
1) Press and hold button A until the green LED begins to flash; this will also
be confirmed by a beep.
2) Press and hold the button corresponding to the desired chime (button
E1/button E2/button E3) until you hear the melody on the interphone.
3) Press the button (button E1/button E2/button E3) repeatedly to select
the desired melody.
4) Once you have selected the desired chime, press button A to store it or
do not touch any buttons for 5 s. Once configuration is complete, the
flashing green LED switches off.
Chime volume adjustment
Button A is used to enter adjustment mode.
Button E5 decreases the melody volume.
Button E6 increases the melody volume.
Configuration:
1) Press and hold button A until the green LED begins to flash; this will be
confirmed by a beep.
2) Press button E5 or E6 depending on the procedure you want to carry
out (decrease or increase the chime volume).
3) Once you have selected the desired volume, press button A to store it or
do not touch any buttons for 5 s. Once configuration is complete, the
flashing green LED switches off and a beep is emitted.
Muting the chime (User away function)
Using the same procedure as described above for volume adjustment,
press button E5 several times to reach the point at which the chime is de-
activated. “Chime muted” status is indicated by the red LED lighting up
steadily.
If the interphone receives a call from the entrance panel while the chime is
muted, the red LED indicates this with one flash for each unanswered call,
for a maximum of 4 calls (these flashes occur every 10 s). When the chime
volume is restored, at least to its minimum level, this indication will be reset.
Adjusting the conversation volume (from entrance panel to interphone)
The volume is adjusted during conversation.
Button A is used to enter adjustment mode.
Button E5 decreases the conversation volume.
Button E6 increases the conversation volume.
Configuration:
1) Press and hold button A until the green LED begins to flash (both LEDs
are lit).
2) Press button E5 or E6 depending on the procedure you want to carry
out (decrease or increase the conversation volume).
3) Once you have selected the desired volume, press button A to store it or
do not touch any buttons for 5 s. Once configuration is complete, the
flashing green LED switches off and a beep is emitted.
A
E5
E6
Configurations
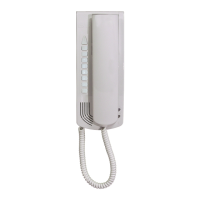
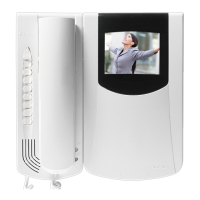
Disabling/Enabling “hands-free” communication
Interphone 6901 is programmed by default for “HANDS-FREE” communi-
cation.
To disable or re-enable this function, follow the procedure as described.
When the interphone is in standby:
1) Press button A until the green LED flashes; the interphone will also emit
a tone.
2) Press and hold buttons E1 and E2 simultaneously, until the red LED be-
gins to flash.
3) While both LEDs are flashing, press button B (speak/listen) to confirm
the change.
The RED LED switches off as soon as button B is pressed, while the
green LED flashes for a few seconds when it switches off, the interphone
emits a tone.
Important: This procedure applies for both enabling and disabling, once to
enable and another time to disable.
Automatic answer
The interphone can be configured to start AUTOMATICALLY on receipt of
a call.
To enable this function, follow the procedure as described.
While the interphone is off:
1) Press button A until the green LED flashes; the interphone will also emit
a tone.
2) Press and hold buttons E3 and E4 simultaneously, until the red LED be-
gins to flash.
3) While both LEDs are flashing, press button B (speak/listen) to confirm
the change.
The red LED switches off as soon as button B is pressed, while the green
LED flashes for a few seconds when it switches off, the interphone emits
a tone.
Important: This procedure applies for both enabling and disabling, once to
enable and another time to disable.
Selecting call melodies
Melodies can be selected and adjusted. Different melodies can also be set
for outdoor, intercommunicating and door calls (see below). Melodies are
adjusted while the interphone is in standby.
Button A is used to enter programming mode.
Button E1 selects the ENTRANCE PANEL CALL melody.
Button E2 selects the INTERCOMMUNICATING CALL melody.
Button E3 selects the AUDIO DOOR CALL melody (using only landing call
button 20577 or 14577 by Vimar).
A
B
E2
E3
E1
A
B
E3
E4
A
B
E2
E1
 Loading...