Do you have a question about the Emeril Lagasse Power AirFryer360Plus and is the answer not in the manual?
Insert the Drip Tray below the bottom heating elements at the very bottom of the Unit.
Place food on a Crisper Tray and slide into shelves. Use door markings for shelf selection.
Press the Airfry Button on the Control Panel to select the Airfry cooking preset.
Press the Start/Pause Button to begin or pause the cooking process.
Use oven mitts to remove the Crisper Tray by sliding it out when cooking is complete.
Insert the Drip Tray below the bottom heating elements at the very bottom of the Unit.
Hold Spit at a slight angle, insert the left side, then drop the right side securely.
Press the Rotisserie Button on the Control Panel to select the Rotisserie cooking preset.
Press the Start/Pause Button to begin or pause the cooking process.
Use mitts to lift the right side, then the left side of the Spit to release it.
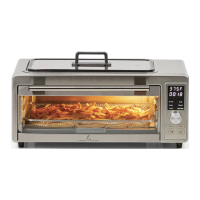
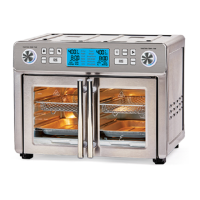
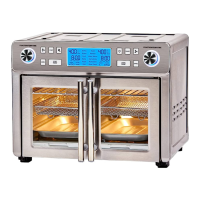
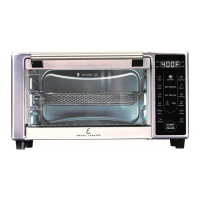
The Power AirFryer 360 Plus is a versatile kitchen appliance designed to offer multiple cooking functions, including air frying and rotisserie, providing a convenient way to prepare a variety of meals. This quick start guide outlines the essential steps for getting started with both air frying and rotisserie cooking, emphasizing safety and proper usage from the initial unboxing to the final removal of cooked food.
Before using the Power AirFryer 360 Plus for the first time, it is crucial to unpack all parts from its box. This includes removing any clear or blue protective film that may be present on the components. This film is often applied during manufacturing to protect surfaces and must be completely removed to ensure proper operation and prevent potential hazards. Once unpacked and the protective film is off, all parts should be washed with warm, soapy water. This initial cleaning helps to remove any manufacturing residues or dust that might have accumulated during shipping. It's important to note that only select accessories are dishwasher safe, so users should consult the owner's manual for specific instructions regarding which parts can be safely cleaned in a dishwasher to avoid damage. Adhering to these initial setup and cleaning steps ensures that the appliance is ready for safe and effective use, contributing to the longevity of the device and the quality of the food prepared.
The owner's manual is an indispensable resource for complete instructions and important safety information. It is highly recommended that users consult this manual before operating the product to familiarize themselves with all features, safety precautions, and maintenance guidelines. This proactive approach helps prevent accidents, ensures optimal performance, and extends the lifespan of the appliance.
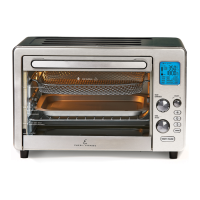
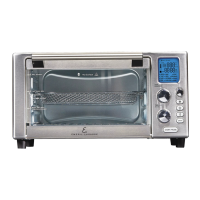
The air frying function of the Power AirFryer 360 Plus allows users to cook food with a crispy texture using little to no oil, offering a healthier alternative to traditional deep frying. The process involves several straightforward steps, making it accessible for everyday use.
Drip Tray Placement: The first step in preparing for air frying is to insert the Drip Tray. This tray should be placed below the bottom heating elements, at the very bottom of the Unit. The Drip Tray serves a crucial purpose by collecting any excess oil, grease, or food particles that may drip during the cooking process. This not only helps keep the interior of the appliance clean but also makes post-cooking cleanup significantly easier. Proper placement ensures that drips are contained, preventing them from burning onto the heating elements or the bottom of the unit, which could create smoke or odors.
Food Placement: Once the Drip Tray is in place, food should be arranged on a Crisper Tray. The Crisper Tray is designed to allow hot air to circulate evenly around the food, ensuring a consistent and crispy result. After placing the food on the tray, slide the Crisper Tray into one of the shelves inside the Unit. The Power AirFryer 360 Plus features markings on the door of the Unit, which serve as a guide for choosing the best shelf position for a specific recipe. Different foods may require different shelf levels to achieve optimal cooking. For instance, thicker items might benefit from a lower shelf for more direct heat, while thinner items might cook better on a higher shelf. It's also important to note that the Pizza Rack can be used in a similar fashion, sliding into the shelves. When using the Baking Pan, it should be placed on top of the Pizza Rack, not directly on the shelves, to ensure proper air circulation and heat distribution.
Selecting the Airfry Preset: With the food properly positioned, the next step is to select the "Airfry" cooking preset. This is done by pressing the Airfry Button on the Control Panel. Selecting this preset automatically configures the appliance with the recommended temperature and cooking time settings for air frying, simplifying the cooking process and ensuring consistent results. Users can typically adjust these settings if their recipe requires specific temperatures or durations.
Initiating and Pausing Cooking: To begin the cooking process, press the Start/Pause Button. This button activates the heating elements and fan, starting the air frying cycle. A convenient feature of this appliance is the ability to pause the cooking process at any point during the cycle by pressing the Start/Pause Button again. This allows users to check on their food, flip items, or add ingredients without interrupting the entire cooking program, providing flexibility and control over the cooking outcome.
Food Removal: Once the cooking cycle is complete, the appliance will typically signal with an audible alert. At this point, it is crucial to exercise caution as the interior of the Unit and the Crisper Tray will be very hot. To safely remove the cooked food, use oven mitts or potholders. Carefully slide the Crisper Tray out of the Unit. This ensures that users can retrieve their food without risking burns from the hot surfaces.
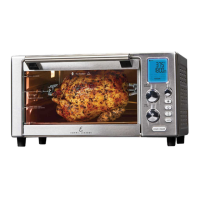
The rotisserie function of the Power AirFryer 360 Plus is ideal for cooking whole chickens, roasts, or other large cuts of meat, ensuring even cooking and a beautifully browned exterior. This method involves rotating the food slowly, allowing it to self-baste in its own juices.
Drip Tray Placement: Similar to air frying, the first step for rotisserie cooking is to insert the Drip Tray below the bottom heating elements, at the very bottom of the Unit. This tray is essential for collecting any fats or juices that drip from the rotating meat, preventing them from burning and making cleanup easier. Proper placement is key to maintaining a clean cooking environment and preventing smoke.
Assembling and Inserting the Rotisserie Spit: The rotisserie process begins with holding the assembled Rotisserie Spit at a slight angle. The right side should be held higher than the left side. The left side of the Spit is then inserted into the Rotisserie connection located inside the Unit. Once the left side is securely in place, the right side of the Spit is dropped into the Rotisserie connection on the right side of the Unit. This two-step insertion ensures that the Spit is properly seated and balanced, allowing for smooth and even rotation during cooking. It's important to ensure the meat is securely fastened to the spit before insertion to prevent it from slipping or becoming unbalanced.
Selecting the Rotisserie Preset: After the Rotisserie Spit with the food is correctly installed, the next step is to select the "Rotisserie" cooking preset. This is done by pressing the Rotisserie Button on the Control Panel. This preset automatically adjusts the appliance's settings to the optimal temperature and cooking time for rotisserie cooking, simplifying the process and ensuring that the meat is cooked thoroughly and evenly.
Initiating and Pausing Cooking: To start the rotisserie cooking process, press the Start/Pause Button. The appliance will begin to heat up and rotate the Rotisserie Spit. As with air frying, the Start/Pause Button offers the flexibility to pause the cooking cycle at any time. This feature is particularly useful for checking the doneness of the meat, basting it, or making any necessary adjustments without having to restart the entire cooking program.
Food Removal: Once the rotisserie cooking cycle is complete, the appliance will signal its completion. The interior of the Unit and the Rotisserie Spit will be extremely hot, so caution is paramount. To safely remove the cooked food, use oven mitts or potholders, ideally silicone ones, which provide better grip and heat resistance. The removal process involves lifting the right side of the Rotisserie Spit first, and then the left side, to release it from the connection points. This method ensures that the spit can be safely disengaged and removed from the hot appliance without causing injury.
In summary, the Power AirFryer 360 Plus is a user-friendly appliance that offers both air frying and rotisserie capabilities. By following the detailed steps for setup, cooking, and removal, users can enjoy a wide range of healthy and delicious meals. The emphasis on safety, proper cleaning, and consulting the owner's manual ensures a positive and efficient cooking experience.
| Brand | Emeril Lagasse |
|---|---|
| Model | Power AirFryer360Plus |
| Category | Fryer |
| Control Type | Digital |
| Material | Stainless Steel |
| Dishwasher Safe Parts | Yes |
| Cooking Capacity | 12 quarts |
| Power | 1500 W |
| Functions | Air fry, Bake, Roast, Broil, Dehydrate, Toast |
| Accessories Included | Air Fryer Basket, Baking Pan, Rotisserie Spit, Recipe Book |