EasyManua.ls Logo

Emeril Lagasse Power Grill 360 User Manual

Emeril Lagasse Power Grill 360
2 pages
To Next Page IconTo Next Page
Page #1 background imageLoading...
Page #1 background image
Step 1
Insert the Air Fryer Drip Tray
below the bottom heating
elements (at the very bottom
of the appliance).
Step 2
Place food on the Crisper Tray
and slide the Tray into shelf on
the inside of the appliance.
NOTE: The Wire Rack and Baking
Pan also slide into the shelves.
Step 3
Use the Control Knob
to select the Air Fry
cooking preset.
Step 5
When the cooking cycle is
complete, use oven mitts
or potholders to remove the
Crisper Tray by sliding it
out of the appliance.
Step 4
Press the Control Knob
to begin the cooking process.
NOTE: You can press
the Control Knob to pause
any cooking cycle.
AIR FRYING
See owner’s manual for
complete instructions and important safety
information before using this product.
Quick Start Guide
IMPORTANT: Unpack all parts from the
box and remove any clear or blue protective
film on the components. Check all packaging
material thoroughly for accessories. Wash
with warm, soapy water before first use (only
select accessories are dishwasher safe).
Question and Answer IconNeed help?

Do you have a question about the Emeril Lagasse Power Grill 360 and is the answer not in the manual?

Emeril Lagasse Power Grill 360 Specifications

General IconGeneral
BrandEmeril Lagasse
ModelPower Grill 360
CategoryFryer
LanguageEnglish

Summary

Air Frying Guide

Air Frying: Insert Drip Tray

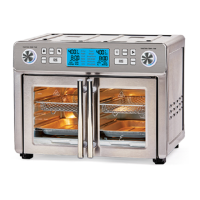
Insert the Air Fryer Drip Tray below the bottom heating elements of the appliance.

Air Frying: Place Food on Tray

Place food on the Crisper Tray and slide it into the appliance shelf.

Air Frying: Select Preset

Use the Control Knob to select the Air Fry cooking preset.

Air Frying: Start Cooking

Press the Control Knob to begin the cooking process or pause any cycle.

Air Frying: Remove Food

Use oven mitts or potholders to remove the Crisper Tray when the cycle is complete.

Grilling Guide

Grilling: Assemble and Trays

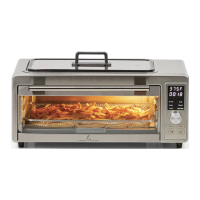
Assemble the appliance and ensure the Grill Plate and Grill Drip Tray are in place.

Grilling: Select Preset & Preheat

Use the Control Knob to select the Grill preset and allow the appliance to preheat.

Grilling: Place Food & Cover

Place food on the grilltop and cover with the Glass Lid when preheated.

Grilling: Start & Monitor Cooking

Press Control Knob to start, flip food halfway, and replace lid.

Grilling: Remove Food

Use tongs or a spatula to remove the food when the cooking cycle is complete.

Related product manuals