EDR and ETR Valves
Instruction Manual
Form 5050
August 2006
5
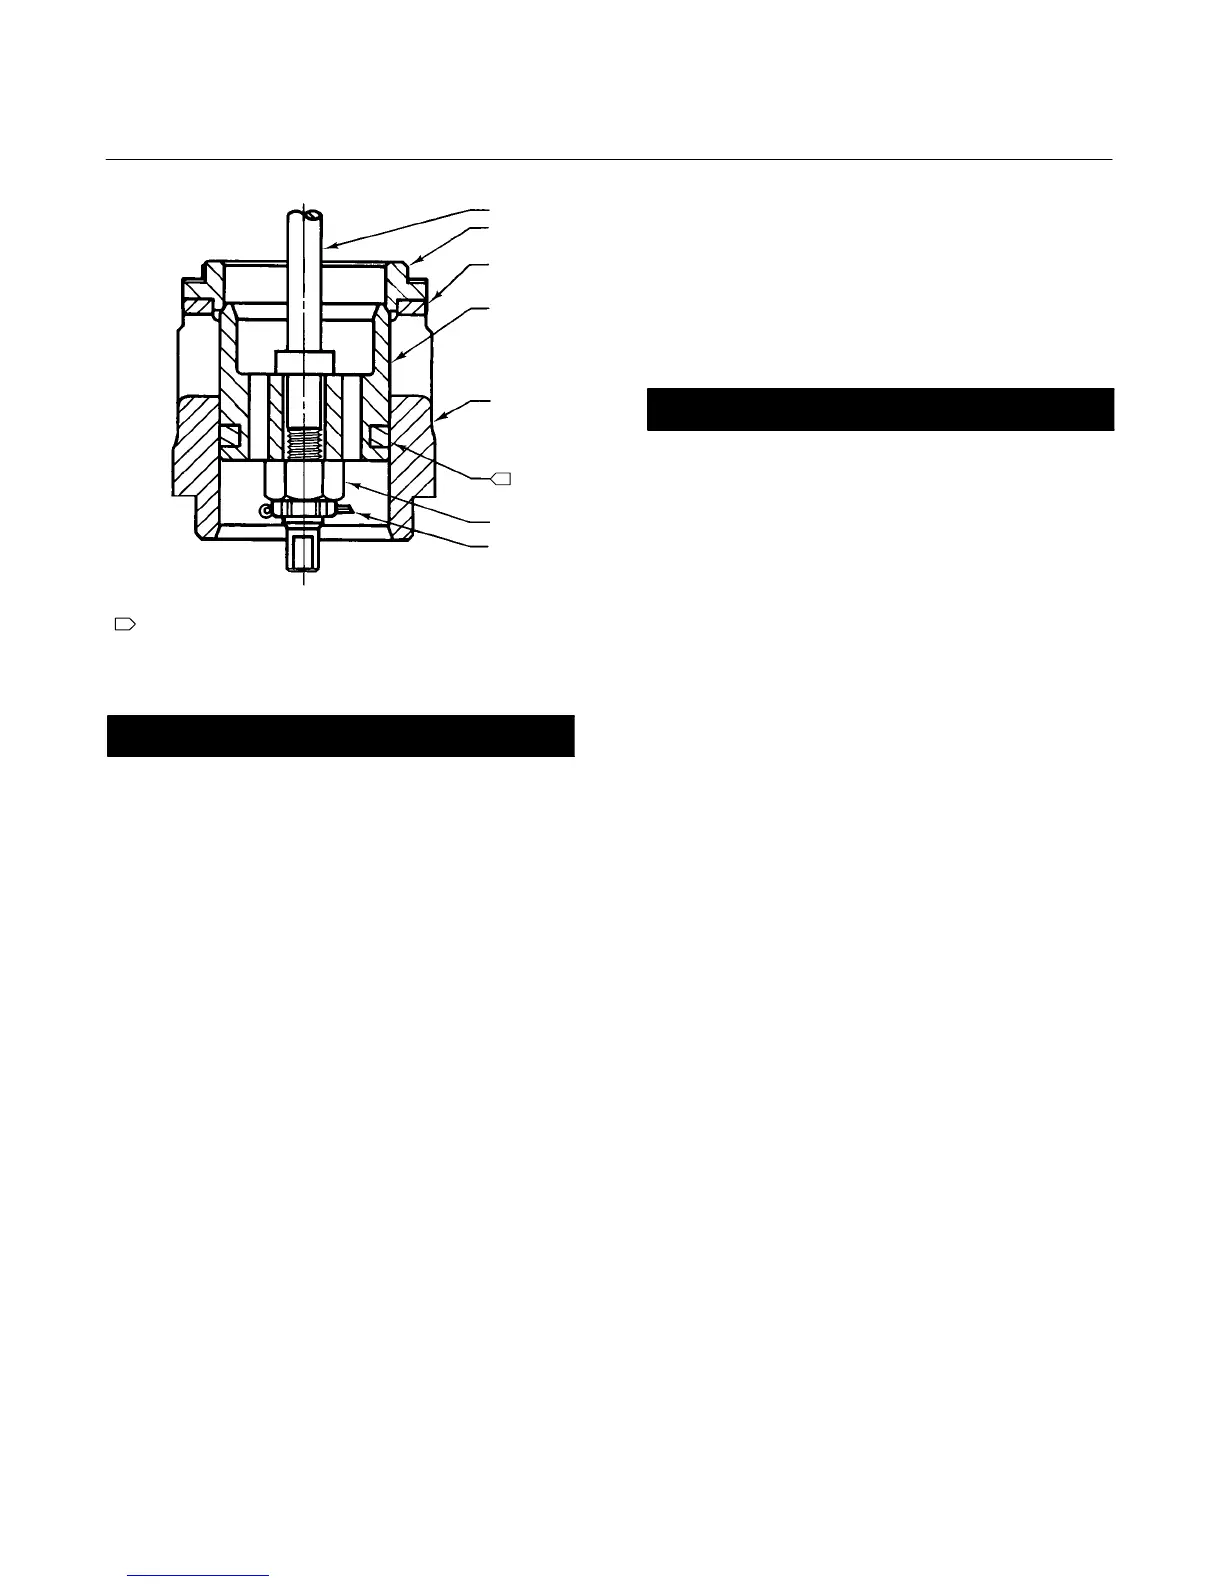
STEM
DISK SEAT
DISK
VALVE PLUG
CAGE
CASTLE NUT
COTTER PIN
DESIGN ETR OR EDR
NOTE:
DESIGN ETR USES A SEAL RING (KEY 24) AND A BACKUP RING
(KEY 25) (SEE FIGURE 12).
40A5479-B
B2360 / IL
1
1
Figure 3. Valve Plug Assembly
CAUTION
Take care when removing the bottom
flange (key 31) in the following
procedure, to prevent possible product
damage from parts unexpectedly
falling out of the valve body.
1. Isolate the control valve from the line pressure,
release pressure from both sides of the valve body,
and drain the process media from both sides of the
valve. If using a power actuator, also shut off all
pressure lines to the power actuator, release all
pressure from the actuator. Use lock-out procedures
to be sure that the above measures stay in effect
while you work on the equipment. When removing the
bottom flange (key 31), be careful that the cage and
other parts are not damaged by unexpectedly falling
out of the valve body. Remove the nuts (key 16) or
cap screws from the bottom flange.
2. Removing the valve plug from the valve body, the
valve plug can be removed independently of the
valve stem by removing the cotter pin and castle nut
(keys 30 and 8). Then, slide the valve plug out of the
cage (see figure 3).
D Disconnect the stem connector, and loosen the
packing flange nuts (see figure 2).
D Move the valve stem away from the actuator
stem allowing room to remove the indicator disk and
stem locknuts. Remove the parts indicated.
D Remove the valve plug by pulling the valve
plug/stem assembly through the packing and out of
the bottom of the bonnet.
D If the valve plug is to be re-used but the stem
needs to be replaced, drive the pin (key 8) out of the
plug/stem assembly and unscrew the valve stem.
CAUTION
Take care during disassembly in the
following procedure, to prevent
possible damage to sealing surfaces.
3. Remove the seat ring (key 9), gaskets
(keys 10, 11, 12, and 13), and any remaining parts if
they did not come out with the valve plug. If the seat
ring (key 9) is stuck in the valve body, strike the
outside of the valve body at the seat ring line with a
rubber hammer while pulling down on the seat ring.
Carefully remove the seat ring without damaging
sealing surfaces.
If necessary, machine or grind metal seats before
installing the piston ring/seal ring or packing, or refer
to the Lapping Metal Seats procedure in this section.
Lapping Metal Seats
A certain amount of leakage should be expected
with metal-to-metal seating in any valve body. If the
leakage becomes excessive, however, the condition
of the seating surfaces of the valve plug and seat
ring can be improved by lapping. (Deep nicks should
be machined out rather than ground out.) Use a
good quality lapping compound of a mixture of 280
to 600-grit.
Assemble the valve to the extent that the seat ring
(key 9), cage (key 3), cage adaptor (key 4, if used),
and bonnet are in place. Also, remove the piston ring
or seal ring from the valve plug (if used).
1. Insert the valve stem (key 7) into the bonnet and
thread the plug (key 2) onto the end of the stem.
Make a simple handle from a piece of strap iron; lock
it to the valve with the stem locknuts.
2. Apply the lapping compound to the seating
surfaces. Rotate the handle alternately in each
direction to lap the seats. After lapping the seats,
remove the valve plug and stem, then clean all parts.
Repeat the lapping procedure if necessary.
Trim Assembly
Carefully clean all gasket surfaces. Use new gaskets
during reassembly of the valve.

 Loading...