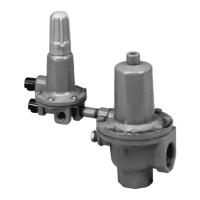
Type 289P
7
Type 6358B Pilot
Key numbers are referenced in Figure 6. The pilot may
remain on the pipe nipple (key 29) during maintenance.
Disassembly
1. Remove the closing cap (key 12), loosen the locknut
(key 11), and back out the adjusting screw (key 10) to
remove the spring (key 7) tension.
2. Remove the machine screws (key 17). Separate
the spring case (key 2) and body (key 1). Remove
the control spring seat (key 8) and the control spring
(key 7).
3. Lift out the diaphragm assembly (key 5) and valve
plug (key 4). Check the stem guide (key 9) and
restriction (key 20) for damage or plugging.
4. If necessary to replace the diaphragm assembly
(key 5), the valve plug (key 4), the valve spring
(key 14), or the stem O-ring (key 37), remove the
connector cap (key 6) and gasket (key 36) from the
top of the diaphragm assembly.
Assembly
1. If removed, install the body plug gasket (key 13) over
the body plug (key 3), and install the body plug into
the body (key 1).
2. Install the stem guide (key 9), if removed, and make
sure to install the gasket (key 36) between the body
(key 1) and the stem guide.
Note
In step 3, if installing a different size
restriction, be sure to remove the code
letter on the bottom of the pilot and
indicate the new letter.
3. If the restriction (key 20) was removed, coat the
threads with lubricant and install it.
4. If replacing the stem O-ring (key 37), sparingly apply
lubricant and install the O-ring over the valve plug
(key 4).
5. If removed, install the valve plug (key 4) and valve
spring (key 14) into the diaphragm assembly (key 5).
Place a new gasket (key 36) on the diaphragm
assembly, and secure with the connector cap
(key 6).
6. Install the diaphragm assembly (key 5) and push
down on it to see if the valve plug (key 4) moves
smoothly. The diaphragm assembly should stroke
approximately 1/16-inch (1,6 mm) after the valve
plug contacts the port.
Note
In step 7, if installing a control spring of
a different set pressure range, be sure
to remove the set pressure range on the
spring case and indicate the new range.
7. Place the control spring (key 7) and the control
spring seat (key 8) on the diaphragm assembly
(key 5).
8. Install the spring case (key 2) on the body (key 1)
with the vent assembly (key 16) oriented to prevent
clogging or entrance of moisture. Install the machine
screws (key 17) and tighten in a crisscross pattern,
using 5 to 7 foot-pounds (7 to 9 N•m) of torque.
9. Replace the closing cap gasket (key 19) if necessary,
and install the closing cap (key 12).
Type 6365 Pilot
Key numbers are referenced in Figure 7. The pilot may
remain on the pipe nipple (key 29) during maintenance.
Disassembly
1. If necessary to check the outlet end of the body
cavity and the seating surfaces for moisture or
debris, remove the body plug (key 3) and body plug
gasket (key 13) from the body assembly (key 1).
2. Remove the closing cap (key 12), loosen the locknut
(key 11), and back out the adjusting screw (key 10)
to remove control spring (key 7) tension.
3. Remove the machine screws (key 17). Separate the
spring case (key 2) and body assembly (key 1).
Remove the control spring seat (key 8) and the
control spring (key 7).
4. Remove the diaphragm assembly (key 5) and
plug/stem assemblies (key 4). Make sure the
plug/stem guide (key 9) and the registration hole in
the pilot restriction (key 20), are not damaged
or plugged.
5. To replace the diaphragm assembly, the plug/stem
assembly, the plug/stem spring (key 14), remove the
connector cap and connector cap gasket (keys 6 and
36) from the top of the diaphragm assembly.
Assembly
1. If removed, put the body plug gasket (key 13) over
the body plug (key 3). Place the body plug in
the body.

 Loading...