EasyManua.ls Logo

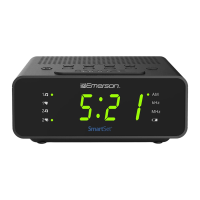
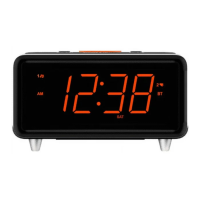
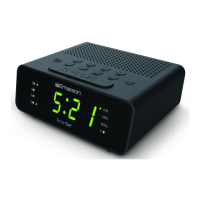
Emerson SmartSet ER100202 User Manual

Emerson SmartSet ER100202
2 pages
To Next Page IconTo Next Page
Page #1 background imageLoading...
Page #1 background image
WARNING
1.) Read these instructions. Keep these instructions. Follow all instructions. Heed all
warnings.
2.) Do not use this apparatus near water.
3.) Clean only with dry cloth.
4.) Do not block any ventilation openings. Install in accordance with the manufacturer's
instructions.
5.) Do not install near any heat sources such as radiators, heat registers, stoves, or other
apparatus (including amplifiers) that produce heat.
6.) Do not defeat the safety purpose of the polarized or grounding-type plug. A polarized plug
has two blades with one wider than the other. A grounding type plug has two blades and
a third grounding prong. The wide blade or the third prong is provided for your safety. If
the provided plug does not fit into your outlet, consult an electrician for replacement of the
obsolete outlet.
7.) Protect the power cord from being walked on or pinched particularly at plugs,
convenience receptacles, and the point where they exit from the apparatus.
8.) Only use attachments / accessories specified by the manufacturer.
9.) Unplug this apparatus during lightning storms or when unused for long periods of time.
10.) Refer all servicing to qualified service personnel. Servicing is required when the
apparatus has been damaged in any way, such as power-supply cord or plug is damaged,
liquid has been spilled or objects have fallen into the apparatus, the apparatus has been
exposed to rain or moisture, does not operate normally, or has been dropped.
11.) Use only with the cart, stand, tripod, bracket, or table specified by the manufacturer, or
sold with the apparatus. When a cart is used, use caution when moving the
cart/apparatus combination to avoid injury from tip-over.
12.) The apparatus shall not be exposed to dripping or splashing and that no
objects filled with liquids, such as vases, shall be placed on apparatus.
13.) Mains plug is used as disconnect device and it should remain readily
operable during intended use. In order to disconnect the apparatus from
the mains completely, the mains plug should be disconnected from the
mains socket outlet completely.
14.) Battery shall not be exposed to excessive heat such as sunshine, fire or the like.
CAUTION: Danger of explosion if battery is incorrectly replaced. Replace only with the
same or equivalent type.
IMPORTANT SAFETY INSTRUCTIONS
PRÉCAUTION: Danger d’explosion si les piles sont remplacées de facon incorrect.
Remplacer les piles seulement par le méme type de pile ou
léquivalent.
WARNING
Do not ingest the battery,Chemical Burn Hazard
This product contains a coin/button cell battery.
If the coin/button is swallowed,it can cause severe internal burns
in just 2 hours and can lead to death.
Keep new and used batteries away from children.
If the battery compartment does not close securely,stop using the
product and keep it away from children.
If you think batteries might have been swallowed or placed inside
any part of the body,seek immediate medical attention.
1
2
Th e e xc la ma ti on poi nt wit hin
an e qui l a te r a l tr i an g l e is i n-
t e n d e d t o a l e r t t h e u s e r t o
t h e p r e s e n c e o f i m p o r t a n t
o p erating a n d m a i n t e n a n c e
( s e r v i c i n g ) i n s t r u c t i o n s i n
t h e l i t e r a t u r e a c c o m p a n y -
i n g t he a p p l i an c e .
The lightning flash with arrow-
head symbol, w ith in an e qui -
lateral trian gle i s int ended to
alert the user to the presence
of uninsulated 'dangerous voltage'
within the product's enclosure
t h a t m a y b e o f s u f f i c i e n t
magnitude to constitute a risk
of ele ctric sho ck to person s.
WARN I NG : TO RE DU C E TH E RI SK OF
ELE CTR IC S HO O K D O NOT REM O VE
COVER (OR BACK),NO USER SERVICEABLE
PA RT S IN SI D E R E F ER SE RV I C IN G T O
QUA LIF IE D SERV ICE PERS ONN EL.
AVIS: RISQ U E DE CHOC
E L E C T R I Q U E - N E PA S O U V R I R
POUR ÉVITER TOUT DANGER DE CHOC ÉLECTRIQUE, NE PAS
RACCORDER AU SECTEUR TANT QUE LA GRILLE N'APAS ÉTÉ REMISE
EN PLACE.POUR RÉDUIRE LE RISQUE DINCENDIE OU DE CHOC
ÉLECTRIQUE, NE PAS EXPOSER CET APPAREIL SOUS LA PLUIE
ET L’HUMIDITÉ.
.
Package Contents
ER100202
4
5
Read This Insert
(Quick Start Guide)
®
D
“ ”
“ ”
o
U
“ ”
®
4
5
6
7
7
8
9
10
11
12
13
14
15
16
17
23
22
21
20
19
24
25
26
28
18
27
REAR PANEL
29
30
31
6
7
the Clock
8
3
clock
clock
9
AUX IN
USB OUTPUT
5V 2.1A
Question and Answer IconNeed help?

Do you have a question about the Emerson SmartSet ER100202 and is the answer not in the manual?

Emerson SmartSet ER100202 Specifications

General IconGeneral
BrandEmerson
ModelER100202
CategoryClock Radio
Display TypeLED
Power SourceAC Power
Battery BackupYes
Radio BandsAM/FM
Snooze FunctionYes
Sleep TimerYes
Weight1.5 lbs
USB Charging PortNo
Alarm TypeBuzzer
Presets20

Summary

SmartSet Clock Radio Features

Important Safety Instructions

Essential guidelines for safe operation and handling of the clock radio to prevent hazards.

FCC Compliance Information

Details regarding the device's compliance with FCC rules for radio frequency energy.

Preparation For Use

Initial steps to unpack and prepare the clock radio for its first use.

Setting the Time Zone

Instructions for setting the clock to the correct time zone for accurate time display.

Checking Current Settings

Procedure to review the current year, date, day of the week, and time.

Setting the Year

Guide on how to manually set the current year on the clock.

Setting the Date

Instructions for manually setting the current month and date on the clock.

Setting the Time

Steps to manually adjust the hour and minute for accurate time display.

Daylight Saving and Leap Year Adjustment

Information on automatic adjustments for Daylight Saving Time and Leap Years.

Disabling Daylight Saving Time

Learn how to disable the automatic Daylight Saving Time function for specific regions.

Setting the Alarm

Comprehensive guide on setting up and configuring the dual alarm functions.

Adjusting Wake Up Time

Set the desired wake up time for Alarm 1 or Alarm 2 using the AL1/AL2 buttons.

Alarm Configuration

Alarm Week Modes Explained

Understand Everyday, Weekdays only, and Weekends only alarm settings.

Changing Alarm Week Mode

Learn how to set the desired alarm week mode for Alarm 1 and Alarm 2.

Checking Alarm Settings

Review the currently set wake up time and alarm week mode for alarms.

Setting Alarm Volume

Adjust the volume level for Wake-To-Radio and Wake-To-Buzzer alarms.

Activating and Deactivating Alarms

Learn how to turn alarms On, select wake sources, or turn them completely Off.

Snooze Alarm Function

How to temporarily silence an active alarm for a 9-minute interval.

Audio and Connectivity

Listening to FM Radio

Guide for tuning into stations, adjusting volume, and managing FM reception.

Storing and Recalling Radio Stations

How to save favorite FM stations to memory and recall them easily.

Listening to Bluetooth Speaker

Instructions for pairing and streaming audio wirelessly via Bluetooth.

Audio Sources via AUX IN Jack

Connect external audio devices like MP3 players using the AUX IN jack.

Sleeping to Music Timer

Set a timer to automatically turn off the audio source after a specified duration.

Qi Wireless Charging

Information on using the built-in pad to wirelessly charge Qi-compatible devices.

USB for Charging

Utilize the USB port to charge external devices like smartphones or tablets.

4-Level Dimmer Control

Adjust the brightness level of the clock display to suit your preference.

Maintenance and Warranty

Changing the Lithium Battery

Procedure for replacing the internal backup lithium battery when indicated.

Care and Maintenance

Guidelines for cleaning and maintaining the clock radio's cabinets and components.

Lithium Battery Precautions

Important safety warnings and handling instructions for lithium batteries.

Limited Warranty

Details of the product's warranty coverage, terms, and conditions.

Related product manuals