3
Screw in the reduction on the valve and turn until the valve ts / snaps.
If the reduction is adjusted for this, tighten it by a screw.
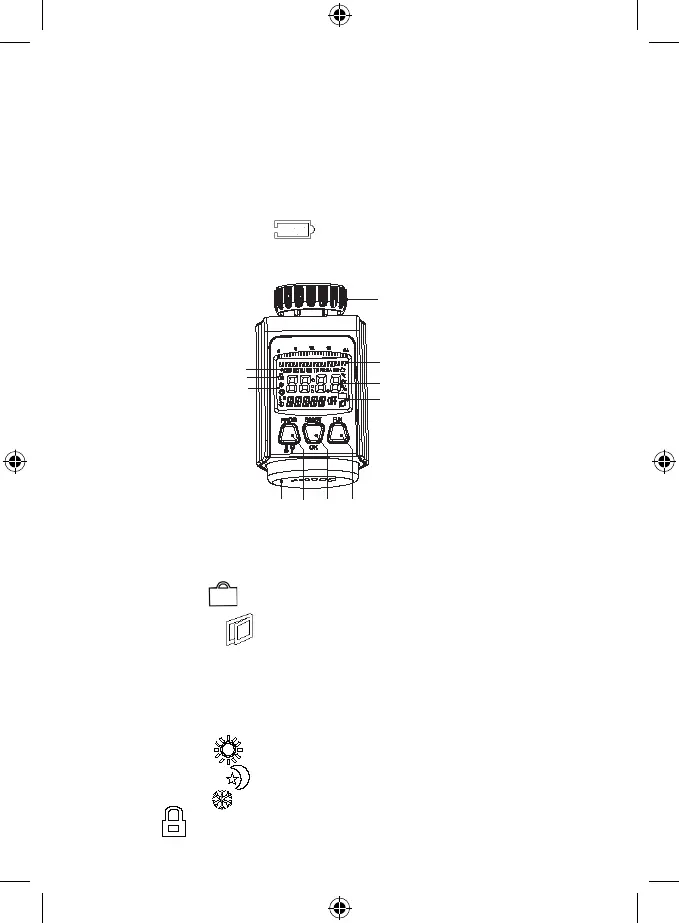
Batteries insertion/change
1. In the part of the valve, where is located the joining part, loosen the control part of the valve by pressing the
cover in the lower part of the valve and slowly remove the cover, as shown in the picture.
2. Open the battery cover and insert 2× 1.5 V AA alkaline batteries. Observe the proper polarity!
3. Put the battery cover back.
Use new alkaline batteries only, do not use the rechargeable batteries.
• If the valve’s display is not ashing, check the polarity of the inserted batteries.
• Low batteries are indicated with this icon
. Change the batteries for the new ones of the same kind, donot
use the rechargeable batteries.
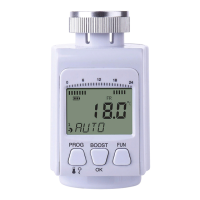
Thermostatic radiator valve description
10
11
1
2
4
5
3
1. The nut for mounting to the radiator
2. The temperature prole of the day indicator
3. Low batteries icon
4. Thermostatic valve’s display
5. The TRAVEL function
Open windows function
Manual mode
AUTO mode
6. The FUN button – the mode changer, set-up mode quit, child lock
7. The BOOST/OK button – the BOOST function activation, setting conrmation
8. The PROG button – the temperature mode selection
9. Control thumb-wheel to set the values (hereafter just „thumb-wheel“)
10. Comfort temperature
Cost-saving temperature
Anti-freeze function
11. Child lock