3
Note: The pushbutton unit can be placed on wooden or brick walls, however, do not place it on metal surfaces or surfaces
containing metal. It might aect the correct function of the unit.
Bell unit installation
1. The bell unit (RX) is designed for inner use. It has to be plugged in a socket (230V AC/50Hz) and have open area around
when operating.
2. The transmission range is up to 100 meters depending on the surroundings (number of walls, metal frames of doors, etc.)
Problem solving
The chime does not work:
• It can be out of specied range.
- Amend the distance between both units of the set. Communication can be inuenced by some interfering objects.
• Flat battery in the pushbutton (TX)
- Replace the battery according to the polarity indicated. Proceed new pairing of bell unit with pushbutton.
• Bell unit has no power supply.
- Check whether the bell unit is correctly plugged in or whether the power is not down.
Maintenance
The wireless digital chime is a sensitive electronic device therefore it is necessary to follow these instructions:
• The bell unit (RX) is for indoor use only.
• The doorbell should be placed in an easily accessible place for easy handling and removal.
• Check the bell and pushbutton frequently and change the battery in the pushbutton with a good quality alkaline battery
after a period of time.
• Keep the door button away from metal surfaces such as UPVC doorpost that has a steel center core.
• If the unit is left unused for a long period of time, remove the battery.
• Do not expose either the bell unit or the pushbutton to excessive shocks.
• Do not expose both the bell unit and the pushbutton to direct sunlight or moisture.
• Do not use any depurators to clean the doorbell.
• Do not intervene in the inside of the doorbell.
• Take at batteries back to the shop where you bought them or to a collection spot for their recycling.
• Take the doorbell back to the shop where you bought it or to a collection spot after the end of lifetime.
Hereby, Emos spol. s r. o., declares that this P5710G in compliance with the essential requirements and other relevants provisions
of Directive 1999/5/EC. The equipment may be freely operated within EU. Declaration of conformity is enclosed in manual orweb
sites http://shop.emos.cz/download-centrum/.
Bezdrátový zvonek P5710G
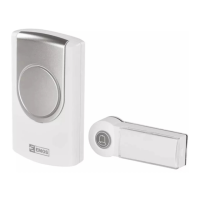
Soupravu tvoří tlačítko zvonku (vysílač) a domácí zvonek (přijímač). Zvonek je určen k trvalému připojení k elektrické síti o
napětí 230 V AC/50 Hz. Přenos mezi tlačítkem a zvonkem zprostředkovávají rádiové vlny na frekvenci 433,92 MHz. Dosah závisí
na místních podmínkách a je až 100 m ve volném prostoru bez rušení.
Souprava má tzv. funkci „self-learning“ – tlačítko má schopnost vygenerovat vlastní párovací kód, který zvonek poté přijme a uloží
si ho do paměti. Sestavu tak lze rozšiřovat doplňkovými tlačítky. Díky funkci „self-learning“ se také neovlivňují sousední zvonky.
Pro správné použití bezdrátového zvonku si pečlivě prostudujte návod k použití.
Specikace
Dosah vysílání: až 100 m ve volném prostoru (v zastavěném prostoru může klesnout až na pětinu)
Tlačítko: voděodolné; krytí IP44
Párování zvonku s tlačítky: funkce „self-learning“
Kapacita párování: maximálně 3 tlačítka
Počet melodií: 3 melodie – až tři tlačítka je možné rozlišit nastavením různých melodií
Napájení zvonku: 230 V AC/50 Hz
Napájení tlačítka: baterie 1×12V (typ A23)
Součást dodávky: oboustranná lepicí páska
Párování tlačítka se zvonkem
1. Sejměte zadní část krytu tlačítka otvorem na boční straně pomocí šroubováku. Vložte do tlačítka baterii 12V, typ A23. Dbejte
na správnou polaritu vkládané baterie!
2. Stiskněte tlačítko „SW2“ na plošném spoji – na 5 sekund se rozsvítí signalizační LED na tlačítku. Během těchto 5 sekund znovu
stiskněte tlačítko „SW2“ – signalizační LED na tlačítku 3x blikne, což značí, že byl vygenerován nový párovací kód.
3. Tlačítko opět sestavte.
4. Pro párování více tlačítek opakujte pro každé tlačítko postup v bodech 1. až 3.
CZ


 To Next Page