12821-10-1011 Page 9
1. STOP! Read the safety information to the left of this label.
2. Set thermostat to lowest setting.
3. Turn off all electric power to the appliance. (If applicable)
4. Remove access panel (front panel).
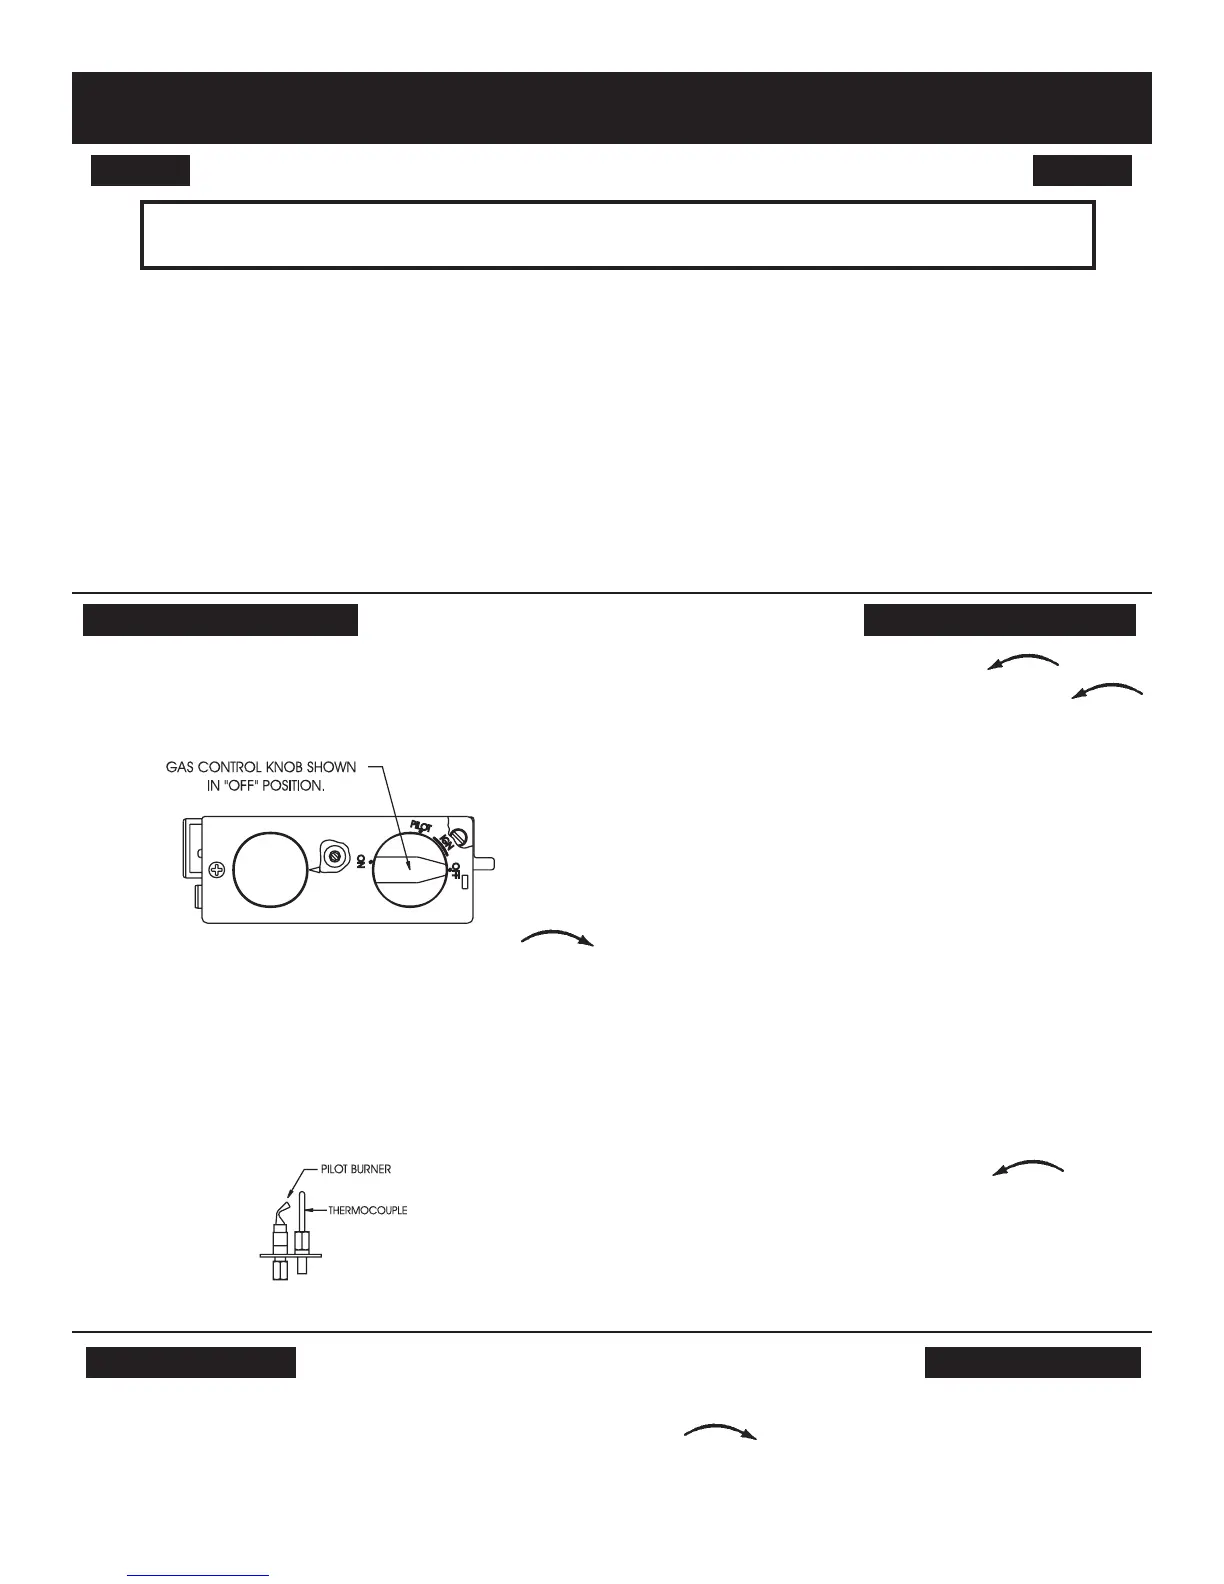
5. Push in gas control knob slightly and turn clockwise
to “OFF”. Do not force.
6. Wait ten (10) minutes to clear out any gas. Then smell for
gas, including near oor. If you smell gas, STOP! Follow “B”
in the safety information to the left of this label. If you do not
smell gas, go to the next step.
7. Remove the pilot access cover located on the combustion
chamber.
8. Find pilot - the pilot is attached to front of burner.
9. Turn gas control knob counterclockwise to “IGN”.
10. Depress and turn gas control knob counterclockwise
to “PILOT”. A spark is produced when gas control knob is
turned between “IGN” and “PILOT”. Repeatedly depress and
turn gas control knob between “IGN” and “PILOT” until pilot
is ignited. Continue to hold the control knob in for about one
(1) minute after pilot is lit. Release knob and it will pop back
up. If it goes out, repeat steps 5 through 10.
• If knob does not pop up when released, stop and im-
mediately call your service technician or gas supplier.
• If the pilot will not stay lit after several tries, turn the gas
control knob to “OFF” and call your service technician or
gas supplier.
11. Attention! Gas control has INTERLOCK latching device. When
the pilot is initially lit and the safety magnet is energized (pilot
stays on) the INTERLOCK latching device becomes operative.
If the gas control is turned to the “OFF” position or gas ow to
the appliance is shut off, the pilot cannot be relighted until the
safety magnet is de-energized (approximately 60 seconds).
There will be an audible “click” when the safety magnet in the
gas control is de-energized. Pilot can now be relit. Repeat
steps 5 through 10.
12. Turn gas control knob counterclockwise to “ON”.
13. Turn on all electric power to the appliance. (If applicable)
14. Replace pilot access cover and access panel (front panel).
15. Set thermostat to desired setting.
TO TURN OFF GAS TO APPLIANCE
A. This appliance has a pilot which must be lighted by hand.
When lighting the pilot, follow these instructions exactly.
B. BEFORE LIGHTING smell all around the appliance area for
gas. Be sure to smell next to the oor because some gas
is heavier than air and will settle on the oor.
WHAT TO DO IF YOU SMELL GAS
• Do not try to light any appliance.
• Do not touch any electrical switch;
do not use any phone in your building.
• Immediately call your gas supplier from a neighbor's
phone. Follow the gas supplier's instructions.
• If you cannot reach your gas supplier, call the re de-
partment.
C. Use only your hand to push in or turn the gas control knob.
Never use tools. If the knob will not push in or turn by hand,
don't try to repair it; call a qualied service technician. Force
or attempted repair may result in a re or explosion.
D. Do not use this appliance if any part has been under water.
Immediately call a qualied service technician to inspect
the appliance and to replace any part of the control system
and any gas control which has been under water.
LIGHTING INSTRUCTIONS
1. Set thermostat to lowest setting.
2. Turn off all electric power to the appliance. (If applicable)
If service is to be performed.
3. Push in gas control knob slightly and turn clockwise
t o “OFF". Do not force.
FOR YOUR SAFETY READ BEFORE LIGHTING
WARNING: If you do not follow these instructions exactly, a re or explosion
may result causing property damage, personal injury, or loss of life.
LIGHTING INSTRUCTIONS


 To Next Page